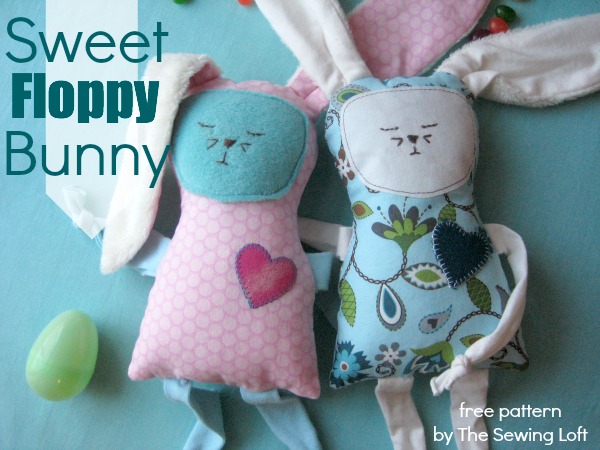
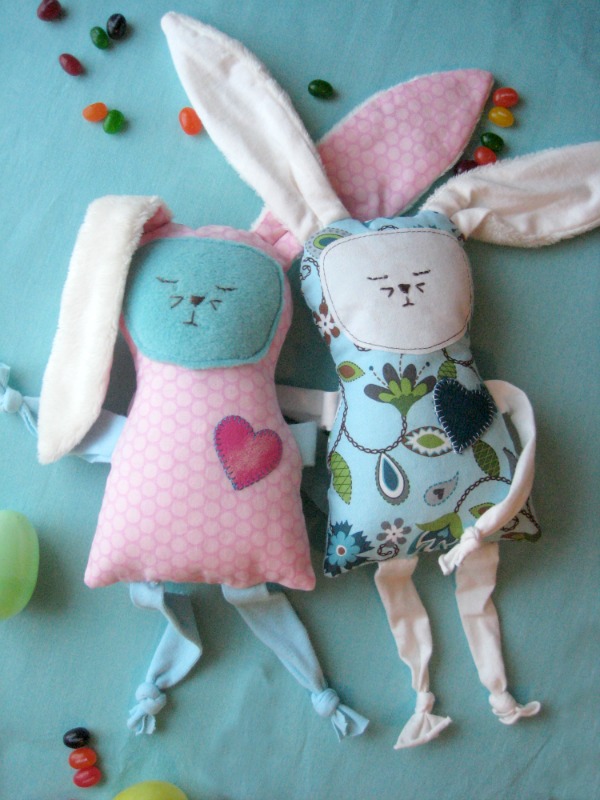
Easter is right around the corner and I have an easy, yet totally adorable, free bunny pattern for you! This floppy-eared fellow will hop straight into the heart of your kiddos, and be a beloved friend for life.
This project is for all levels.
Skill Level- 1 Button

Supplies:
- 1 fat quarter of printed cotton fabric
- fleece scrap 9″ x 7″
- felt scrap 6″ square
- knit scrap 6″ x 10″
- embroidery thread
- polyfil
*Small piece of double-sided fusible is optional.
Tools:
- basic sewing supplies
- sewing machine
- small embroidery hoop
- ruler
Quick Note
Interested in an Ad-Free, printable PDF version of this tutorial? Scroll to the bottom for more info!
Basic Instructions:
- Cut out the fabric as directed on the pattern. Please remember that cutting counts on the smaller pieces. They will be appliquéd directly to the bunny.
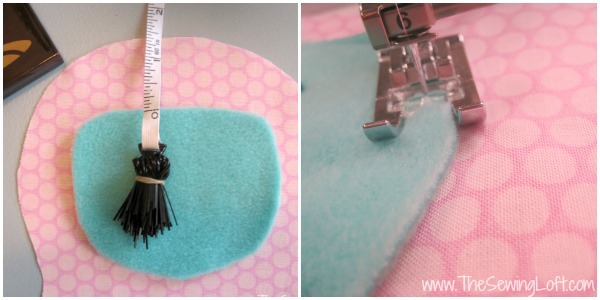
- Place the face 1 ¼” below the top edge of the body. Be sure to center from side to side and pin in place. All around machine straight stitch. *Be sure to use small stitches per inch here. This will help you achieve a nice smooth curve along the pattern piece.
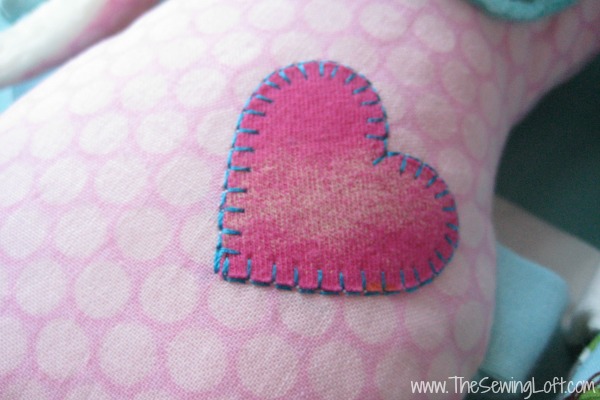
- Position the heart in place on the body. *Note if using fusible, iron in place according to package instructions. Set machine to Blanket Stitch, reduce length and width slightly and stitch all around the heart shape. (This stitch is found under decorative stitches.) Stitch all around the heart shape.
- Stack the tail pieces and attach them to the bottom back of the body.
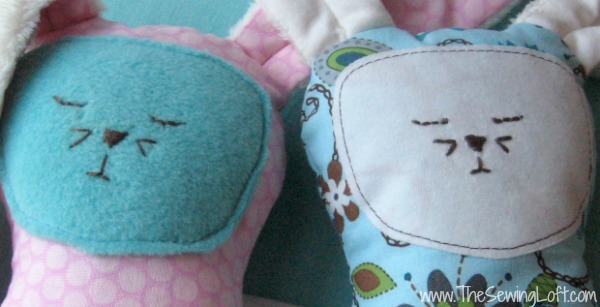
- Position bunny face in the embroidery hoop. With embroidery thread and needle use small simple back stitches to create the face details. If needed, draw guidelines with a heat-erasing pen.
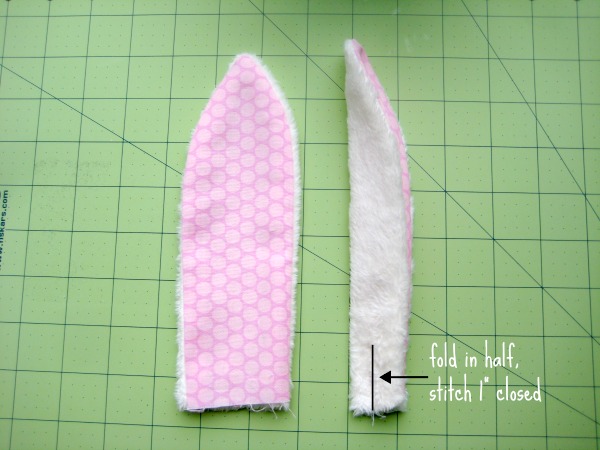
- Match the ears, wrong sides together and straight stitch all around. Clip and turn the ears right side out. Lightly press. Be sure to pull out the points of ears with a pin if needed. Fold ears in half and with a straight stitch, stitch down the center of ear starting at the bottom for 1”.
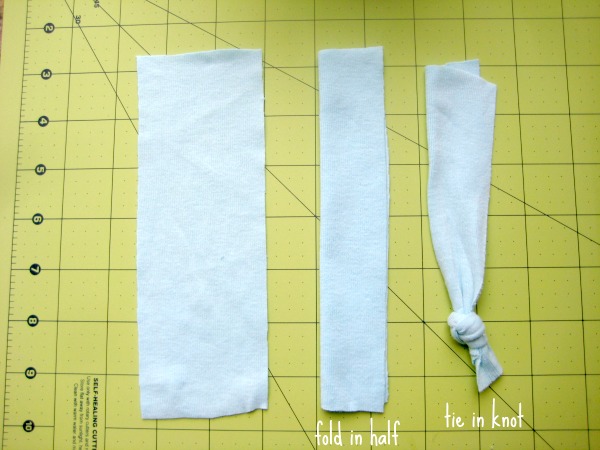
- To create the arms and legs; fold your knit fabric strip (long side to long side) in half. Tie a knot close to the end. Repeat to all 4 limbs.
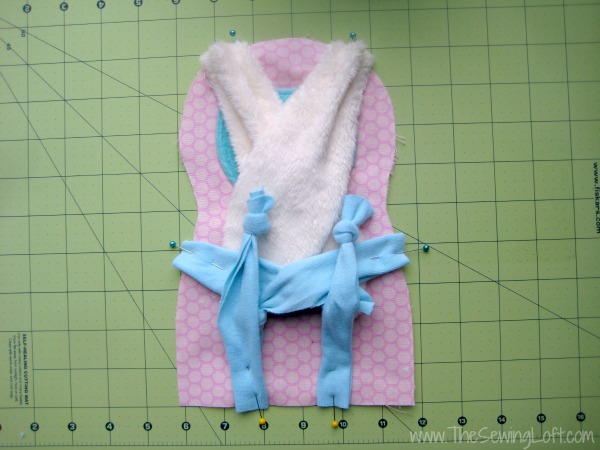
- Position and pin ears and limbs in place. Be sure to turn towards the body of the bunny. Stitch the legs with ¼” seam allowance to the bottom face of the bunny. Sandwich the front and back body of the bunny with right sides together; pin to keep in place. Straight stitch all around.
- Clip all curves and corners. Turn bunny right side out, lightly press and fill with stuffing.
- Slip stitch the opening closed with needle and thread.

Get the ad-free Floppy Bunny PDF
Click below to download the full printable PDF and print at home!
How cute is that! Need a few ideas on what to do with your Floppy Bunny Pattern? How about swapping out that chocolate bunny for a stuffed one? Or make your bunny out of velveteen and pair it with a copy of The Velveteen Rabbit for a gift that leaves a lasting impression. This would be great for those trying to cut back on candy.
Free Bunny Pattern
What ideas do you have for using the adorable free bunny pattern for Easter or any other gift-giving event? We’d love to hear them – share in the comments below! If you make a bunny of your own, post a photo in The Sewing Loft Community Flickr pool so we can all see your gorgeous work!





Comments & Reviews
Thank you for a new bunny pattern.. its sweet and the new grandbabies will love them.
Cute little bunny! I have a Craft Gossip post scheduled for later today that links to your pattern:
http://sewing.craftgossip.com/free-pattern-sweet-floppy-bunny/2014/03/24/
–Anne
Thank you so much I am new to sewing. This will be a great baby gift add on!
Thank you..this is a sweet little bunny!
Thank you. I can’t wait to make this for my 3 kids for Easter!
Seriously so cute. I featured you on my blog http://www.plushiepatterns.com
sitting down to make this now and I can’t find the measurements for the arms/legs. i downloaded the pattern and didn’t find the measurements there either. Please Help!
–Last Minute Easter Crafter 🙂
Thank you for sharing this cute pattern 🙂
How do you attach the tail? The directions say “stack and attach” but there’s no picture. Do I sew through the middle and leave the edges free? Or sew each layer’s edges down?
Hello Kate,
Yes, you just stitch the tail by hand.