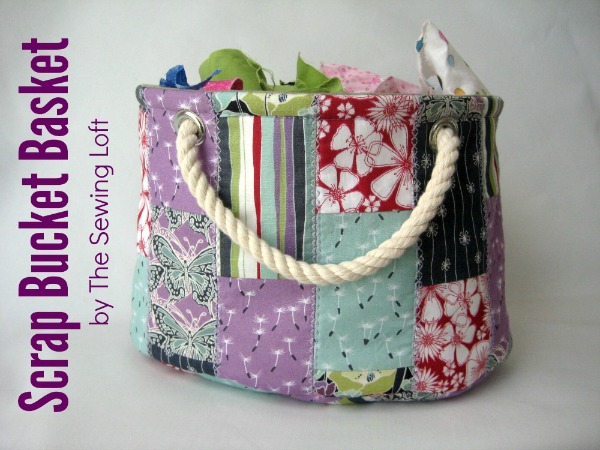
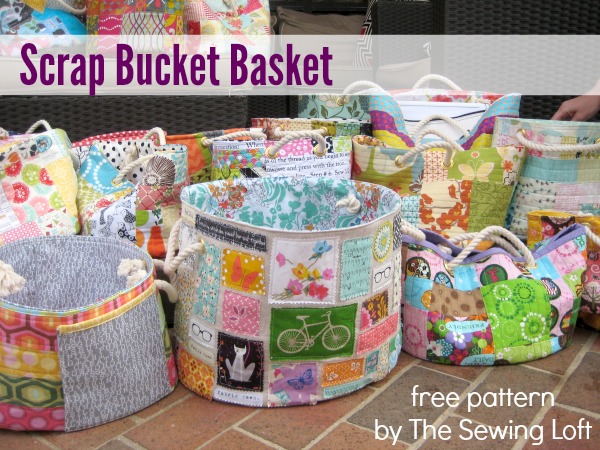
It is no secret that I love my scraps. Well today, I am going to share a fun project that will not only use your scraps but help you store them going forward. Allow me to introduce the Scrap Bucket Pattern.
This baby made its debut at Sew South last weekend and I was so excited to see all the variations everyone created. The pattern is easy to make and totally limitless!
Scrap Bucket Pattern
This project is for all levels.
Skill Level- 1 1/2 Button
Supplies:
- 1/2 yard of main fabric
- 1/2 yard of heavy weight fusible (Pellon TP971F)
- 1/2 yard of lining fabric
- 1 yard 3/8″ cotton rope
- 4 extra-large eyelets
- scrap bucket pattern
Tools:
- basic sewing supplies
- sewing machine
- hammer
- tape
- marking tool
*Use 3/8″ seam allowance for all seams.
Basic Instructions:
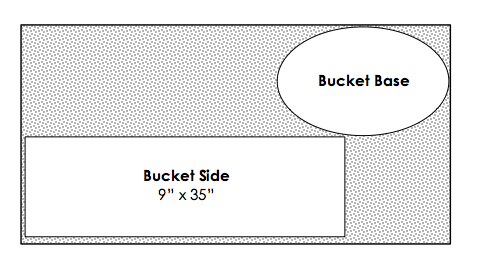
- Print out pattern pieces and tape together to create the base of the bucket. Following manufactures instructions, adhere fusible to the wrong side of main fabric and cut out pattern pieces.
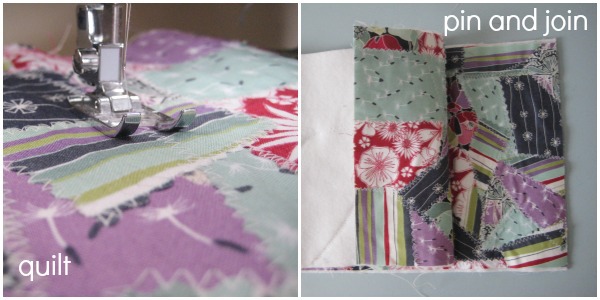
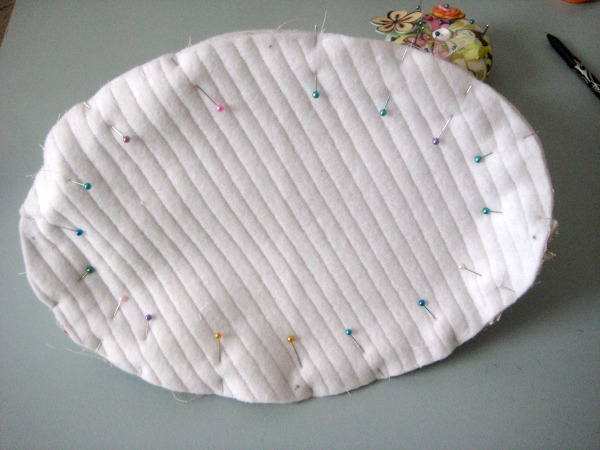
- Machine quilt fabric to fusible as desired and mark matching points on bucket base.
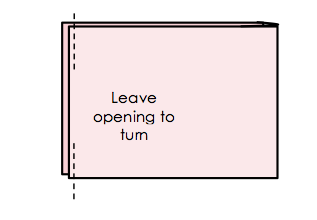
- With right sides together, fold the rectangle in half to match the short sides of the rectangle. Join seams together with a straight stitch. Press open.
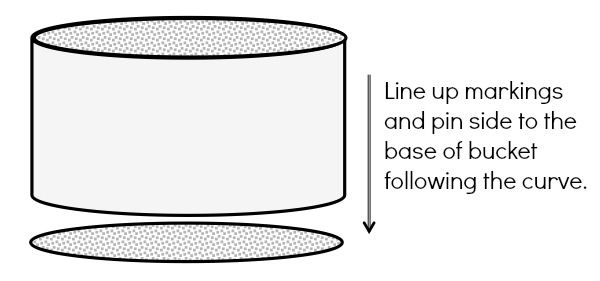
- Position the seam to one side of the bucket base and pin the right sides together, matching your marking points. Join seams with a straight stitch. Press to “lock” stitches in place. Clip every 3/8″ to 1/2″ to allow for a smooth curve.
*Tip: It is best to pin 4 markings first and then ease in the space between. This will help control the shape and allow ease to gently incorporate into the seam when sewing.
- Repeat the process to join the lining; leaving a small opening at the center of the side seam.
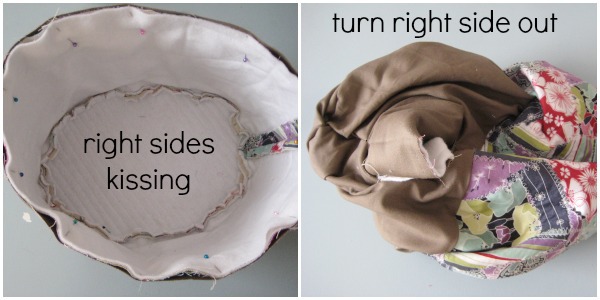
- Join lining to the basket by turning the lining right side out and slip it inside the bucket. Right sides should be kissing here. Pin in place. Stitch all around the top edge. Turn right side out and press along seam. Topstitch through all layers 1/2″ below the top edge.
- Press lining seam allowance: pin and straight stitch opening closed. *This can be machine or stitched by hand.
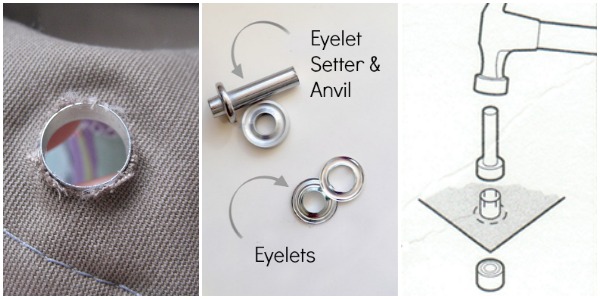
- Mark eyelet placement 6″ on center, 3/4″ below the top edge. Following the manufacturers instructions for the eyelets, trace the inside of the washer. Clip out the circle.
- Slide the eyelet barrel through the hole from the right side of the bucket, place washer over the barrel to create a fabric sandwich. Grab your setter tools and hammer and set eyelets in place.
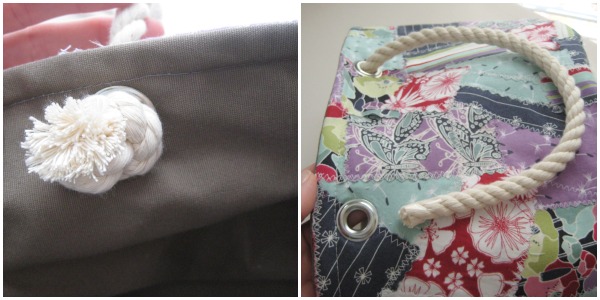
- Cut two pieces of rope 18″ long. Tie one end in a knot and thread through the eyelet from the inside of bucket out: then back through the other eyelet. Tie in a knot.
There are so many possibilities with this scrap bucket pattern. Add a pocket, make the sides fold over, bind the top edge with contrast…. the sky is the limit. Just check out what everyone made during my class at Sew South last weekend. LOVE THEM!!
Additional Tips:
- When sewing the side to the base, I like to place my left hand in-between the layers and help smooth out the fullness. This also helps to guide the fabric when joining seams.
- It is better to cut your eyelet hole smaller and stretch the opening over the hardware.
- Hammer the eyelets over concrete works best.
- A piece of tape wrapped around the rope end will prevent unraveling and make quick work of threading the eyelets.
- Remove tape from rope before tying knot. Pull knot as close to edge as possible.
- Don’t let the 1 1/2 button rating fool you. It is an easy pattern but sometimes sewing curves can be challenging.
We have these buckets all over the house. Think magazine storage, toys, scarves, and of course, scraps! What would you store in your scrap bucket? I’d love to know.
ps- Be sure to check out my past scrap basket busters to use up your scrap fabric!



Comments & Reviews
Easter baskets!
That would be super cute!
When you say “quilt the scraps” do you mean to essentially applique them on to create that crazyquilt effect?
Yes Annie. I like to create fabric from my scraps https://thesewingloftblog.com/2012/11/12/turn-fabric-scraps-into-yardage/. While teaching at Sew South, it became clear to me that many quilters really need straight edges so, we made a few buckets that were all clean finished with straight edges. Really the fabric is totally up to the maker. They all look so good. I even have one from printed fabric that I added free motion quilting to. I will do my best to get a few pictures up in the flickr group today.
~Heather
Thank you Heather for the Scraps for the Scraps Bucket Tutorial…Loved it, will make some of these for gifts. I am an old recycler by nature. I use the empty cans from coffee, put plastic lid on bottom and make a covering with or without pockets for the outside and a lining for inside for my scraps. I have started to really dislike my plastic totes, so will need more fabric buckets in future….I can try to drink more coffee, but for x-mas my kids got me a new machine that uses those itty bitty cups,,,,,,,,
I love, love, love this!! I have the hugest bucket of scraps that need to be used up! I’ve got a Craft Gossip post scheduled for later this morning that links to your tutorial:
http://sewing.craftgossip.com/tutorial-scrap-bucket-basket/2014/03/31/
–Anne
Thanks so much Anne! I would love to raid your scrap basket. Maybe when you get tired of them we can swap. I always love a good snail mail package.
~Heather
Thanks so much for such a sweet basket! I’ve been using a small plastic shopping bag I got from Whole Foods for my scraps ~ this will be a vast improvement and look so much nicer! Very generous of you to share this pattern!!!
What a great tutorial!! One question where do you find the cotton rope?
Thanks!!
I could not find the cotton rope at any local store and purchased the cotton rope on line at Knot & Rope Supply. I’d love to see your finished bucket. Please share a picture or two in our flickr group!
~Heather
Thank you for sharing this pattern. I saw it in the posts about Sew South and I really wNted to make one for myself.
Yay, so glad that you like it. The buckets made at Sew South were fantastic. Just have fun with the main fabric and share tons of photos with us in our flickr group!
~Heather
Es hermosa, gracias
ThanK you. Great for our Guild Meeting. We liKe to do hands On Projects I
Beautiful. Smart use of scraps.. Even great for children learning to use machine to practice by sewing scraps on the rectangle.
Thank you Toni! Please share pictures of your projects to the flickr group. https://www.flickr.com/groups/thesewingloftcommunity/ I would love to see them.
~Heather
Great idea, thank you for sharing.
thank you so much for this wonderful pattern! can’t wait to start.
You’re welcome Susan! I can’t wait to see what you create.
~Heather
P.S. just signed up to follow you on bloglovin!
Loved seeing this in the Hawthorne Threads newsletter today! Your class at Sew South was so fun and love my bucket! Hope to see you again.
Good Morning Heather, What a fabulous way to use up scraps. I have so many and wondered what I could make with them…. and now I know. Although this will be a first for me, as I have never made a bag before, but your step by step instructions will certainly guide me through the process wonderfully.
Heather, I have enjoyed my visit and I have become a new follower via Google +
Enjoy your weekend.
Best Wishes
Daphne
I love this idea, I need to make a few
I have a large amount of fabric sample books. This project would be PERFECT for them! I can’t wait to use them up!
I’ll bet that would look great Christina!
Thanks for the great tutorial! I’ve already made one but want to make more:)
would strips of scrap plaited be alright to make the handles?
Thank you Heather love your ideas Jan uk
This is one of the best written tutorials I’ve seen in a long time. I’m going to make a couple for baby shower gifts, they will coordinate with blankets, burps & bibs. Thank you.
Thank you Sandie. I’m so glad that you like it. I would LOVE to see your buckets when finished. Please drop me a few photos or share them in our flickr group here: https://www.flickr.com/groups/thesewingloftcommunity/
~Heather
Can’t wait to try making a few of these baskets for around the house. The directions look easy to follow and very detailed. Just a hint when applying grommets – use a scrap piece of wood or put a thick piece of felt on the cement so the grommet won’t get scratched or dented. Thanks so much for sharing your pattern.
Great tip Kate. Can’t wait to see your basket all stitched up!
~Heather
Hi – I tried to download the pattern but it didn’t seem to work as the ads are still there. So I copied & pasted it but the pattern pieces aren’t printable & tapeable! The bucket side is easy to do but the bucket base is a bit trickier. Did I do something wrong?
Hello Marge, you need to download the full template from Craftsy, not the photos. The template is to scale, ad free and totally tapeable. Please let me know if you have any questions.
~Heather
Love this bag. Can I save a copy to my computer?
You can download the pattern straight to your computer and use it over and over again. Be sure to send me a few pictures of your finished bucket!
~Heather
Heather, thank-you for sharing this! I go through so much fabric(biz related) no way i store my scraps in boxes as it is just too much to store any other way. Donate a bunch of my scraps every month to charity to keep my studio clean.
But these baskets are perfect for a mud room, can make them bigger to store gloves & hats in. Perfect for bathroom to organize must need products. Tons of uses and a great way for me to get through more of my upholstery/leather then just for my products 🙂
SO cute! I love your choices of fabrics 😀 Thank you for sharing your tutorial and the fabulous inspiration of the cheerful and very pretty buckets!
I see I am quite behind the times on this project. Love it but……how big is the base of the bucket. Instructions say to print the pattern but I’m lost on to what percentage or inches I need to enlarge it. Hope you will help me clear this up ‘cuz I need one of these soooooo badly. Thanx
Hello Pauline,
There is no need to enlarge the pattern. This is a direct print to size pattern. I hope that helps!
Happy Stitching-
Heather
I am new to this site but am excited to try this basket with some friends of mine.
Oh this is so beautiful and smart to use up all those scraps of material. I’m definitely going to make so.e of these! Thanks for sharing!!!
Hi there! I’ve started piecing my fabric together, and I’m starting to stitch the sides & bottom, but what do you mean “clip” every 3/8″ to 1/2″? Do you mean cut notches into the edge of the oval bottom or pin every 3/8″ to 1/2″? I love the basket! I’ve only recently started sewing, and I am addicted! Thank you!
Hello Luz,
Clip/cut the seam allowance to create notches. Just be careful not to cut straight through your stitches.
-Heather