Hello Sewing Loft Readers! Today I’m going to show you how to draft a skirt pattern from scratch – no rub-off patterning this month!
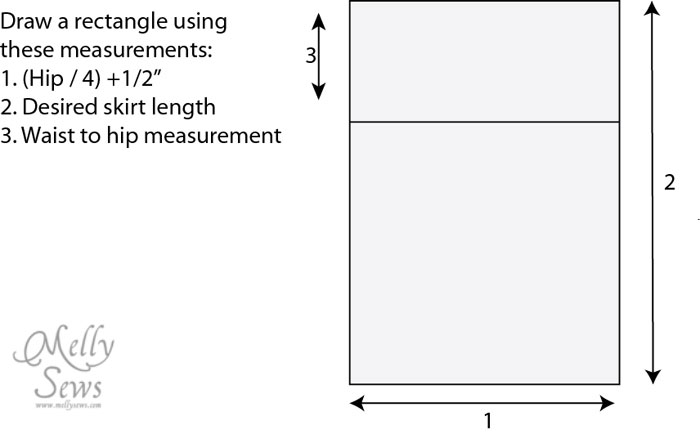
To start with, you need three measurements: your waist, your hips, and your waist to hip length. Let’s discuss more.
Waist: This can be your actual waist, or where you want your skirt to sit. I prefer my skirts to sit above my hips, but lower than my actual waist. When you measure, make sure to hold the measuring tape snugly, but your shouldn’t be sucking in, unless you plan to suck in the entire time you’re wearing your skirt. Which would get uncomfortable.
Hips: Measure around the fullest part of your hip, preferably while wearing underwear or a slip, not over other clothing.
Waist-to-Hip: You may want to put a sticker on yourself level with the tape while holding the measuring tape for the waist and hip measurements, so that you can easily measure the distance between your waist and hip. Alternately, you can tie yarn around yourself at both levels and measure that way. This is a vertical measurement.
OK, we’re ready to draft. Get out some kraft paper, or tape a bunch of printer paper together. Wrapping paper works too. Grab your ruler (see through is helpful) We’re going to draw 1/4 of the skirt for the pattern, so you’ll need to do a tiny bit of math. Calculator (or more likely, phone) at the ready! Also make sure you have a pencil, and some muslin (or scrap fabric – enough to cut out your skirt) and pins. When it comes time to fit the muslin, you’re also going to need a friend or a spouse, and a fabric marker or chalk.
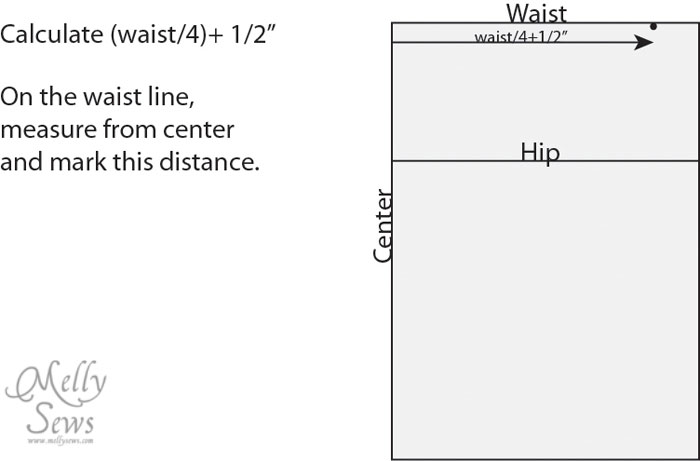
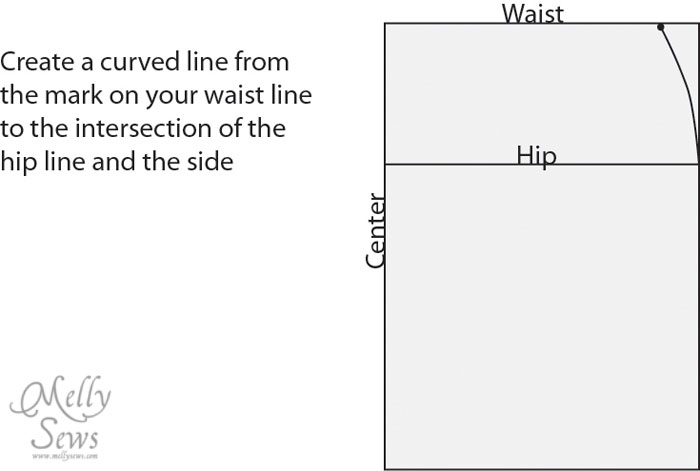
But wait Melissa, I’m not a rectangle! Of course you’re not. This is just our starting place. Now we’ll work on the waist.
A bendy ruler works well to draw this curve, as does a French curve. Or a dinner plate. Just make sure the majority of the curve is in the top 3″ or so, because that’s where the body curves the most.
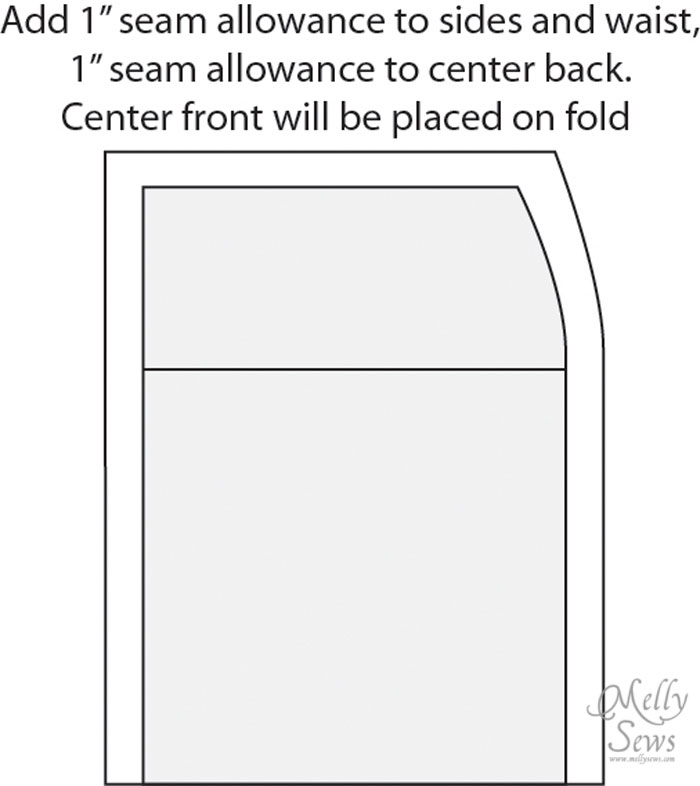
Add seam allowances to the side and waist, then retrace the pattern and add the center back seam allowance, and you have your muslin patterns. Cut out the front piece on the fold, and two back pieces out of muslin. IMPORTANT: you’re going to want to mark your hip line on the muslins.
Pin up your center back seam, and one side seam. Then put the skirt on yourself, inside out. Pin up the remaining side seam. You may need assistance from your spouse or friend (frouse? spiend?).
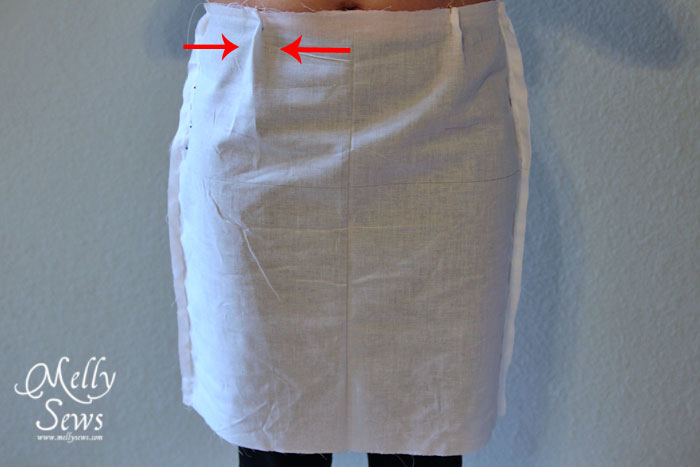
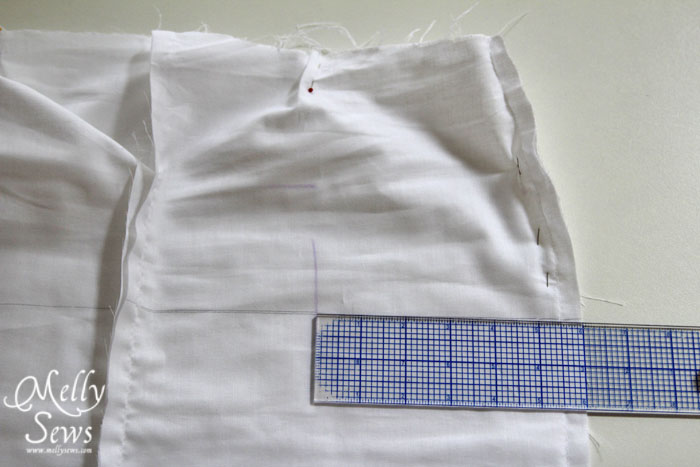
Starting in the front, smooth your hands together from the center and side seam to pin the front darts. Pin the excess fabric at the waist. Repeat on the other side. This isn’t too hard to do yourself.
But then you’re going to need your spouse/friend/spiend/frouse or whatever to help you in the back. Because trying to pin back darts on yourself results in getting stuck with pins. And other bad stuff. So as you did on the front, have your friend smooth the fabric in the back and pin the darts in the waist.
If the muslin is tight around your rear, let out the pins in center back seam first, not the side seams.
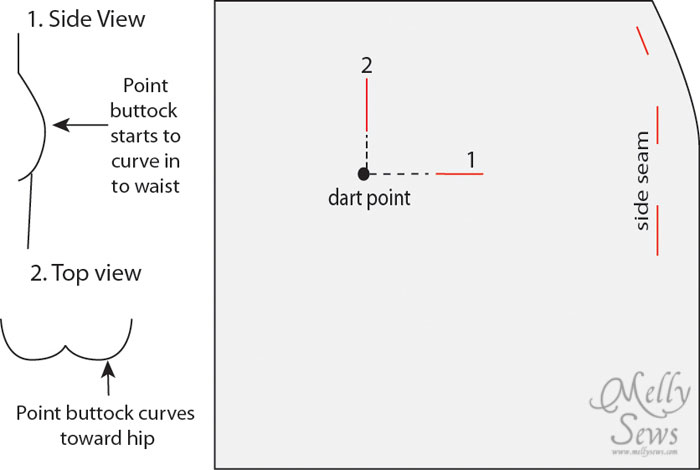
Next we need to determine where those darts will be positioned. It’s easier to start in back with this, and it involves some looking at your rear (Omigod Becky, look at her…just try not singing “I Like Big Butts” while you do this). With the fabric marker or chalk, you’ll want your friend to mark the point where your buttocks start to curve toward your back (mark 1) and where they start to curve out toward the hip (mark 2).
In the front, you’ll need to do the same thing, except the curve will be your tummy instead of your butt. Of if you’re a flat ab workout queen, you may not need front darts. And many women might secretly hate you. Kidding. Sort of. And let me assure you I’m sucking in big time for this next picture. Because I’ve had two kids and I have the extra skin and tummy to prove it.
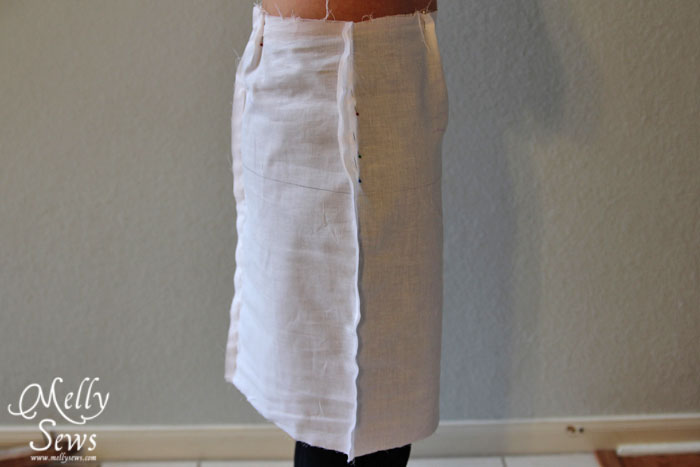
Now, check out your side seams. Make sure they’re going straight down your sides. If they’re not, unpin and adjust until they are.
Now use your marker or chalk to mark where the pins are on the side seams and back seam. Then unpin yourself down one side and take off your muslin. Excuse your friend/spouse and thank them for their help, you’re on your own from here on out.
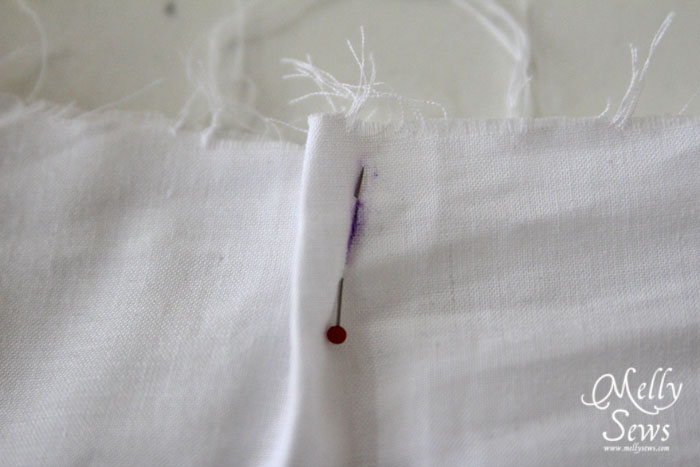
Mark the pins that are holding the darts, on each side of the dart. Then you can remove those pins.
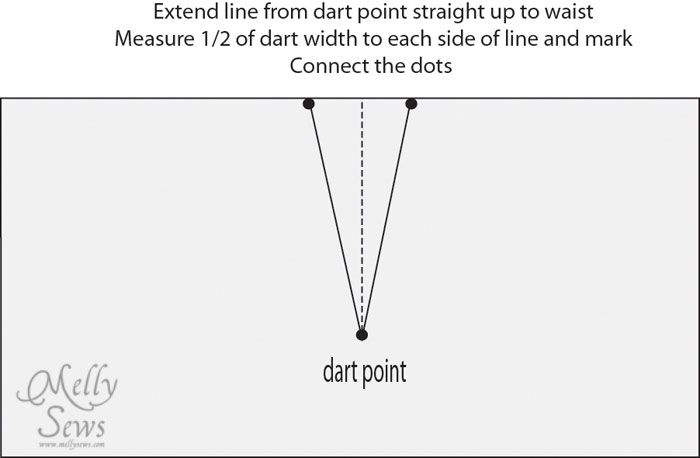
We’re going to figure out where the darts go. Measure over on your lines that marked the curve breaks on your body; where they intersect is the bottom of your dart. Transfer these measurements to your paper pattern, and mark the bottom of the dart. Repeat with the front dart on the front pattern piece.
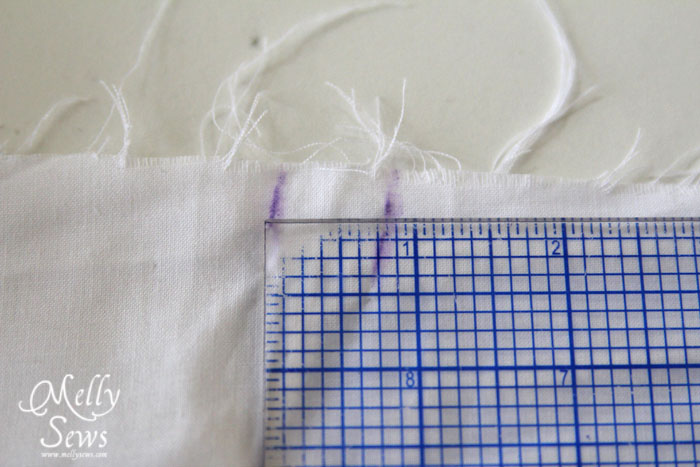
Now measure the width of your darts on your muslin.
Make a straight line up through your dart point, perpendicular to the hip line on your pattern.
Repeat this dart creation for the front piece, Finally mark off your side seams and adjust the seam allowances. You now have a skirt pattern!
Now, it’s a good idea to make another muslin and test this pattern before you cut into the good fabric, but any adjustments should be minor.
Come back next week and I’ll take your questions, as well as show you how to modify this skirt pattern into all the shapes I showed last week. See you then!
[ts_fab]



Comments & Reviews
Think I could cry this was an amazing tutorial and it made sense. I have tons of sewing books and I think uh whatever at times. I have no idea what some of the pages are talking about. But, this was perfect! Thanks!
Hi. Thank you for this. I have been sewing for years but am just now venturing out to create new skirts and dresses for clients/friends. . ..as an instinctual artist I have often avoided numbers but now am quite keen on accuracy though I am still making up the pattern. I am currently working on creating 3 A-line skirts for a shortish very curvy gal with a waist to hip difference of 10 inches and the skirt has four panels with the seams to the side of center so am a bit stumped on how to actually conjur the correct angle for the curve of that difference. I would love your advice. Thank you. Anna
Melissa,
Thank you for sharing your knowledge. I really appreciate that you thought about the ladies with tummies and booties. We now know how to construct a dart in the proper place without so much trial and error.
Many Thanks,
Hi, I have a question I need help, I’m modifying a skirt pattern with darts at the front and back I want to change the waistband to elastic and remove the darts , do I add on the pattern or leave as is. Thanks
Hello Liddy,
You will need to make sure the pattern waist measurement without the darts will fit over your hips. If not, you will need to add additional ease to the pattern to ensure a smooth fit.