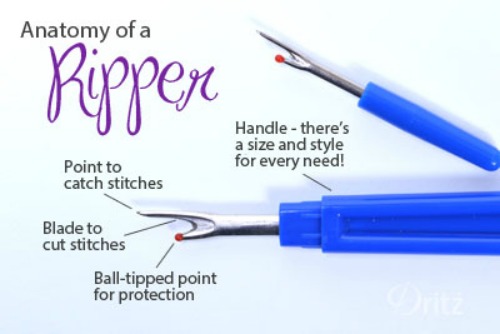
Wow, I can hardly believe that National Sewing Month 2013 is almost over. Sara from Craft Snob is here today to share one of the most despised tools in everyone’s sewing basket… The Seam Ripper! Whenever I reach for this small tool I know I am in trouble! Let’s check out some seam ripper anatomy before she gets started.

The seam ripper is my most essential (and favorite) tool for sewing because… mistakes are waiting to happen! Instead of starting over or tossing a project to the scrap bin, the seam ripper allows me to back up a couple of steps and then continue sewing.
How to Use Seam Ripper
With all the cool and clever tutorials shared on The Sewing Loft for NSM, surely a few sewing mistakes have been made. So this tutorial is all about undoing some of the cool things you’ve sewn while sewing along with TSL this month.
You can use seam rippers to:
- Undo mangled messes of thread (like when your bobbin starts acting up or your tension is not set right)
- When you sew the two inch opening closed on accident (when you were suppose to leave it open)
- Or you just don’t like the seam
Steps for using a seam ripper:
Lay the seam flat. Locate the part of the seam you want to remove and insert the pointed end of the ripper under the thread. The curve in the seam ripper is the part that will cut the thread.
Once you have cut one stitch, remove the ripper and continue the previous step for every two to four stitches, depending on how tight or loose your stitch is.
Remove the cut thread to reveal your opening.
Now you can continue with your sewing project and no one will ever be the wiser!
I have multiple seam rippers stashed throughout my sewing area. So confession time… how many seam rippers do you have? I won’t assume that the number of seam rippers you own is proportional to your sewing blunders!
Join the Craft Snob Facebook group to download your free pattern set.
If you are new to sewing, then follow Bite Sized Sewing, a series of free patterns and tutorials for the beginner sewer.
Thanks to The Sewing Loft for allowing me to celebrate National Sewing Month with all of you!
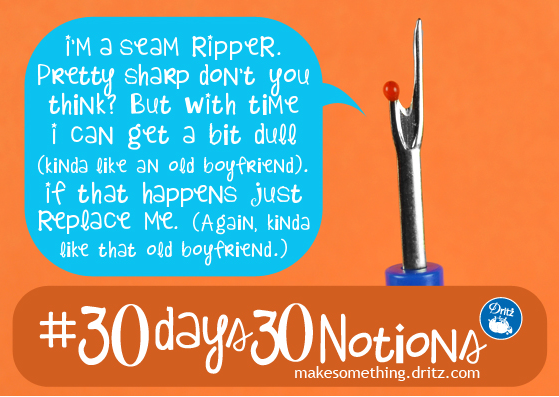
I love how Sara broke down the dreaded task of tearing out a seam into bite size bits! Speaking of bite size bits…. did you know that the Dritz Make Something Blog has been running a month-long series for National Sewing Month? Each day they have highlighted one of their tools in a clever way. You can check out the enter series here.
ps- Don’t forget to enter the National Sewing Month 2013 giveaway! If you have not already entered you will want to check out the amazing prize packages and enter to win here.
Hello! Are you new to The Sewing Loft?
If so, I’m glad you stopped by and hope that something has inspired you to keep your needle moving! Don’t miss a single project and subscribe via email HERE! Bonus- free embroidery pattern with newsletter sign up.
Another great way to connect with me is via Facebook, Pinterest, Twitter , Google + or Follow my blog with Bloglovin. I’m looking forward to getting to know you and creating together!


Comments & Reviews
Thanks Heather for having me! P.S. I posted a link to your giveaway on my FB page.
I teach sewing to friends and family – right now I’m teaching a ten year old neighbour to sew on her late grandmother’s Singer 247. She’s got the hang of the seam ripper but this great post will make a nice addition to her personalised sewing book being built in a 3-ring binder. Thank-you!
Hi Bianca…Wow what a lucky girl to have you teaching her!
The number of seam rippers I own is proportional to the disorganized mess my sewing tools are perpetually found in… as of late. (JK) I can find exactly three seam rippers (which does not mean that I might not have more hidden in the muck someplace). The three rippers are different from one another, three different sizes. The largest fits my hand best and is the most used; however, I’ve found that the smallest is best for ripping seams in small places… the medium sized one I own because it came with a batch of sewing tools I purchased as a set for other items I did not have, but needed at the time. I have not used that one, so far as I can recall.
Great advice regarding the size of ripper, Lady D.
If I am ripping something like a cover that I am going to recycle, I use a small rotary cutter to nick the stitches. This makes unpicking sooooo much quicker and it does not damage the material. I also have some disposable scalpels which are even better for nicking tiny stitches. These have a small curved blade. Almost makes ripping a pleasure!!!? Lol!!!!!
Emmy, using a small rotary cutter is a great idea. And ripping does seem to relieve stress sometimes! 🙂
Gracias es muy interesante recordarlo, aunque uno ya lo sabe siempre es bueno recordar por si algún detalle lo pasamos por alto. Hasta pronto. Saludos.
Sara, Thank you so much for sharing tips on how to use a seam ripper. I read this post last month when it was published and learned a lot. Since then I’ve had two projects go wrong and have had to rip some seams. Having read your post made it so much easier than how I was trying to do it before as I was clueless on how to use the tool correctly. Thank you!!
Hi Monica, I’m so glad you’ve found the seam ripper post helpful and even more excited for you that you’ve attempted and completed 2 projects!