I’m so excited to be guest posting here at The Sewing Loft today! I first started sewing when I was about 7 years old, on a My Little Pony chain stitch machine. When I was 13 I went to quilt camp. At 16 I took garment sewing lessons. Even though my mother is an amazing seamstress, she let me learn from others and waited patiently for me to come to her to ask questions. In that way she fostered my love of sewing. Now, I blog about crafting and sewing at Always Expect Moore and even teach sewing and quilting classes at my local quilt shop!
When Heather told me that she was looking for sewers to share tools, I knew I had to share the seam ripper. The challenge was to come up with a project that intentionally uses a seam ripper… though many of my projects unintentionally use one!
First, I thought I would share with you some tips for the traditional way to use a seam ripper:
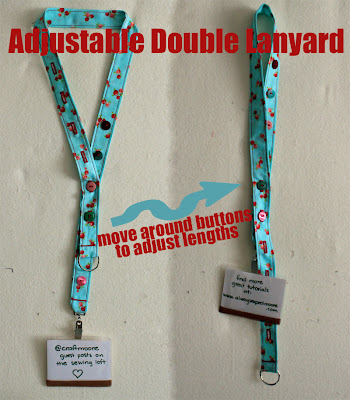
Now on to today’s tutorial! I go to conferences or other events where I need a name badge. Sometimes I want a second name badge to highlight my twitter handle or something about me, but don’t want to wear a second lanyard. Sometimes I only need one badge, but it is handy to have a loop where I can attach my keys to keep them handy, or clip a pen for easy access. This lanyard adjusts depending on what I need to use it for… and is super cute to boot!
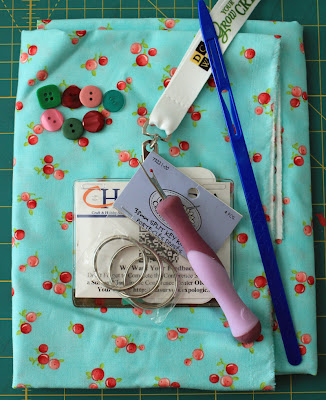
What you’ll need is some fabric, coordinating buttons (I used 6 buttons that are all different, which is fine, but they should be roughly the same size), a lanyard clip or other fastener for one end and a large key ring for the other, and a turning tool (or safety-pin). Plus… have your seam ripper handy!
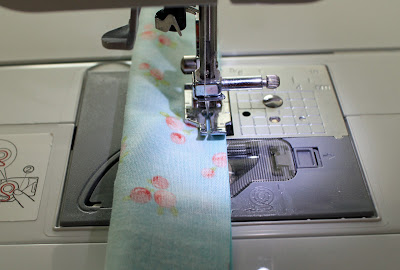
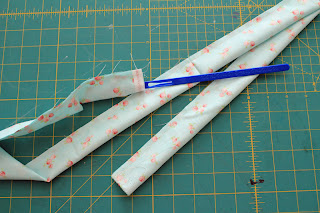
I started with a 3″ x WOF (that means “Width of Fabric”) strip, folded it in half, right sides together (RST), to make 1.5″ x WOF and stitched down the raw edge.
I used my turning tool to turn the tube right side out, and then pressed it flat with my iron.
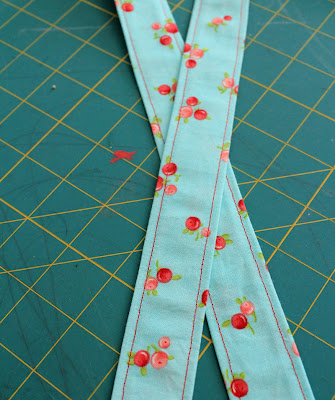
Using a contrasting thread, I stitched 1/8″ away from the edge on both sides.
4″ from each end, I marked 6 dots, each 2″ apart.
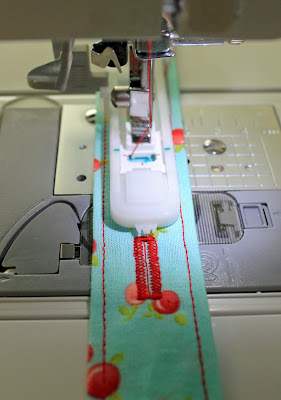
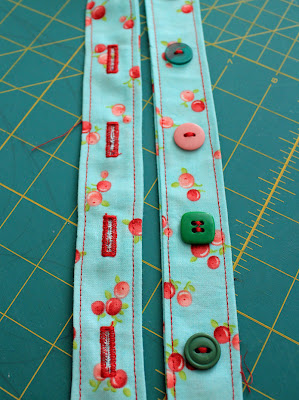
Using my buttonhole foot, I stitched a buttonhole at each dot on one end of the strip. If you have one of these buttonhole feet and don’t know how to use it, search YouTube for a tutorial on how to use it for your brand sewing machine – you’ll be glad you did. These are awesome!
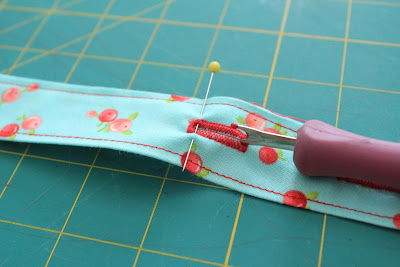
Here is where you get out your seam ripper. At one end of the buttonhole, put a pin perpendicular to your stitched hole. Insert your seam ripper at the other end, and carefully pull towards the pin. The pin will serve as a “stop” so that you don’t rip right through the other end of the buttonhole.
Once you’ve cut open all the buttonholes, stitch a button on each of the marks you made on the other end of your fabric strip.
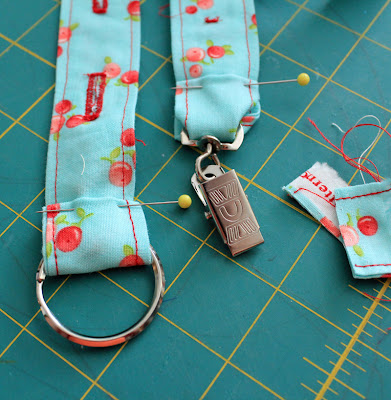
Trim off the raw ends of fabric, fold the end over twice, slip the hardware on each end, and pin in place. Stitch where you have pinned – I used a small zig-zag stitch.
Once you’re done you can slip a couple of the buttons into buttonholes to adjust the two ends of your lanyard!
Thanks for having me, Heather! I hope everyone enjoyed this tutorial, and learned a little more about the seam ripper as an amazing sewing tool! I hope you’ll come visit me at Always Expect Moore or at my Facebook Page!
Love it Carolina!! Since I am off to The Sewing Summit in just a few short weeks, this project is perfect for me. You see, my plan is to travel handmade. So, I’m thinking this might be a fun addition to my packing list. You next is Jean from the Quilted Cupcake. Remember her fun sewing machine photo on Facebook, I can not wait!




Comments & Reviews
Well that’s just too much fun! Great tutorial!
What a great idea and a must-make for conferences!
I visited Carolina’s site and her and I share a last name. I absolutely love the ideas she shares and this lanyard and will be using the tutorial this week to make one for my kids. They will get their first set of house keys very soon and this project is perfect for them. Thank you for having such great information. 🙂
Christine, that is a wonderful idea to give it to the kids! I might have to do the same as my oldest is ready for her 1st key.
Christine – how funny that we are both C.Moore! 🙂
I’m so glad you like the tutorial – I had fun coming up with it! If you have the “one step buttonhole” foot, you might want to get your kids involved with the sewing as well. The project itself is pretty forgiving, but the buttonhole foot is MAGIC! Also, they can help with picking out and sewing on the buttons!
Love this tutorial: Carolina shared a very creative “positive” use for a seam ripper! I’m really enjoying your Nat’l Sewing Month Series so far: every post is so darn interesting!
Thanks so much Laura! I am loving everyone’s tool selection. It is really make me look at my tools in a entirely new light!
Great positive use of the dreaded seam ripper!! I love “intentional ripping”. Thanks for the idea; sometimes the buttonhole cutting knife/block combo does not work, and using scissors is very risky business!
Love this! Thanks for sharing……………………………………
great tutorial!