Wow, that was amazing! I am so inspired to raid my scrap stash and start paper piecing! Joining us today is Robin with a fun project for the kiddo’s!
Hi, I’m Robin from Create Kids Couture. If you haven’t heard of CKC, we make children’s boutique style PDF and paper sewing patterns. To keep up with us, find us on Facebook here.
Zipper Foot
Today, I’m showing off a zipper foot. Not anything crazy, but something a lot of Create Kids Couture fans and other novice sewists might not be familiar with…yet. Oh, zippers, zippers, zippers…I have heard so many people complain and cry about them, telling of completely irrational fears about zippers, but there’s really nothing to be afraid of, and this is the perfect EASY little project to start getting you comfortable with the thought of using them.
School is in full swing now, and I’m always busy packing lunches. If there’s one thing I hate, it’s waste, and that’s one of the reasons I pack my son’s lunch, because most of the time when he “eats” school lunch, most of it goes in the trash. I have to pack a lunch and an afternoon snack packaged in a separate bag. He has a soft sided thermal lunch box that he takes everyday, and I had been packing his snack and drink in a quart size ziplock bag, but I hate the fact that every day that bag gets thrown out. No, I’m not one of those super crunchy mamas, but I think there are little things that we all can do to help save money and save the earth, and reusable snack bags are one of them. Even if you don’t have kids to pack lunches for, you can use this tutorial to make a change purse, lined makeup bag, or any kind of zippered bag with a lining.
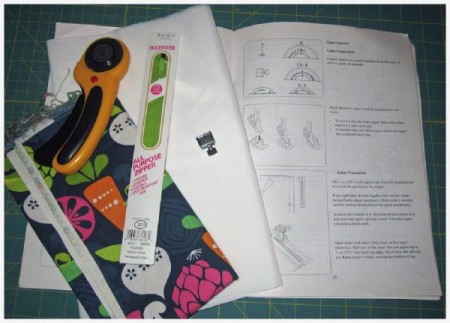
For this project you will need the outer cotton fabric (size depends on bag size you decide to make), inner nylon fabric (or other suitable fabric, see note below), a zipper, sewing machine with zipper foot, and thread. I chose a 7″ zipper, which is a good size for a snack bag, I think, and I cut my fabrics 7″ x 10″.
*A note about fabrics: Not all fabrics are foodsafe, so check with the manufacturer before selecting fabric for snack bags. MOST waterproof fabrics contain lead or other toxic chemicals that can leach into food. As far I know, Nylon is the safest choice, but it is not 100% waterproof.*
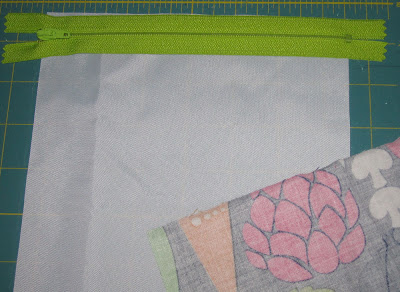
Notice that the total length of the zipper is longer than 7 inches. When cutting your fabric, be sure to cut it the to the size of the actual zippered portion, in this case, 7 inches.
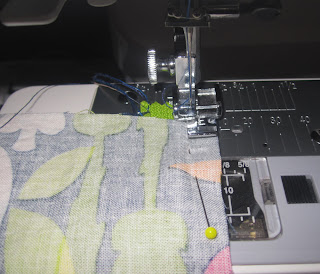
Put your zipper foot on according to your machine’s directions. If you are sewing to the right of the zipper as I am here, the foot needs to be attached on the left side. The zipper goes into a groove on the bottom of the foot and the foot rides on top of the zipper while the needle sews next to it. Take your time. Nylon can be tricky, slippery stuff. Sew the full length of the fabric and zipper backstitching at beginning and end.
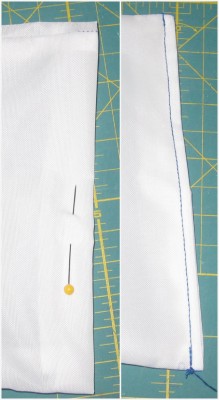
This is what it looks like when you’ve finished one side. I’ve flipped the top fabric over and the nylon is now on the bottom. Now you can topstitch the seam, making sure the nylon is pulled down flat on the back side.
Now for the the second side. Place your nylon down again, and line your zipper up with the top and your outer fabric right side down, just like you did the first time. Pin and sew in place, then flip the outer fabric over the zipper and topstitch.
Pin your fabrics on 3 sides, leaving the nylon bottom open. Sew the 3 sides, but do not sew the bottom.
Open the bottom of the nylon, reach in, and pull the outer fabric out through the open zipper. Continue pulling until you have also turned the nylon right side out.


Comments & Reviews
Great post! I feel like I could maybe try a zipper! I love the idea for the snack bag! Robin is a truly creative earth mother =0)
Great Idea
Question.. I will not use this pattern for food storage..eliminating nylon.. using regular fabric for lining..is the lining fabric face up or down in the very bginning when I align the top pf the zipper to the top of the fabric..in your case nylon..? Thank you!!
lol I just noticed how long ago you actually posted this question, but here’s the answer anyway. You have to lay your lining fabric face up, the zipper on top and the outer fabric face down. Even if you don’t need it now anymore, maybe it’ll help someone else. 😉