Hello friends of first Fridays! It’s your old pal TJ of Studio Mailbox here reporting to you for my monthly post. I have recently finished the best thing I’ve sewn since my killer T-shirt quilt and I came running right here to share it with you.
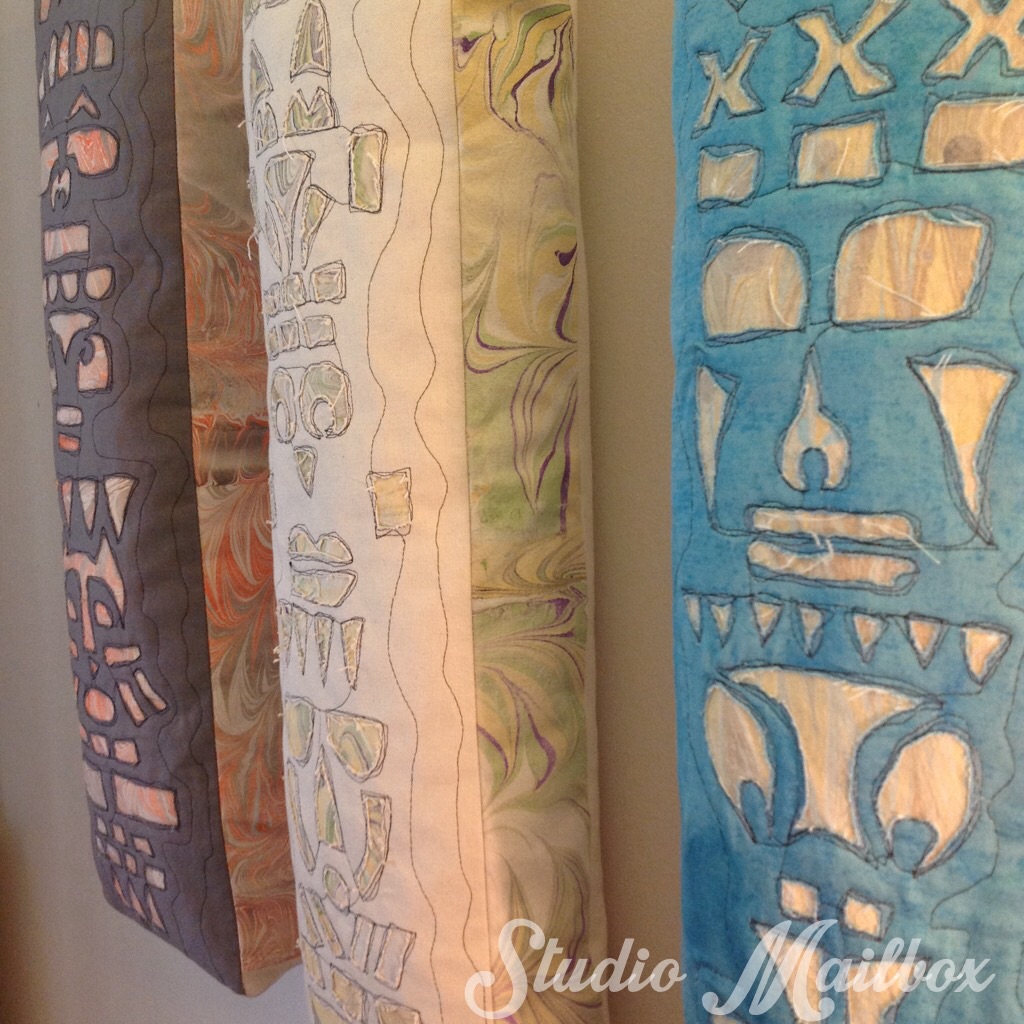
Check out my reverse applique wall totems:
 Last winter I had marbled some large pieces of canvas. Although I was really pleased with the results I wasn’t sure how best to use them. Each canvas is basically a print of acrylic paint that was floating on a dense water solution. They would make the coolest giant bags, but my concern was how often they could be washed before wrecking the paint. I decided I wanted to use the canvas in a decorative rather than functional sense.
I considered a set of stacking blocks; like giant baby blocks that could hang out on shelves or side tables. I still want to explore that. Just think of the party pictures… adults playing and stacking over-size fabric blocks! I’ve put it on the back burner for now. Knowing me I’d get side tracked making baby themed party favors.
Since I’m a member of the Artist’s Cooperative at the Minnesota Center for Book Arts I’ve been exploring the ways stories are told. I wanted a way for the marbled canvases to mimic the beautiful marbled endpapers in books. I knew reverse applique would give my project a layer, hopefully enough to give the viewer a sense of depth and feel as if they are looking into something reminiscent of a book.
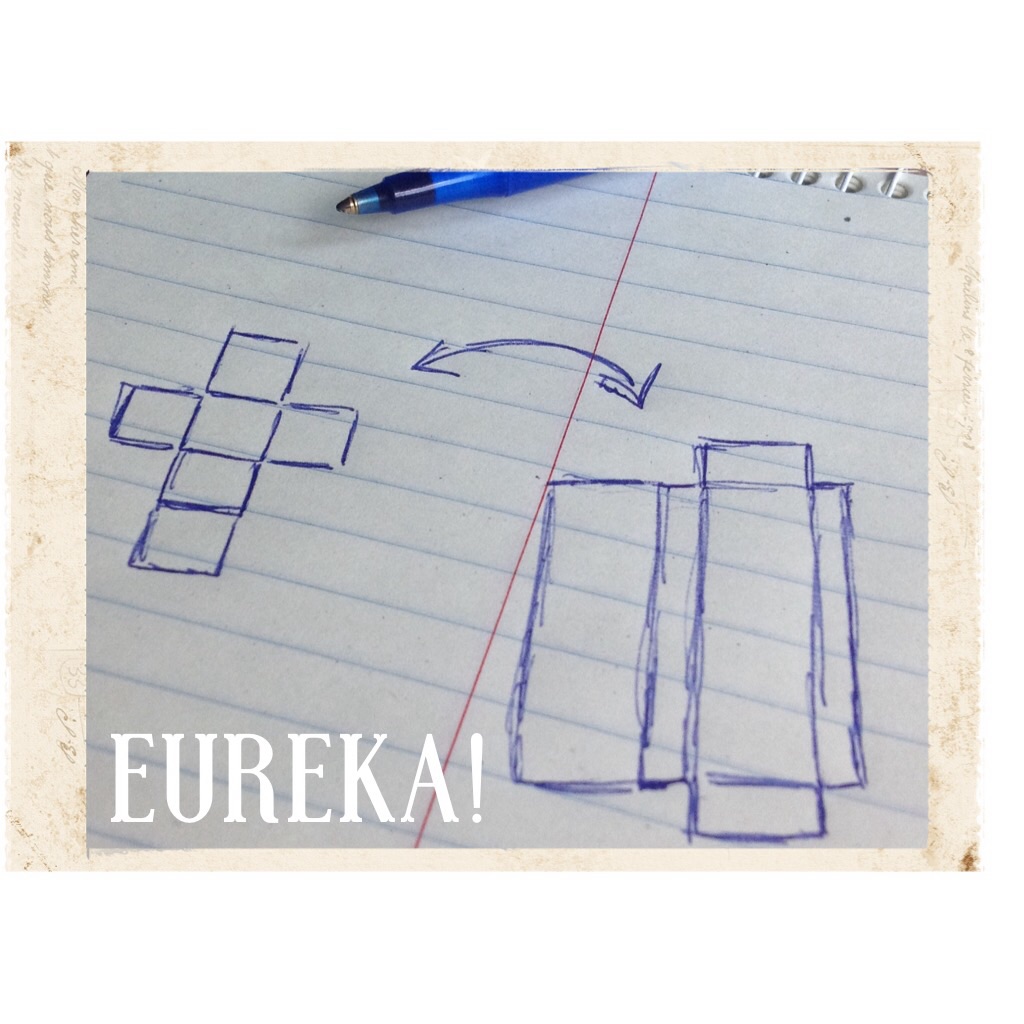 Years ago I actually made a set of baby blocks for a childhood friend who had twins. This was shortly after I had moved to England and I remember painstakingly hand sewing them together, fascinated at how as I kept connecting the seams it would fold in on itself and turn into a cube. Pure genius! I figured if I modified the pattern for a cube, I could end up with something close to the shape of a totem.
Quickly I sketched out a plan as well as some rough ideas for the shapes I wanted to use for the eyes, noses and mouths of my totem faces. I didn’t feel any urgency to be precise (people you know me by now. I never have the urgency to be precise!) But seriously folks, I knew I was going to free motion stitch this so I simply wanted to have a rough plan in place to follow as I sewed down the column.
I laid my face pattern out over the marbled canvas just to get an idea of what would show up in the holes at the end. Remember in reverse applique you have layers of fabric that get revealed as you cut away the fabric that is on top of it. There is still a part of me that feels that hiding so much of that wonderful marbled canvas was a crying shame. Something like that should almost be illegal. Oh well…no risk, no reward.
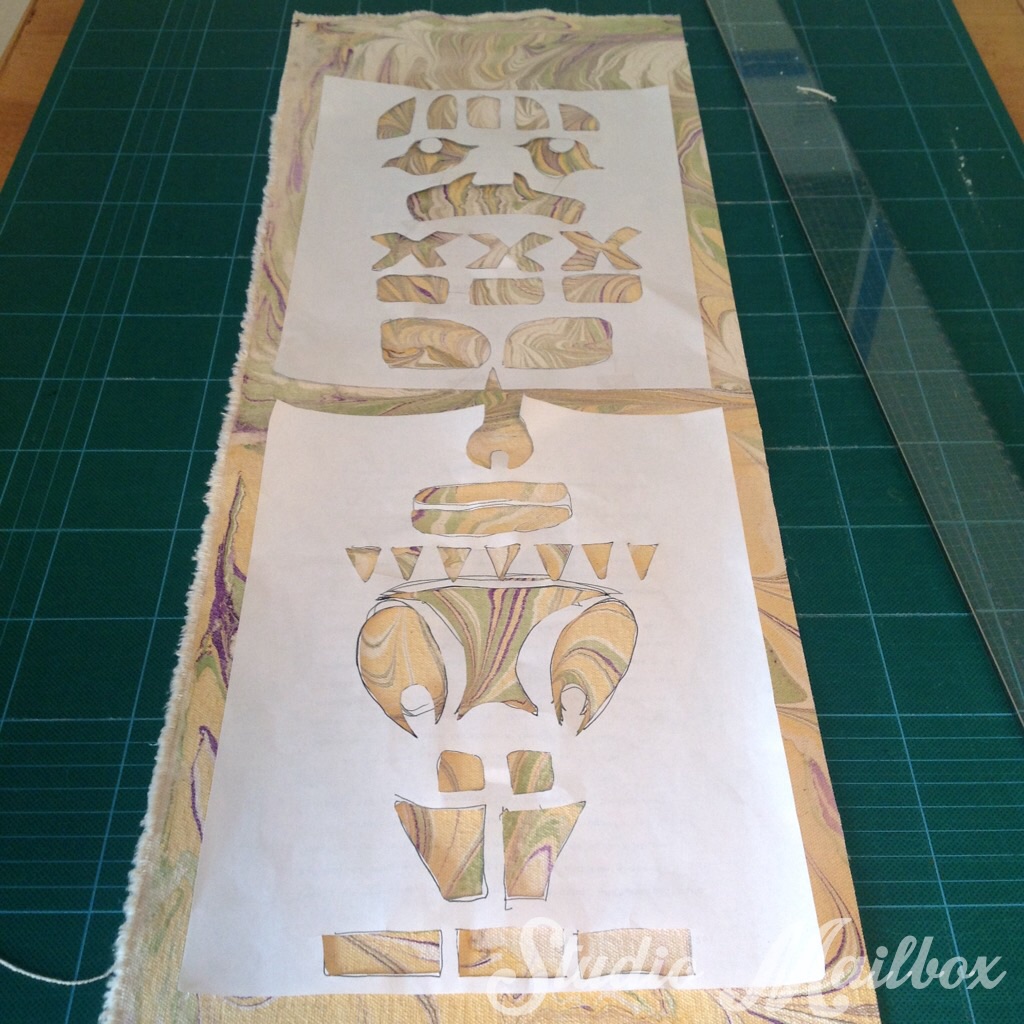
I went for it. Time to sketch out some guidelines to follow along while stitching.
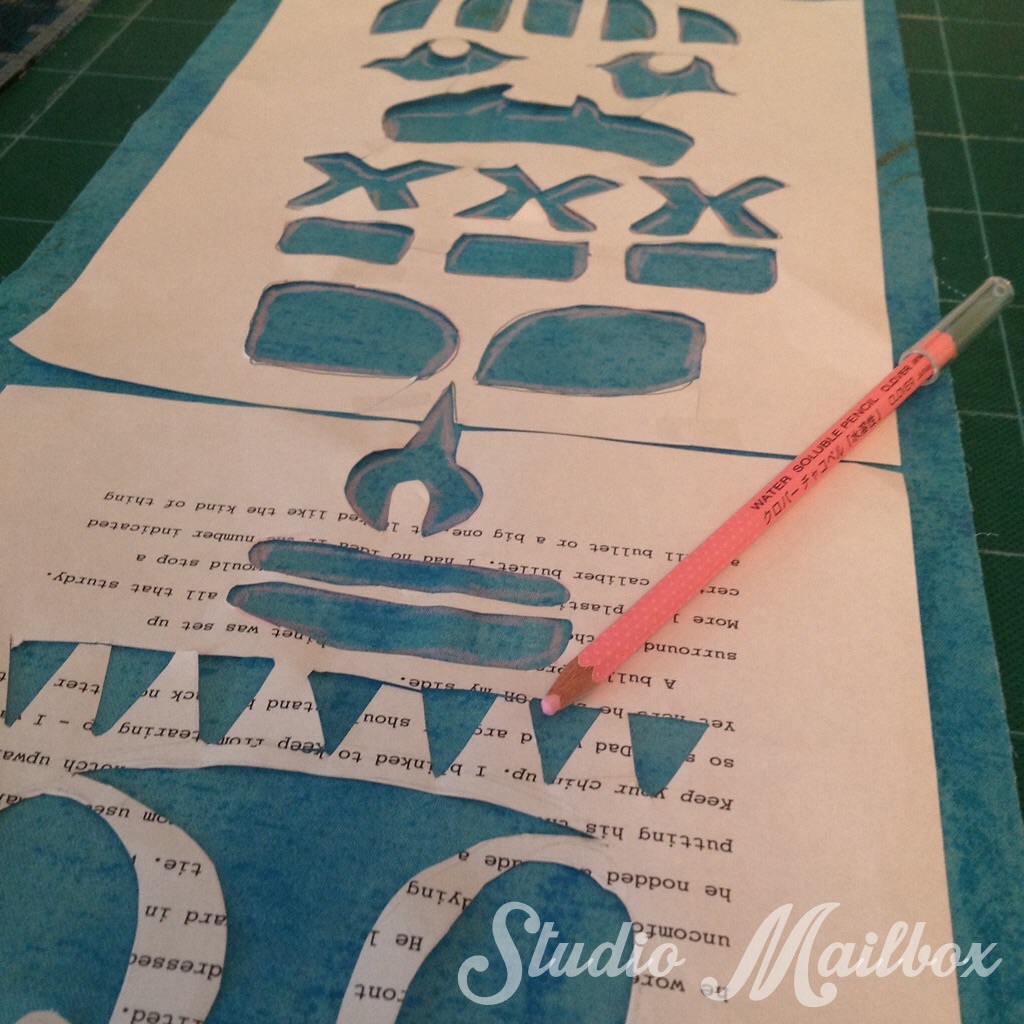 Notice how I used my very best paper to make this pattern. This is what happens to children who were encouraged to use scraps from the recycling bin for all their craft projects. They grow up to have a stack of scrap paper they use for crap like this. Lucky you. There is no charge extra for this.
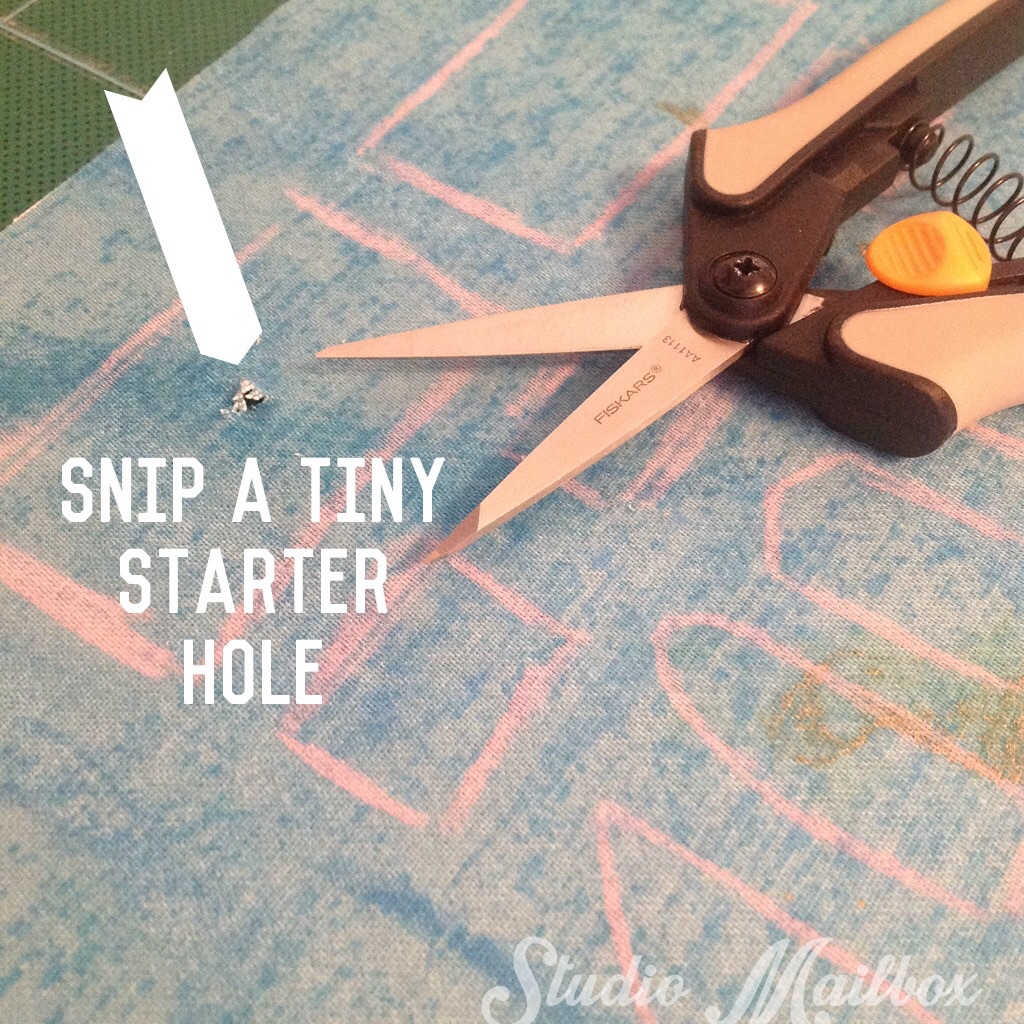 Now here is a very important thing I am going to share with you. I have found that doing reverse applique stresses me out. My biggest nightmare is wondering what will happen the day I slip up when it comes time to cut away that top layer. What if I cut too deep and go through the marbled canvas? This is exactly the kind of thing that keeps me awake at night. I took a few minutes and snipped a small starter hole in every spot so that when it came time to get rid of that top layer I wouldn’t have to stab down and risk ruining my canvas underneath it. You may now take over the world with this little tip. You’re welcome.
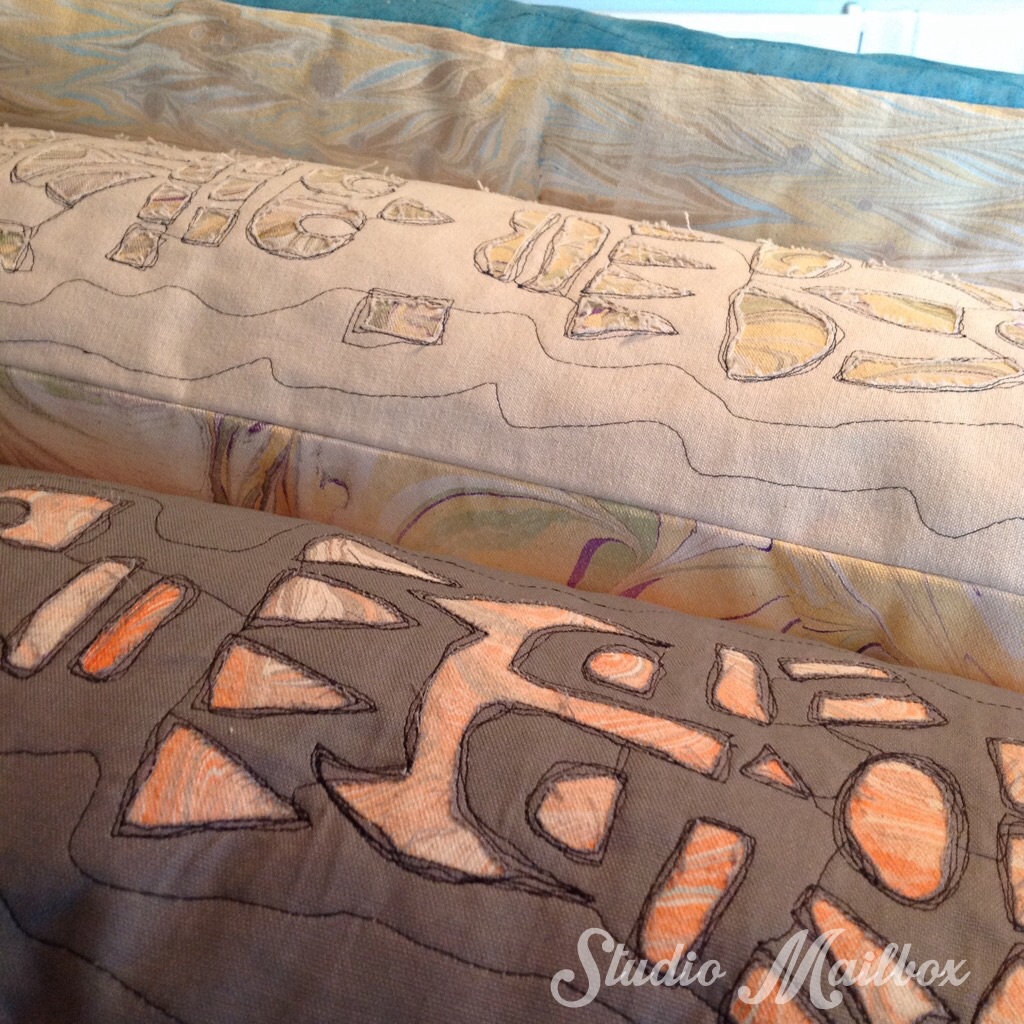
 Then I went and sewed up my two layers. The blue on top (obviously) and the marbled canvas directly underneath it. You can see my little starter snip holes. It was easy to go in and cut the blue fabric away allowing the marbled goodness to peek through. Notice how I kept stitching between all the little spots. Other people would probably stop, lift the presser foot and set back down on the next spot to embroider. Not me. Clearly I am not that kind of person.
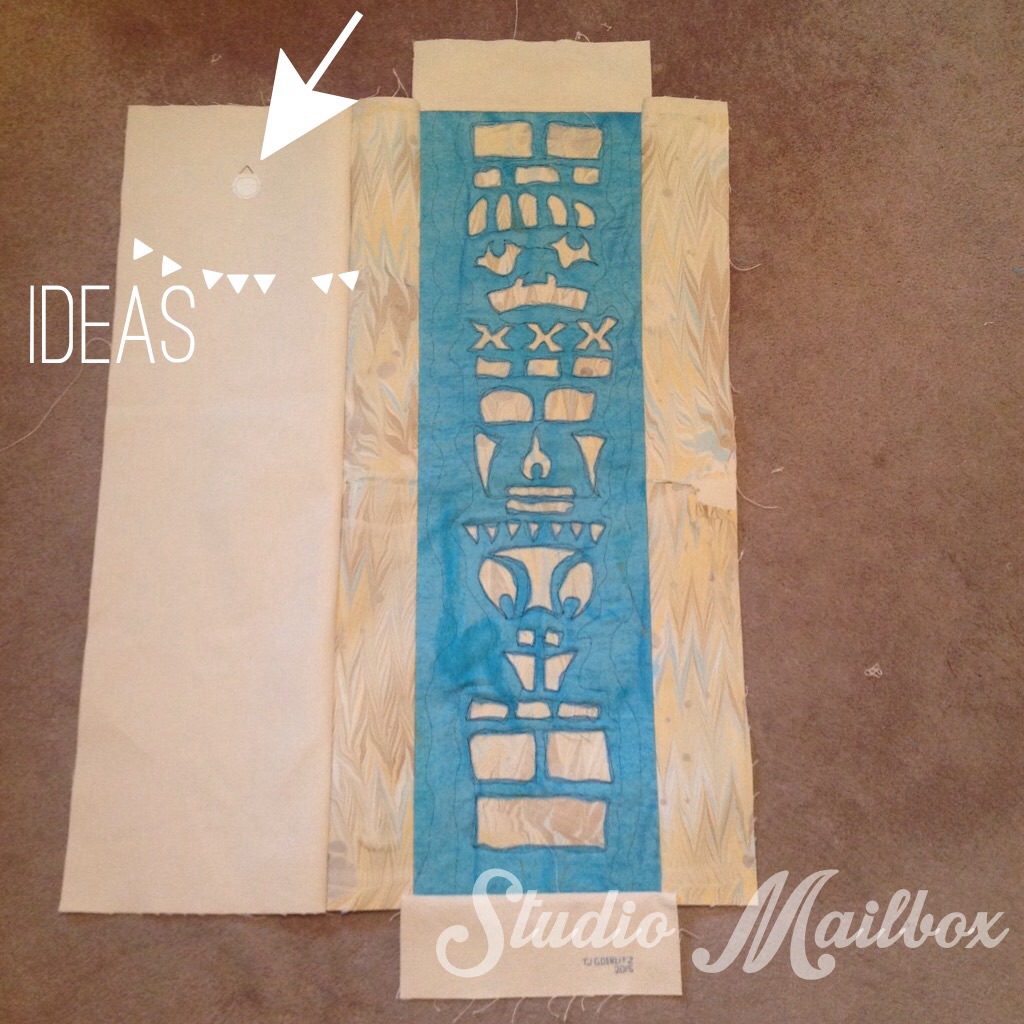 Remember my modified pattern from up above? Here’s what it looked like before I sewed it all up. And because I’m crazy generous I’ll give you another little tip here. Make sure and sew a doodle hanger thingy on the back panel. Yes that is the technical term for what you need to put on the backside in order to hang it on a wall in the end. Again, thank me later. If you neglect to do this you will have to carry your totem around under your armpit everywhere you go for the rest of your life.
From here it was simply a matter of carefully folding this thing in on itself and joining all the seams except at the bottom flap. That’s where I turned the entire project inside out and stuffed it from. I closed them all by hand.
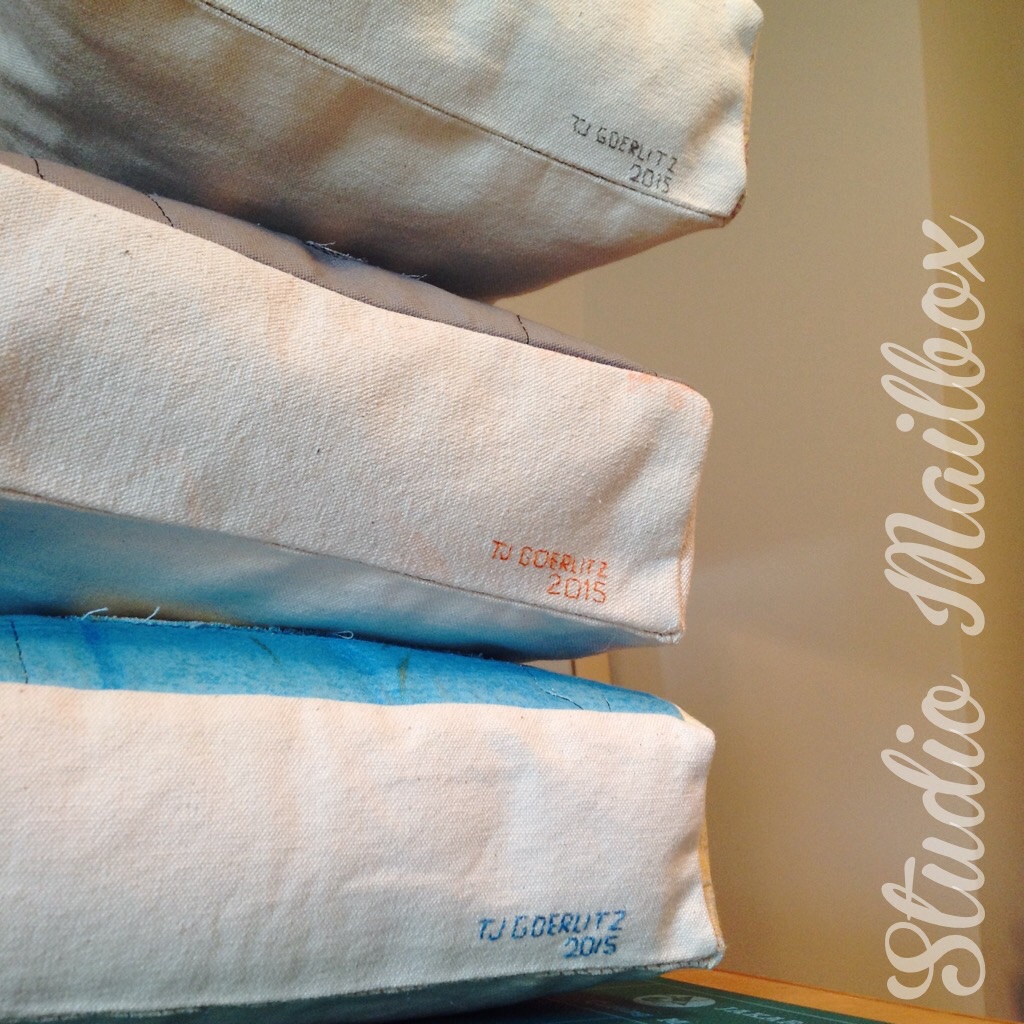 As you can see I also took a few extra minutes per totem to hand stitch my name and the year into the bottom panels. They don’t hang my stuff in galleries for nothing people.
I spent an awkward amount of time trying to decide how stiff to stuff them. I didn’t want them rock hard but I didn’t want them sloppy either. I got one where I thought it was just right and then I tried to get the other two close to it. There I was stuffing, squeezing, working it up into the corners testing it.
I used the rest of the marbled canvas on the long sides. I think that was the best touch of it all, bringing it all together. All jokes aside, I am really really pleased with these. Chirp in and comment if you’ve got totem fever now too.
 TJ Goerlitz is a mixed media artist who pretends to be a seamstress whenever possible. Come connect with her on her site, Studio Mailbox, her Facebook page, or in Pinterest. Join her on the first Friday of every month where she shares her latest sewing tales with the readers of The Sewing Loft.

Comments & Reviews
What a fun project! Thank you so much for sharing (and with great instructions)
Thank you so much for taking the time to comment Loretta! Glad to hear my instructions made sense… let us know if you make one. Happy stitching, tj