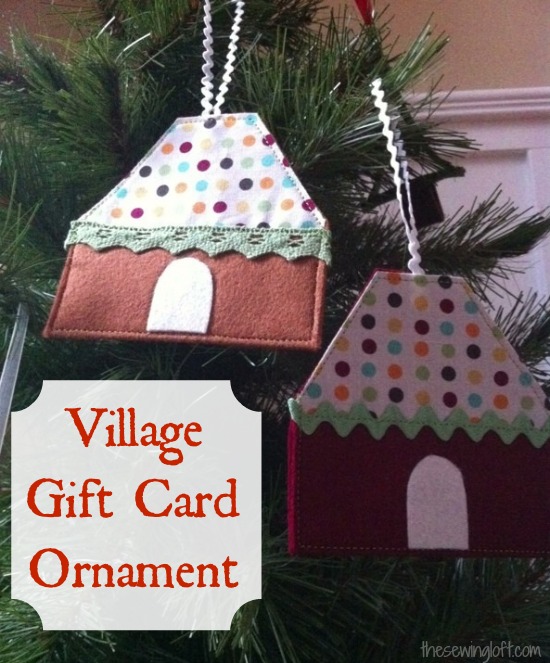
Last year, I shared my Candy House Gift Card holder. While it looks great, it took time to make. And with the clock ticking on the holiday count down, time is a luxury I do not have. I think it’s safe to say that I am not alone in the mad dash to the finish line this season.
I wanted to improve this project. This year, I am turning the gift card holder into something that can be hung on the tree.
Village Gift Card Holder Ornament
This project is for sewers of all levels.
Skill Level- 1 Button
Materials:
- fabric scraps
- 6″ x 4″ piece of felt
- trim scraps, plus a 10″ piece of ribbon or trim
- double-sided fusible
Pattern:
Village Gift Card Holder Pattern PDF
Basic Instructions:
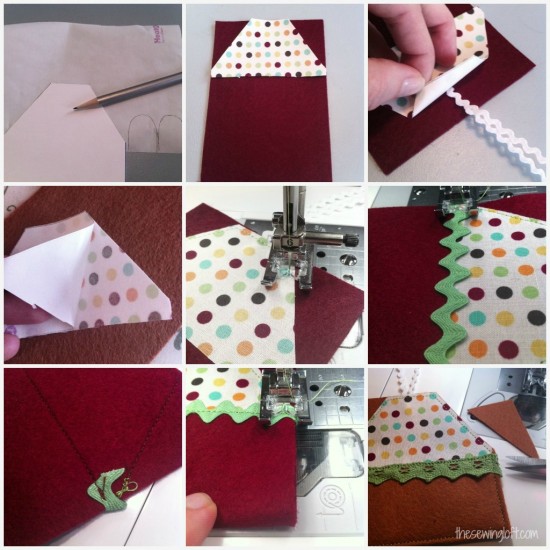
- Trace roof and door onto double-sided fusible. Cut out and fuse the double-sided fusible to the wrong side of fabrics. Follow the instructions on the packaging.
- Cut pieces to size and set door aside. Peel the backer off the roof and position along the top edge of your 6″ x 4″ piece of felt. Fold 10″ ribbon trim in half and sandwich along the top of roofline. Fuse all layers in place.
- To ensure strength of my hanger look, I added an all around straight stitch along the edge. You can also add a touch of whimsy with a row of trim along the bottom edge of roofline. Fold under the edges and straight stitch with matching thread.
- Fold up the bottom edge of rectangle to create a pocket. The pocket is on the backside of house. Machine stitch all along the edge
- Cut away the corners to reveal the roof shape, position and fuse the door in place and you are all set.
If you have more time, you could embellish them further. Maybe add a small button on the door, squares for the windows or even a folded piece of ribbon as the chimney.
I’m just going to slip a few iTunes bucks in the back and these gift card holder ornaments are headed for the tree! My girls will have to “find” their last gifts.


