I’m super excited about today’s special guest Samantha aka Mrs. H. She is reminding us just how easy it is to add a focal point to our work with a strategically placed section of scrap patchwork.

Hi there,
I’m Samantha, aka Mrs H! I’m here today to show you how I use my scraps in my handbags. I’ll be using my Reversible Hobo bag pattern today to demonstrate.
Scrap Patchwork
We’ll start with making the ‘crazy patchwork’.
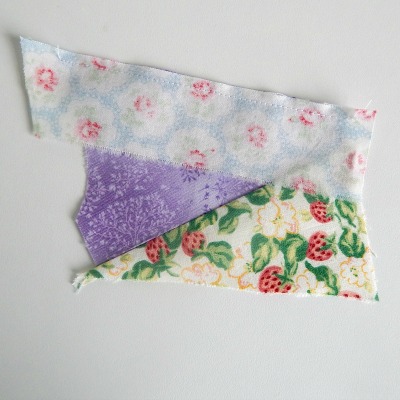
1) Select scraps that range in sizes from small to medium of a similar palette.
2) Begin with the centre scrap, preferably one of the smaller scraps.
3) Join a slightly larger scrap to one side of the centre scrap using a scant 1/4” seam allowance, right sides together.
4) Press the seam to one side, opening the scrap panel out.
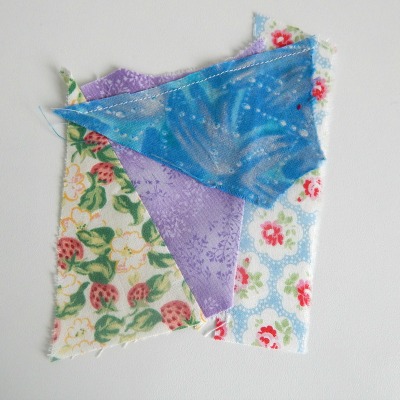
5) Join another scrap onto another side of the centre scrap in the same way.
6) Continue adding scraps, right side to right side, covering all previous raw edges until you have a piece large enough to fit the template or measurements. Trim the seams to an even width.
Now you’ll want to actually use your ‘yardage’. In my case, I cut out my stabilizers and backing piece. The piece pictured is my front flap.
I pinned it right sides together with my crazy patchwork piece and sewed around it using the correct seam allowance for my pattern. In this case it was 3/8″. After it was sewn I cut around the piece and then fused the stabilizer on. It was just easier to make sure it was in the right place that way.
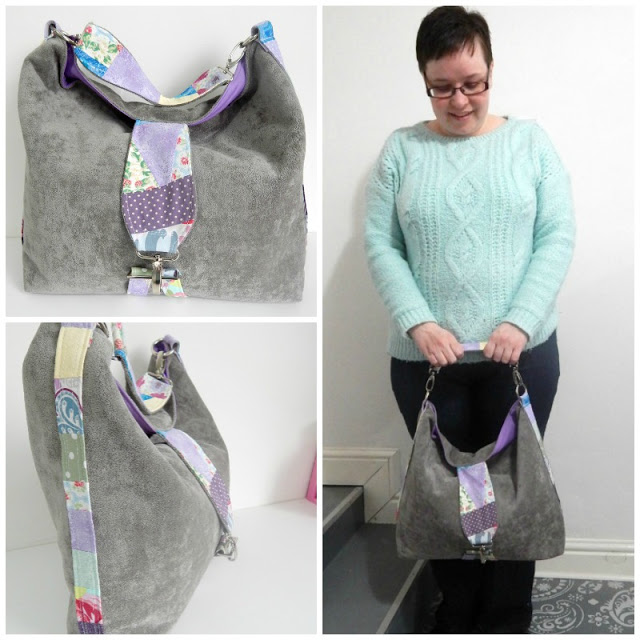
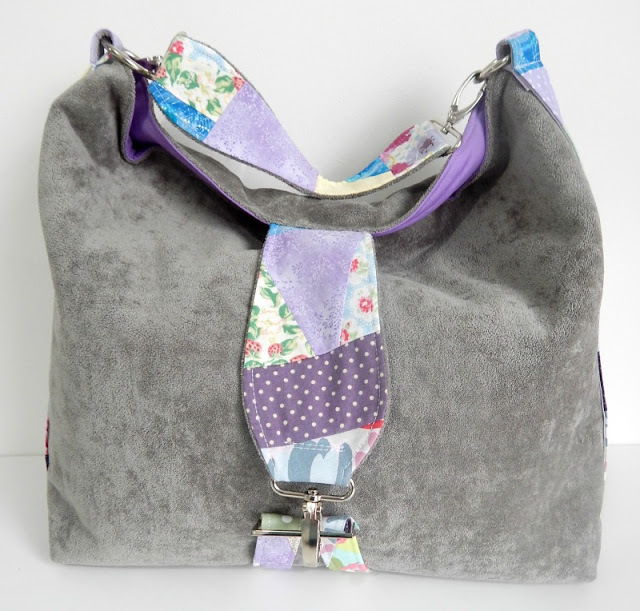
Here’s the finished bag with crazy patchwork accents. I used the same method for the front flap, the handle and the side accents.
I think it makes the bag look more fun, and is a great way of using up those scraps!
If you’d like to make your own, you can find my Reversible Hobo bag pattern in my Craftsy store.
For those scraps which are too small to use, I like to throw them all in a bag lined bin in my office. My local children’s hospice charity shop are happy to take my scrap bags and use them as ‘rag bags’, which they can sell to the rag man for £7 a bag.
I throw all of my thread offcuts in, my serger tails, my seam allowance trimmings, boxed corner cuttings and every tiny little scrap that would otherwise end up in the bin.
The charity shop ends up with much-needed finances, the rag man ends up with fibres he can break down to recycle and I’m not contributing to landfill. For the small amount of extra effort, I’d say that’s definitely worth it.
Why not check with your local charity shop to see if they can sell on ‘rag bags’? Just make sure they’re clearly labelled when you drop them off!
Samantha from Sewing Patterns by Mrs. H is an independent pattern designer, living in Wales, UK with my husband and our unfortunately nicknamed daughter, Elvis. Samantha specializes in bag sewing patterns and also runs the Sewing Patterns by Mrs. H Etsy shop where you can get a whopping 25% discount on her Great Value bundles using the code BUNDLEBONANZA.
———–
Can I just say how cute that is!! I love how Samantha added a pop of color and created a focal point with her scraps. It’s that type of out of the box thinking that makes sewing so personal. A big thank you to Mrs. H for joining in the National Sewing Month fun! Be sure to stop by and visit her blog. She has a bunch of fun tutorials including this one on how to install a thumb catch. (let’s just say… I’m all over it and think it’s a MUST add to my new market bag in the making!)
** Disclosure: This post contains links to brands that I am affiliated to, believe in and feel add value to our sewing community.
Hello! Are you new here?
Do you want to learn more about sewing? If so, be sure to sign up for our newsletter HERE and never miss a stitch! Daily Sewing Tips, Everyday Projects and Fantastic Inspiration delivered straight to your mailbox!
Bonus– free download with newsletter sign up.
Feel free to connect with me on Facebook, Pinterest, or Instagram. I look forward to getting to know you and stitching up a storm together!
