Cross stitching has gained popularity in the last few years – it’s not just for samplers and handkerchiefs any more! If you’ve ever wanted to learn more about cross stitch and how to incorporate it into your regular sewing projects, read on!
Let’s get started with a basic definition:
Cross Stitch
- a stitch in which pairs of diagonal stitches of the same length cross each other in the middle to form an X.
- embroidery or needlepoint done with this stitch.
How to Cross Stitch
- Most cross stitch requires a particular type of fabric (cotton Aida fabric). This fabric is made with a precise woven pattern of squares, making it easy to see where to put your needle and where to form your stitches.
- You’ll also need some embroidery thread or floss,
- a needle,
- and an embroidery hoop or frame.
- Insert your fabric into the embroidery hoop or frame. Pull it taut and tighten the frame as needed.
- Cut your embroidery floss into a length that is approximately 24-36 inches.
- Separate the embroidery floss into 3 groups of 2 strands each. Keep one and set the other two aside for later.
- Thread your floss onto your needle and tie a knot in one end.
3. Begin to stitch:
- Pull your needle up from the back of the fabric to the front, going through a hole at the corner of one square. Pull until the knot in your thread is snug up against the back of the fabric.
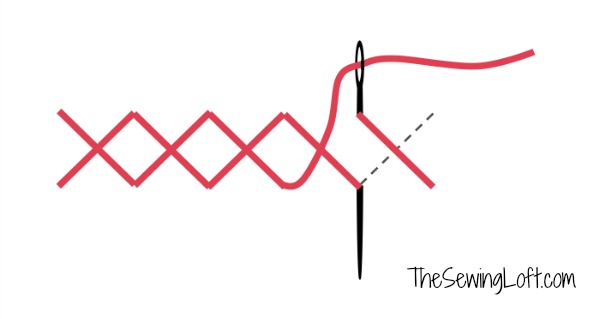
- Make your first stitch by moving diagonally upward and to the right, poking your needle back through the fabric from top to bottom that is at the top right corner of the square you started in.
- Bring the needle back up from bottom to top of the fabric, this time coming through the hole that is directly underneath the last one used (the bottom right corner of the square). Pull gently until the thread is snug against the fabric on the top and bottom.
- Complete the stitch by inserting your needle into the top left corner hole of this starting square. Your stitch should look like an “X.”
Tips for Cross stitching:
- When working with a pattern or design, you will need to count the number of squares needed for the whole design. The pattern you follow will look like a grid, that corresponds to the squares in your fabric.
- If you find it difficult to count a pattern and make a grid on a blank piece of fabric, you can purchase stamped cross stitch kits where the design is pre-printed onto the fabric for you to stitch over it.
- Most cross stitchers start from the center and work outward toward the edges of a design. This helps to keep the design centered on the fabric.
- Try to plan your work so that you use one color of floss for several stitches before switching to the next color.
- For stitching across a row, start by making all of the right-slanted stitches all in a line, then come back down the line from right to left to make the left-slanted stitches.
- If you are looking for pattern inspiration, any grid-based, pixelated, or 8-bit image will easily translate itself into a cross stitch design! Just think of every square in the image as one “X” in your stitching. To come up with your own designs, pull out that graph paper and get coloring!
Using Cross Stitch in Everyday Projects
If you want to incorporate cross stitching into your regular sewing projects, here are a few ideas:
- Create a cross stitched edging on a pillowcase.
- Use a cross stitch design as the center panel in a throw pillow cover or quilt block.
- Cross stitch the bottom hem of a skirt.
- Cross stitch the neckline or hem of a top.
- Make a small cross stitch piece and use it as the center for a pin cushion or sachet.
Cross Stitch Resources
If you’re looking for patterns or ideas and inspiration, look no further!
- Cross Stitch Pattern Central – an online directory of tutorials, tips, & free patterns
- Bird Cross Stitch – a collection of free patterns
- Nerd Alert! Super fun, geeky cross stitch patterns (free!)
- Free unicorn cross stitch pattern (because, of course you need a unicorn cross stitch on your wall!)
- A fantastic idea to make a cross stitch inspired quilt!
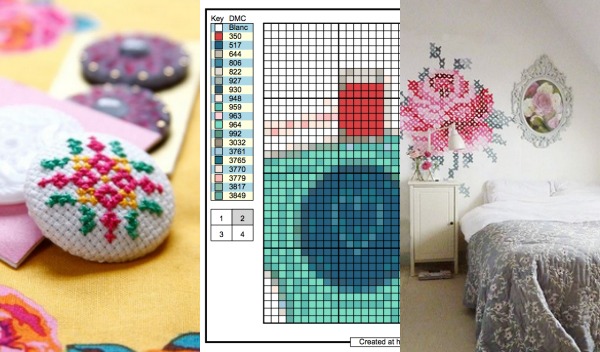
- Adorable cross stitched covered buttons. (love this idea!)
- Cross stitch themed wall art!
- How to sew a cross stitch pillow (incorporate your cross stitch as the center of the pillow)
- How to cross stitch onto anything (not just Aida cloth!)
- How to create your own cross stitch patterns from an image
Hello! Are you new to The Sewing Loft?
If so, I’m glad you stopped by and hope that something has inspired you to keep your needle moving! Don’t miss a single project and subscribe via email HERE! Bonus- free embroidery pattern with newsletter sign up. Another great way to connect with me is via Facebook, Pinterest, Twitter, Google+ or Follow along with Bloglovin. I’m looking forward to getting to know you and creating together!


Comments & Reviews
Just a little pointer here regarding separating the strands of floss; if you separate them all and then put them back together you will find the thread lies flatter and you have a better looking picture. Just a little tip I picked up when I first started to do embroidery seriously. Loving most of the ides that you have on your page
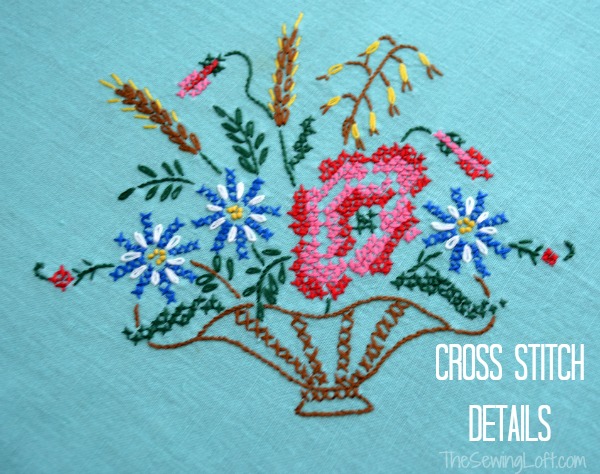
Great tip Lorrie, thanks so much for sharing. I grew up watching my Grandmother and Mother cross stitch and do crewel work all the time. This is actually one of my Grandmother’s pieces.
~Heather
My mom and I have been wanting to try cross stitching because it seems like a really good hobby, which is why we’re currenlty looking for a shop that sells various types of needles and yarns. We’ll keep in mind to look for cotton aida fabric. Thank you for also sharing here that the embroidery floss shall be separated into three groups.