The double fold hem is the most basic hem out there, which also makes it one of the most useful hems you can learn. As the name indicates, a double-fold hem is made when you fold the fabric over on itself to the wrong side two times, to hide the raw edges and create a neat, finished hemline.
Uses for the double fold hem:
-
Hemming garments – use a double fold hem on the bottom edge of a skirt or a pair of pants, a blouse or top, or a jacket.
-
Hemming flat items- the double-fold edge works well for hemming under the edges of tablecloths, baby blankets, napkins, curtains, and other sewing projects which are basically just large squares or rectangles of fabric.
-
Hemming commercial items – a double-fold hem will help you shorten a commercial item that you purchased that doesn’t fit right or isn’t the right length or height.
Tips for the double fold hem:
-
For lighter-weight fabrics, a narrow double-fold hem works best. This will allow the fabric to drape properly.
-
A wider double fold hem is better for heavier fabric weights. The wider hem also helps to hold down the hem for items like curtains or pant legs where you want them to hang a certain way.
-
Use a 5-in-1 sliding gauge or a folding template to keep your hemline uniform throughout the project.
How to Make a Double Fold Hem
This technique is for all levels.
Skill Level- 1 Button
- Measure the total length you want to reduce in your project by the end of the finished hem. For example, in a pair of pants, let’s say you want the hem to take 2 inches off the finished pant legs.
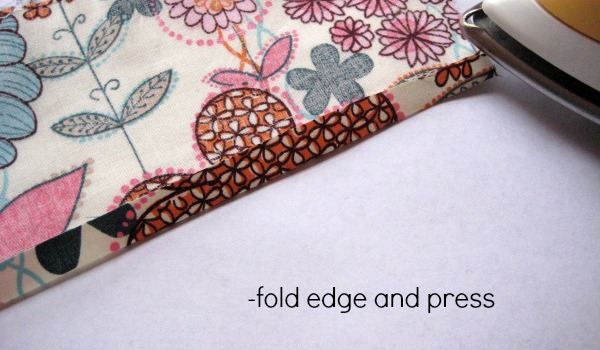
- Fold your fabric toward the wrong side by approximately ½ inch. Use a ruler or a 5-in-1 gauge to make sure you’re actually folding the same amount of fabric the whole way through. (If you’re making a very narrow hem, you may have to reduce this to ¼ inch.) Use your iron to press that hem in place, gently lifting and pressing along the hemline to create a crease.
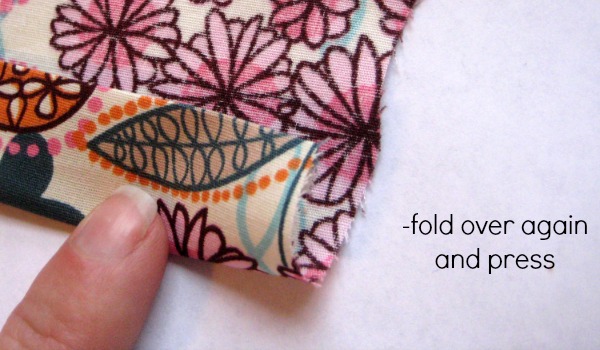
- Fold your fabric toward the wrong side again, this time making sure that the total amount of fabric folded up matches the hem measurement you took in step 1. (So for the pants example, you already folded ½ inch so now you need to fold 1 ½ inches more.)
- Press this new hem in place, and pin it in several places to hold it.
- Test the item – if it’s a garment, put it on; if it’s a home decor item, hang it up or put it in position and make sure that your hem has created the proper dimensions. If it looks wrong, press the fabric open and start again. If it looks right, continue on to the next step.
- Sew the hem. A straight stitch will hold a double fold hem in place for home decor items and garments that use traditional woven fabrics. A zigzag or stretch stitch works better to hold a folded hem on stretch fabrics, and sometimes you will need to hand stitch or use a blind hem stitch for garments. Sew your line of stitching just near the inner folded edge of the fabric to hold the hem properly in place.
Need some inspiration for your double fold hem? Check out this super simple skirt.
I promise you can make it today and wear it tonight with NO pattern needed!
Hello! Are you new to The Sewing Loft?
If so, I’m glad you stopped by and hope that something has inspired you to keep your needle moving! Don’t miss a single project and subscribe via email HERE! Bonus- free embroidery pattern with newsletter sign up. Another great way to connect with me is via Facebook, Pinterest, Twitter, Google+ or Follow my blog with Bloglovin. I’m looking forward to getting to know you and creating together!


Comments & Reviews
Great how-to! I’ve linked to your tutorial on Craft Gossip: http://sewing.craftgossip.com/tutorial-double-fold-hem/2014/03/27/
–Anne
Love this! I actually sew a 1/4″ or 1/2″ line all the way around the bottom edge, depending on the size of hem, them use that as a guide to fold up the hem for the first time, iron, and then fold again. It eliminates the need for the using the seam guide and checking to make sure your fold is even all the way around. Saves time I think!