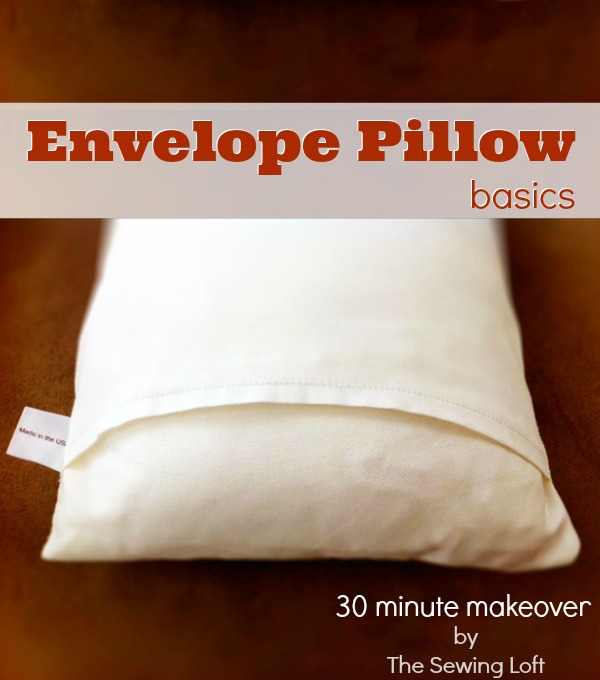
We all know that decorative pillow covers are an inexpensive way to change-up your space on a budget but what about when you are in a hurry? Like guests are coming in half an hour hurry! Allow me to introduce the envelope pillow cover.
Envelope Pillow Cover
This project is for all levels.
Skill Level- 1 Button

Supplies:
- fabric to cover pillow form
Tools:
- sewing machine/thread
- basic sewing supplies
Quick Tip
Interested in an Ad-Free, printable PDF version of this tutorial? Scroll to the bottom for more info!
Basic Instructions:
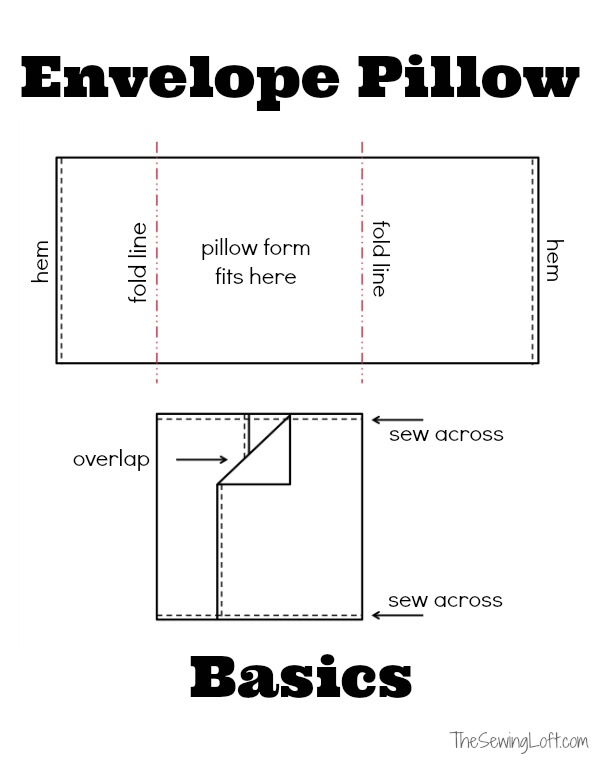
For this easy envelope pillow cover, we are going to fold one long piece of fabric to create the front and back. The ends will overlap approximately 3″ at the back when finished. This extra fabric is to ensure that the pillow form will be hidden when the pillow cover is in place.
- To calculate the fabric measurement you will need measure your pillow insert. Double this number (front & back) and to add 6″ for overlap and hem. Add 1/2″ top and bottom for seam allowance. Example: Cut your fabric 38″ long x 17″ high to cover a 16″ square form.
- To create a hem, fold over the edge 1/4″ and press. Fold over the same edge a second time, press and straight stitch with matching thread.
- Lay fabric wrong side down and fold the left and right sides over to create a square. Position overlap as desired. Pin seam allowance in place.
- Stitch along top and bottom seams with 1/2″ seam allowance, press.
- Turn pillow cover right side out and insert your pillow form.
Toss on the nearest comfy chair or cozy couch for an instant change.
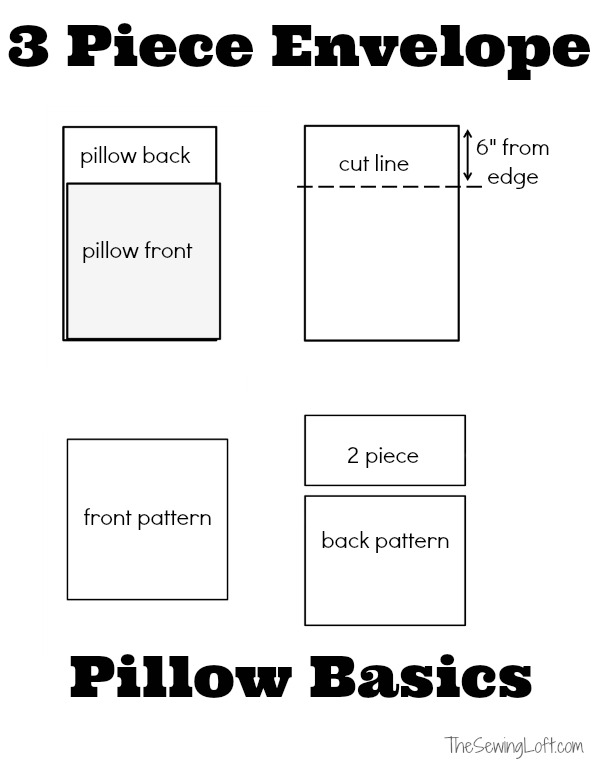
The fold-over method is just one way of making an envelope pillow cover and only works for non-directional prints. If you have a directional print or fabric with a nap-like cuddle™, you will need to cut the front and back separately. The pillow cover would be cut into three pieces and would look like the image below.
Get the ad-free PDF
Click below to download the full printable PDF and print at home!
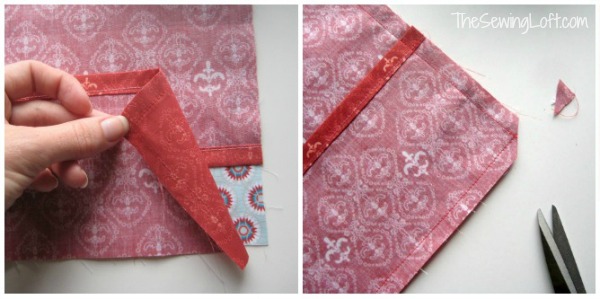
Overall, the construction is basically the same with the addition of sewing the two additional seams. I would also add in clipping the corners to prevent any access bulk.
Choose the envelope pillow cover that best suits your fabric but either way, it can be stitched together in a flash! Even in time for that last-minute guest.
Decorative Pillows are a very easy way to jazz up your space. They come in all sorts of shapes, sizes, colors, and price points. But don’t let the price tags scare you off. With a few simple stitches, you can create your own decorative pillows that will have your space up to date with all the latest trends.


Comments & Reviews
Thanks for the tutorial on the envelope pillow cover.
Ginger
I have been doing this for years , to cover odd pillows. thanks for the pics
How much do you like to overlap? I made some about 2 months ago but didn’t overlap enough so it gaps in the back. Is 6″ pretty standard?
I like to give a good overlap size to avoid seeing the inside pillow form.
Can you tell me what program you use to draw your diagrams? It makes so simple to understand!! Thanks so much.
I’m so glad you like them Barbra. I draw most of them in Word. I just use the standard drawing tool. It is really easy.
~Heather
Getting in late on this, but I just stitched up two of the envelope pillows and it was a snap. Your instructions were very clear and easy to follow. I have sewing experience, but needed to complete this project quickly for a Make-A-Wish gift and this was perfect. Thanks!
How awesome that, thanks so much for the sweet note Terri!
~Heather
I love envelope pillows but can’t get rid of those “dog eads” in the corners. I have e tried many techniques and they don’t work, suggestions are welcomed.
I used the single piece pattern to use up some extra fabric I had. I am a total novice when it comes to sewing, it’s only my second project but I’m so thrilled with how they turned out! Thanks for such a useful post!
Fantastic Rebecca!
~Heather
Thanks for this! The instructions were very easy to follow.
Thank you! I finished my first paper piecing project, but didn’t know what to do with it.
Thanks much to your help, I made it into a pillow cover! ????
Wonderful Amy! So glad you found the article helpful.
-Heather
I’ve made a number of these covers. My sewing skills aren’t very good so I was very happy to find a cushion cover that didn’t require a zip or anything else fancy. However, my dad wanted a cushion that was 5 cm thick and so I thought I could easily adjust this pattern and add 5cm sides all-around – turned out to be not so easy. Although I drew a diagram of how it would work I ended up sewing pieces to other pieces that caused chaos. I eventually moved to the last resort and pinned and tacked! I am happy with the final result but have learnt that when I try something a bit complicated for me, it is worth the time to do some tacking.
Is there anything special you would do for this pattern if you were using “minky” fabric
Hello Lisa,
Minky is very similar to Cuddle and has a clear directional nap. That means that when the fabric is flipped to the backside, you will have the pile or the nap meeting in two different directions. For that reason, I would consider a zipper closure construction. You can find more tips on how to sew with Minky & Cuddle here: https://thesewingloftblog.com/sewing-with-cuddle-tips-tricks/
-Heather
Thank you for this easy pillow cover pattern…..I have a new Cricut machine and now I can use these pillow covers with my vinyl to make perfect pilllows!!
Thank you so much! I love making envelope pillows but haven’t ever been able to figure out the formula for the overlap. This is great!