While at The Creative Connection Event, I had the chance to craft with a wonderful group of women on Friday night. It was so relaxed, almost effortless in fact, the way we all just chatting about life. Not really focusing on why we were at the event or even talking about business. It was so refreshing and reminded me of my sewing group in New Jersey. The Clifton Clippers- wow, do I miss those ladies!! During that “craft time” I made a fun yarn flower with the Bloom Loom from Boye.
Now, to be clear, I normally do not pick up these types of craft tools but something about this one caught my attention. The entire time we were crafting I was racing ahead. I was not a very good listener! The group was still looping yarn and I was anxiously awaiting the next step…. I wanted to see the finished product, off the plastic form and in my hot little hands!! Not to mention that the entire time my mind was racing! I mean, I was thinking of all the ways I could use this little craft ideas and materials I could make it in!!
The 1st material on my hit list was “Plarn”. I have been just waiting to use this technique for something fun. Now, if you are not familiar with Plarn it is plastic yarn. Think of all those plastic bags you have stashed away somewhere in your closet turned into something useful. Here is a quick video on how to make it. (special thank you to PinkChick180 for the “how to”)
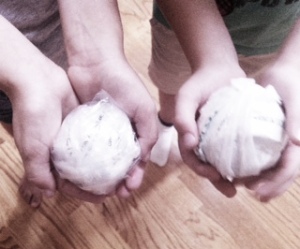
To make the Plarn, I recruited my 2nd grader and her friend. Immediately they sprang into action! Before I knew it, I had two balls of Plarn. One made of clear bags, the other white.
This project is for sewers of all levels.
Skill Level- 1 1/2 Buttons
**Rating is due to the thickness I created the Plarn. The craft is super easy but due to the side of the Plarn, it was difficult to keep on the tool. Next time, I would make my Plarn thinner.
Materials & Supplies:
- Bloom Loom Tool
- Plarn
- Yarn
- Felt
- Pin
- Hot Glue Gun
- Following the instructions provided with the Bloom Loom, I wrapped the plarn around the form.
- It is important to push the plarn down tight against the form. This will prevent it from popping off the form.
- The inside of my flower is created from yarn. Again, following the simple instructions, wrap the yarn around the form.
- Stitch around the center with the needle provided in the kit and you are all set.
- To turn this little cutie into a pin, I cut a small circle of felt as a backer and glued to the back of flower.
- Glue pin in center.
- Cut a small strip of felt and glue in place as added support for the pin.


Comments & Reviews
Great plarn use!
That’s really cute. I’ve always loved loomed flowers but haven’t seen one done in plarn until now. Thanks for sharing your idea. I really like the look.