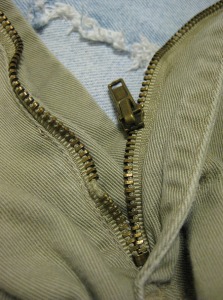
When a garment zipper breaks, it can be tempting to toss the whole garment into the trash (or to salvage the materials for your sewing stash, which isn’t always a bad thing!). The next time you think about tossing a favorite item, take a minute to try replacing the zipper first. You’ll save your wardrobe AND your wallet at the same time!
We’ve got instructions for replacing a zipper in the fly of a pair of pants (or a skirt, for that matter) and for replacing a separating zipper in a jacket. Go dig through your closet and find a broken zipper to experiment on, and let’s get to work!
Supplies You’ll Need:
- seam ripper
- measuring tape
- pins
- replacement zipper
- hand sewing needle
- thread
- sewing machine (zipper foot optional but oh so very useful)
How to Replace the Zipper in a Pair of Pants

Step 1 – Remove the broken zipper. Use a seam ripper to remove the stitches that hold the zipper into the fly of the pants. You’ll be creating a pocket in between the fly shield (the fabric that goes between your body and the zipper) and the fly front. When you reach the top or bottom of the zipper (at the waistband and the base of the fly), simply cut the zipper as close to the fabric of the pants as you can. Don’t remove the stitches in these areas.
Step 2 – Slip the new zipper into place. With the right side of the zipper facing up, slip the zipper tape on one side into the pocket you made in step 1 (between the fly top and the fly shield). Pin it into place and use a zipper foot* on your machine to make a straight line of stitching as close to the edge of the fly top as you can (make sure the fly top has a folded edge so there aren’t any exposed, raw fabric edges).
Tip: Make sure to use the same color thread as the rest of the stitching in the pants, so your new zipper will blend in seamlessly to the overall design of the pants.
Step 3 – Stitch the other side of the zipper. Unzip the zipper and pin the unsewn side to the inside of the fly overlap. Working on the inside of the jeans, use a sturdy needle and thread to hand sew the zipper tape into this position. Make sure to only catch the inner layer of fabric on the fly overlap, so your stitches will not show through on the front of the pants.
How to Replace a Zipper in a Jacket or Coat
Step 1 – Measure the broken zipper.
Measure the length of the zipper in the jacket or coat, and purchase a separating zipper in the same length from your local craft or sewing store. Try to match the color of the zipper as closely as you can, too – or experiment and have fun with a new contrasting color! (Why not? You’re replacing it anyway!)
Step 2 – Remove the broken zipper. Use your seam ripper to remove the stitches holding the existing zipper in the jacket. Pull the zipper out and remove any stray threads. The jacket should now have a pocket for the new zipper to fit into.
Step 3 – Sew in the new zipper on one side. Using one side of the zipper only at first, open up the front of the “pocket” seam from the jacket so that the raw edge is exposed. Position the zipper top-side-down on top of this raw edge and line up the edge of the zipper tape with the edge of the fabric. Sew the zipper down, close to the edge, using a basting stitch.
Fold the zipper and the edge of the fabric back inside the pocket and use a zipper foot* to sew the layers together. Make sure the back seam of the pocket is folded neatly inside, and pin along the zipper to keep it in position as you sew.
Step 4 – Sew in the zipper on the other side. The key to this step is to make sure that the zipper lines up when it is closed, so begin by zipping up the zipper, and then slide the unsewn side of the zipper tape into the pocket on the unsewn side of the jacket. Hand baste a few stitches, then unzip the zipper and baste the rest. Zip the zipper again to make sure everything will line up, and then use your zipper foot and sewing machine to sew the zipper into position permanently. Remove the basting stitches with a seam ripper.
*Don’t have a zipper foot? That’s okay! When you make your stitches, simply move your sewing machine needle to the left or right so that it will line up correctly along the edge of your fabric and you won’t have to sew over the zipper teeth.
Do you have any zipper sewing tips to share? Leave us a note in the comments below!
Hello! Are you new to The Sewing Loft?
If so, I’m glad you stopped by and hope that something has inspired you to keep your needle moving! Don’t miss a single project and subscribe via email HERE! Bonus- free download with newsletter sign up. Another great way to connect with me is via Facebook, Pinterest, Instagram, Google+ or Follow along with Bloglovin. I’m looking forward to getting to know you and creating together!


Comments & Reviews
I had always used the regular foot to sew zippers because I was afraid to change it out and mess with anything on the machine! Then I found out how easy it was to change the foot!