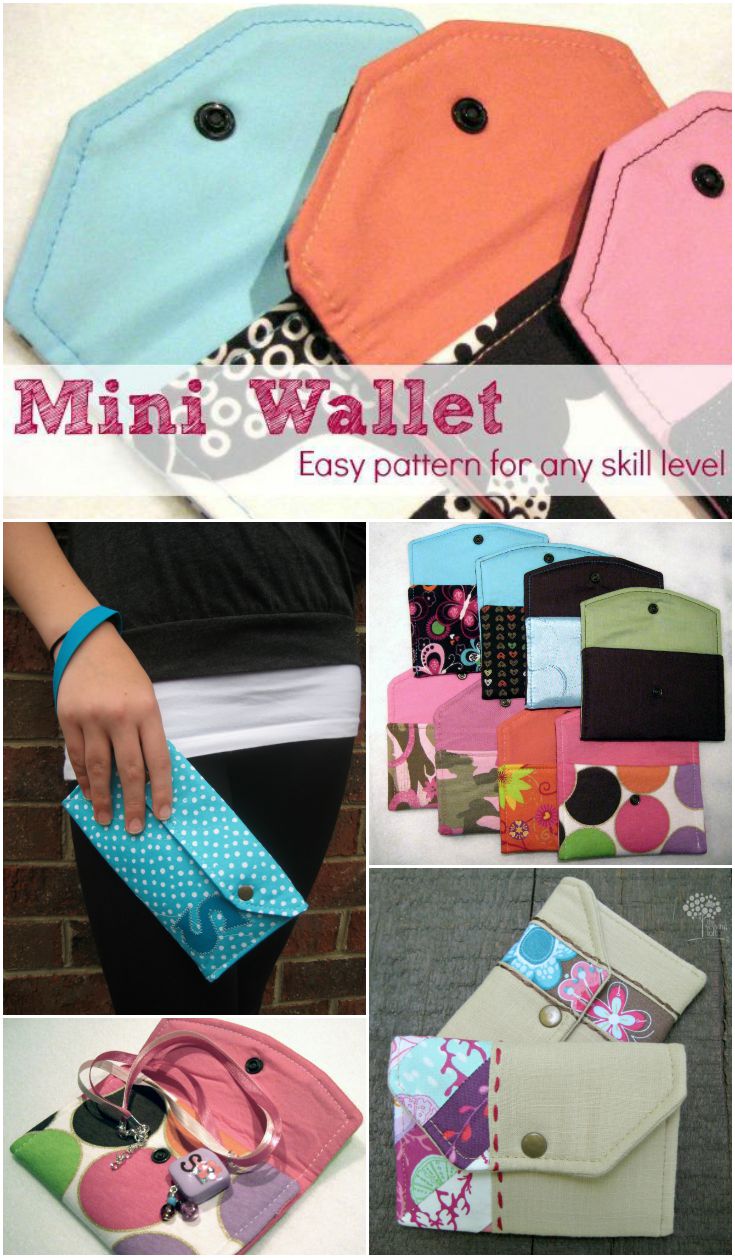
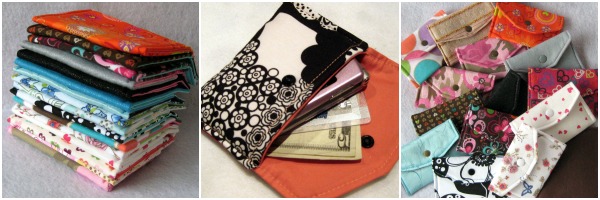
My Mini Scrap Wallet pattern has become very popular recently – I get so excited every time I see that a new crafter has downloaded it from my Craftsy store!
The mini wallet is a perfect little gift – use it to hold a gift card, cash, or just as an add-on to another gift. It’s a fun way to whip up something handmade that is sure to be used and loved. They’re also great for back-to-school time, as it’s a unisex-friendly pattern that’s just the right size for holding a school ID and some lunch money.
Mini Wallet Pattern Ideas
Once you make the basic wallet pattern, you’ll see there are SO many ways to modify it! Here are a few great ideas for how to make this pattern truly your own:
- Paper piece it! I used up the tiniest of scraps from my stash to make a paper pieced version of this pattern, using the printable pattern template itself as the foundation! Find out more in this post.
- Polish it up with pin tucks. My pin-tucked version of this wallet gives it sophisticated style, and it’s so easy to do! Find the full instructions here, including a video tutorial!
- Add a clasp. Caroline of Sew Can She used some twill tape to make a small loop in the side of the pattern so she could add a snap clip to it for attaching it to almost anything! See her modification here.
- No snaps? No problem! Use Velcro to close the flap instead – it’s easy to sew on, but you’ll have to remember to attach it to the wallet front and back pieces before you sew them together.
- Use up your button stash. Instead of closing with a snap, add a button hole to the flap piece and sew one of your favorite buttons to the body of the wallet for a cute & creative closure option.
- Add a small wristlet-length handle to the wallet so you can carry it like a mini clutch purse.
- Add a lanyard to the wallet for wearing around your neck at events or on campus.
- Add a shoulder strap to carry it around like a mini purse (great for little girls, too!).
- Add to the storage capacity! Sew an extra panel of fabric onto the back side for a back pocket – to do this, put two pieces of fabric with right sides together, sewing around the perimeter but leaving a small section un-sewn. Turn right side out, press, and sew the opening closed. Then attach it to the center of the outside panel of the wallet, sewing just across the bottom of the pocket piece. When you fold the wallet up on itself, you’ll catch the sides of this new pocket with the rest of the seams.
- Use the wallet itself as a pocket. Sew it onto a gadget cozy, a purse, or another project to make a cute little pocket add-on to any project.
Have you made this pattern? What are your ideas for modifying it? Share it with me in the comments below!
Hello! Are you new to The Sewing Loft?
If so, I’m glad you stopped by and hope that something has inspired you to keep your needle moving! Don’t miss a single project and subscribe via email HERE! Bonus- free download template with newsletter sign up. Another great way to connect with me is via Facebook, Pinterest, Instagram, Google+ or Follow along with Bloglovin. I’m looking forward to getting to know you and creating together!


Comments & Reviews
I downloaded the mini wallet pattern….its addictive! I’ve made loads already. I also had some plain lanyards I had forgotten about, so put one in each. Next I’m making some tweed ones for the grown ups, and then some quilts ones, and then…… Thanks for the pattern, Sally
I would make thewallet with a zip, but make a back part inside the cover to take cards, so that when using the wallet the cards are not seen except when you want them.