With your Bias Tape Maker!
I am slightly embarrassed to admit it but I have not 1 but 3 bias tape makers in my sewing tool box that have never been used. So, when Jean told me about her favorite tool selection, I was all ears! It was like she knew they were tucked away just waiting to be used.
Hi there, I’m Jean Kake from the Quilted Cupcake blog, podcast and Etsy shop. One of my favorite things to create is handmade bags – I give them as gifts, use them myself, and sell them in my Etsy shop.
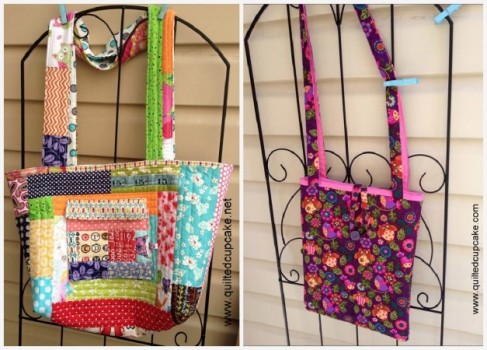
Here are a few of my recent bags:
Tutorial: Easy Bag Handles using Bias Tape Maker Tool
Creating handles for my bags was always a pain for me. Especially if I wanted a sturdy handle. I discovered an easy way make handles that are strong without having to deal with turning a fiddly tube of fabric.
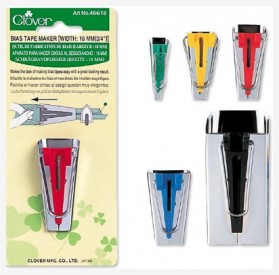
My favorite method uses a bias tape maker tool, like this these from Clover. I use the biggest one for most of my handles – it’s #50 for 2 inch “tape”.
They’re designed to create bias binding for quilts, etc; however, they work really well to make long lengths of perfectly pressed lengths of fabric.
There are three secrets to using the bias maker tool:
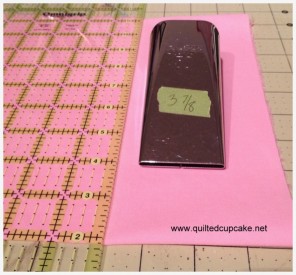
Read the directions to see the SIZE of the fabric strip you need. Mark this number on your bias tape maker with a piece of tape or a fancy label, so you’ll remember each time you use it. Cut your fabric to that size to start. For the #50 tool, the strips should be 3 7/8″ wide.
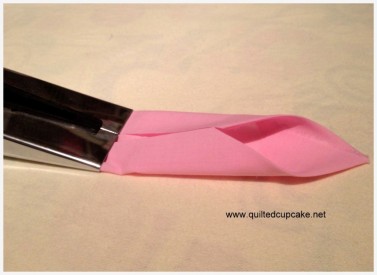
You don’t need to cut the fabric on the bias when making handles this way. I usually just cut a strip the whole length of the fabric. Fold the fabric into a “point” when threading it through the wide end of the tool. Use a pin poked through the hole of top of the binder to guide the beginning edge of the fabric through the tool.
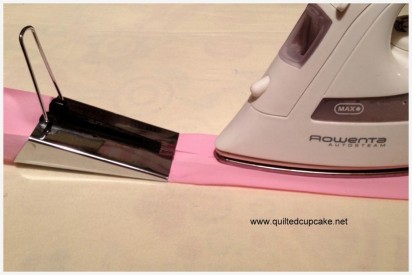
Once you’ve done these few things, the process for making the binding tape is super easy. Once you’ve threaded the end through, just hold onto the pop-up handle and pull the tool along to the left, while ironing from the right.
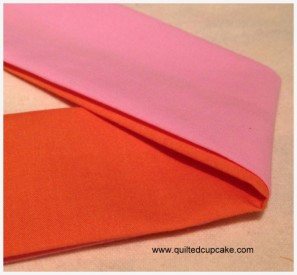
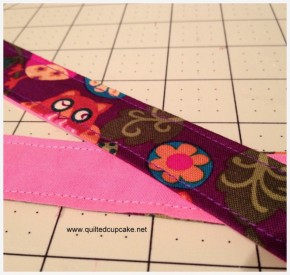
You’ll end up with a 2 inch wide handle that’s nicely pressed on each edge. Now, repeat the process with a second strip of fabric cut the same way. I chose a contrasting color, but you can use the same fabric if you like.
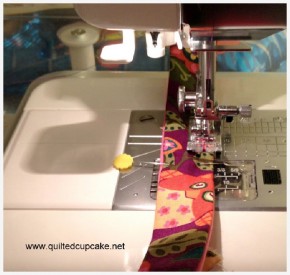
Stack them together, wrong sides (or folded sides) together, and stitch along each edge.
Ta-da – perfect bag handle – and you didn’t have to turn a tube.
To make the handle even sturdier, you can iron a 1.5 inch strip of fusible interfacing on one folded side prior to sewing the two halves together; however, I find that makes the handles too stiff.
Another option is to make one strip a heavier weight fabric – that’s what I did for the second handle shown. The owl print is a home-dec weight, adding additional durability to the handle.
Please feel free to send me any questions you may have on this technique. I always love meeting new crafters and quilters. I’d love for you to become a Facebook friend (Jean Kake), or like my Quilted Cupcake page: http://www.facebook.com/QuiltedCupcake
You can find all my Twitter/Pinterest, etc. links on my blog: www.quiltedcupcake.net, or email me at quiltedcupcake@gmail.com
Love it Jean!! You have inspired me to dig out my bias tape makers and make a quick strap. Stay tuned, Lindsay from Craft Buds is our special guest tomorrow.




Comments & Reviews
I’ve never used a bias tape maker. Thank you for sharing!
Great instructions
What a great idea! Thanks for sharing:)
That’s a pretty cool tool! I love Jeans sense of color!
I am thrilled with this. I have just purchased a bias tape maker and taught myself haw to make the tape. As a bag maker, wow….. what a great use. Many, many thanks.
Oh my… file this one in the “why didn’t I think of that?” folder! Seriously… you just saved everyone reading this a ridiculous amount of time. THANK YOU! I’m so grateful for those who point out the obvious tips that are staring us all in the face and we don’t recognize them. I’ll be putting this to use this week! Thanks again!
I make purses out of old jeans. What about using denim with this? I don’t know that I’d need 2 layers at that point.
This would be perfect for making straps for aprons or little girls dresses, too. Mine are sadly still in their packaging from Christmas (and not 2014, either). Thanks for the inspiration!
Thank you so much for making this info available. Love all your tips and tricks!!!
I think I have all sizes but have never used them to make straps. New project coming up.
Is there any such thing as a 1-1/2″ bias tape maker?
I want to make 2inch bais tape after it is folded in half is there a bais tape maker for that