Yesterday we chatted about dip dyeing our fabrics to achieve a new look and today I want to show you how to create a simple ombre dip dye effect with your fabric dye. The technique is crazy simple and can be finished in an afternoon.
Ombre Dip Dye
This project is for stitchers of all levels.
Skill Level- 1 Button
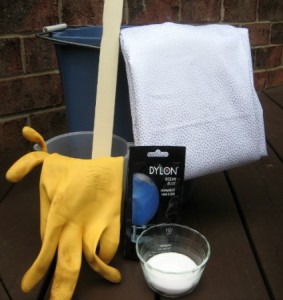
- fabric dyes
- fabric or a garment to dye
- a large bucket (one for every fabric you plan to dye)
- a wooden or plastic stirring spoon or paint stirring stick
- protective clothing
- a sink or hose for rinsing
Basic Instructions:
- Prepare your item for dyeing by washing it to remove any chemicals left from the manufacturing process. Mark fabric tiers with a pin for easy reference.
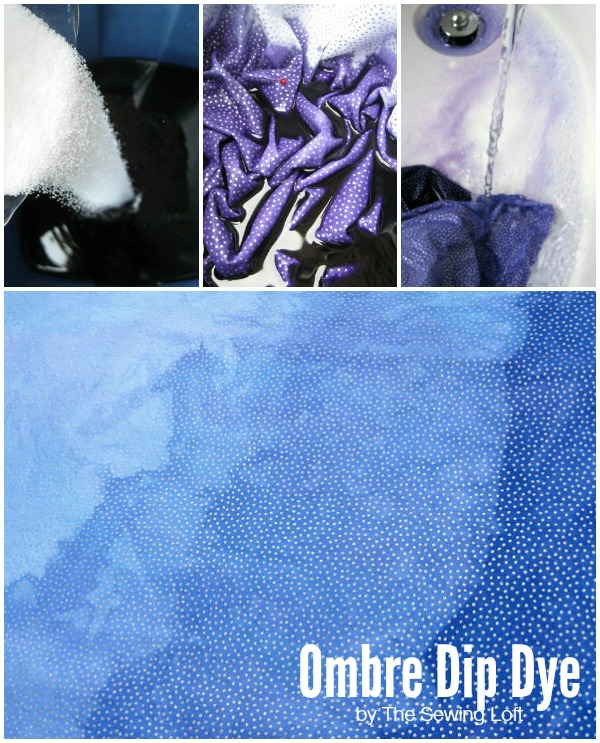
- Prepare dye as per instructions on packaging and stir. Dip the 1st tier into bucket and let sit for approximately 5-10 minutes or until desired color is achieved. Repeat process by submerging fabric to next tier mark and reduce the soak time.
- For last tier of fabric, I added additional water to dilute dye and submerged all fabric in bucket. This layer will soak for the least amount of time. Give fabric a quick swirl around before pulling out of dye.
- Rinse fabric in sink until water runs clear. Process as per dye packaging instructions.
Your finished fabric will have an ombre effect from light to dark in one long color gradient shift.
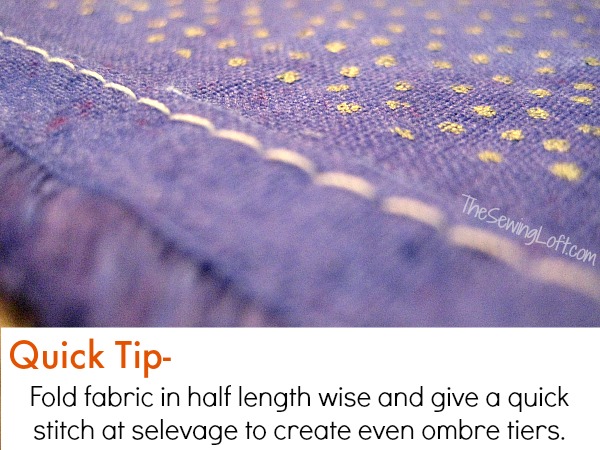
Tip: To make 2 pieces of fabric the same. Fold your fabric in half and stitch sides together.
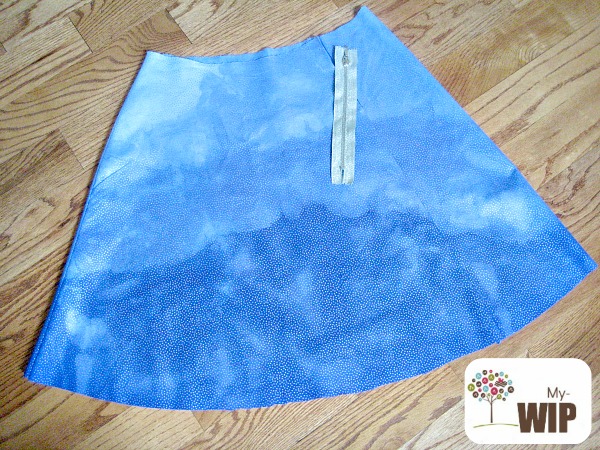
I loved this ombre dip dye effect so much that after washing my fabric, I decided to create an easy A-line skirt for the summer. Too bad, I was too excited and clipped my lining in the wrong place. Luckily, I just placed an order yesterday for more lining. I’ll keep you posted on this project but I think I’m gonna love leaving the metallic zipper completely exposed.
What would you create with your new fabric?
Hello! Are you new to The Sewing Loft?
If so, I’m glad you stopped by and hope that something has inspired you to keep your needle moving! Don’t miss a single project and subscribe via email HERE! Bonus- free embroidery pattern with newsletter sign up. Another great way to connect with me is via Facebook, Pinterest, Twitter, Google+ or Follow my blog with Bloglovin. I’m looking forward to getting to know you and creating together!


Comments & Reviews
That’s going to be a beautiful skirt!!! I’m afraid I have no sewing time until school gets out (3 weeks, I can make it, right?) but I’m thinking an ombre tablecloth would be pretty neat. I’ve got a Craft Gossip post scheduled for later this morning that links to your tutorial:
http://sewing.craftgossip.com/tutorial-ombre-dip-dye/2014/05/20/
–Anne
Anne, we are on the count down until the last day of school and I am stitching up a storm everyday. I feel like once summer hits I will have no time. Fingers crossed the girls will want to do sewing projects with me!
I LOVE the idea of an ombre table cloth. Please send me a few pictures when you make it. Get the kids involved, mine are loving this series!
~Heather