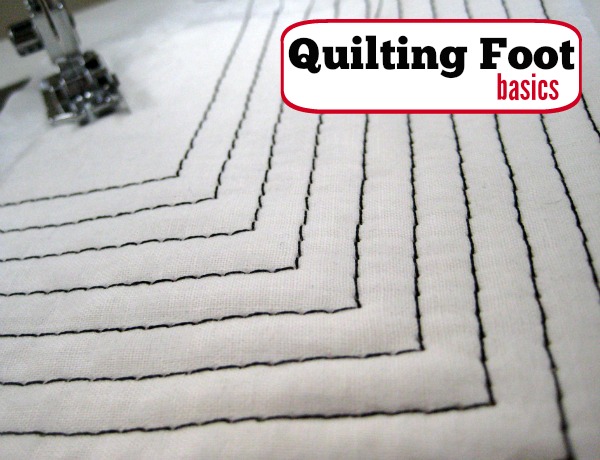
Sometimes we get so settled into the routine of sewing that we forget to look past the basic sewing machine foot. Well today, I want to share a new discovery…. the quilting foot or patchwork foot. It has this amazing 1/4″ guide on it to make every stitch line up perfectly.
.
This little nugget of goodness seems to be a tightly guarded secret in the quilting community. So, the question to all my quilting friends is .. Why Oh Why have you not shared this golden nugget of knowledge? This small piece of steel is fantastic. Not only will it keep your lines straight but it will keep your quilting stress free! That is a huge plus for this novice quilter.
.
Quilting Foot Facts
Let me breakdown:
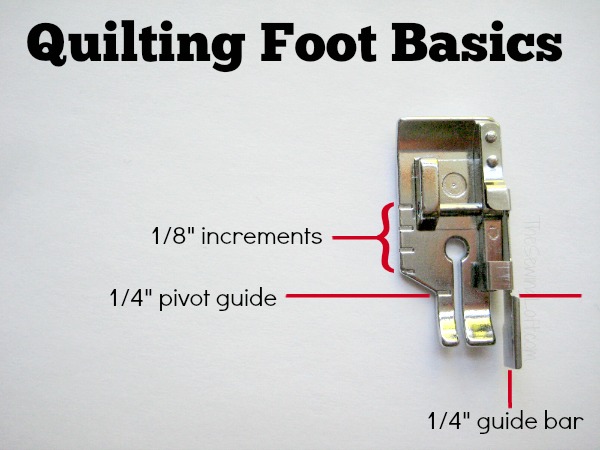
- This foot has a built-in guide bar to help create perfect 1/4″ seams and super straight topstitching.
- It can only be used in a single needle application with the center straight stitch.
- The markings on this foot are measurement guides designed to help keep your stitches exact.
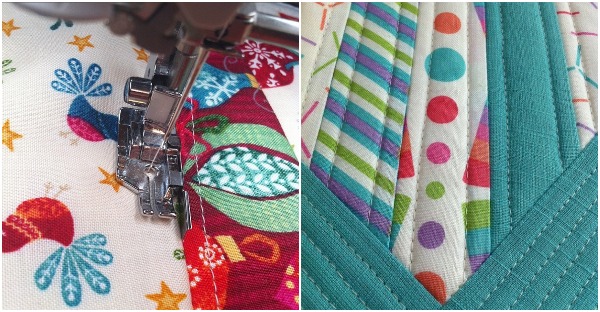
Let’s see the foot in action.
Here are a few more examples of my quilting foot in action.
Tips for using the Quilting Foot:
- Align the raw edge off two fabric layers against the guide at right side of foot. Lower foot and stitch away.
- The narrow toe on the left side can be used as a guide for small piece work or mini quilts.
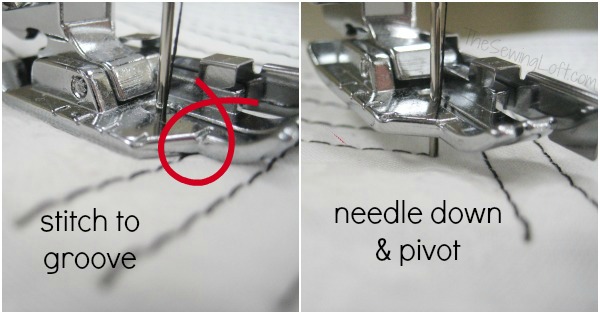
- Maintaining a perfect 1/4″ seam while turning a corner is easy. Stitch until the edge of fabric aligns with the mark on the narrowest part of foot; leave needle and down position, lift up pressure foot and pivot. Return presser foot to down position and continue stitching with fabric against the guide. This technique works for both quilting and top stitching.
This sewing machine foot can change the way you think about topstitching and quilting. You can pick up a quilting foot for your machine at your local shop or here on-line for about $15. I think this little piece of steal is totally worth it!
Hello! Are you new to The Sewing Loft? If so, I’m glad you stopped by and hope that something has inspired you to keep your needle moving! Don’t miss a single project and subscribe via email HERE! Bonus- free embroidery pattern with newsletter sign up. Another great way to connect with me is via Facebook, Pinterest, Twitter, Google+ or Follow my blog with Bloglovin. I’m looking forward to getting to know you and creating together!


Comments & Reviews
Hi Heather, love my patchwork foot, great for keeping that scant 1/4″ for piecing, but still love my walking foot for quilting, keeps everything nice and even, I do use the 1/4″ foot when I make summer quilts from shirts, as I use a sheet for batting and backing. I always use Pellon lightweight fusible on t-shirts, as I do not use logo shirts, but patterned fabric…..Thanks for the foot info……
Oh Rosie, I love my walking foot too. When I stumbled over this little foot, I was just so impressed with how much easier it is to create perfectly spaced topstitching seams. Pellon is a great product and perfect for so many projects.
~Heather
These are wonderful. It makes quilting so much more accurate. Thanks for sharing your
examples. Everyone who sews should have one.
I will agree that the 1/4″ quilting guide is invaluable and this foot is a must for any quilter! This has helped me to greatly improve the quality of my stitches and is well worth the money…I do suggest getting a quality foot when purchasing one although the less expensive models hold up well and all are worth their weight in gold!
I bought one of these to help me with my 1/4″ seams….however, I learned something new in reading this…I was not aware of how the marks on the left side work and now I do! I’m so excited about the 1/4 turn mark now. I want to go home and try it! That will be so helpful in my future projects! Thanks so much for sharing this! 🙂
I’m so happy you found it helpful Shannon!
~Heather
Thank you for this info. I never knew about the 1/4″ pivot turn on this foot. I’m really glad to learn this.
I agree with the comment above about getting a quality one. I had a cheap one for my old singer and the metal guide part was so flimsy that it would just bend and my perfect 1/4″ was gone. I now have a Bernina and the 1/4″ Bernina foot and it is worth its weight in gold.
I would love one of these but have never seen one in the shops. Do they fit all machines. I have Janome and Brother.
I never knew these existed! Thank you!!
That is how I felt Mary!
I agree this is a great foot and had not used it for topstitching as I have a walking foot or edgestitch foot for that. I have a 1/4″ foot both with and without the edge guide and I find I do more precise piecing without the edge guide because I tend to push my fabric into that guide and end up with more than 1/4″ seam, but without the guide I can clearly see I am staying on the 1/4″ mark. I will try it out for close topstitching though – super great idea and thanks for sharing!
Oh Wow – I’d heard of a 1/4 inch foot but never actually seen one up close. You’ve got great photos and explanations and now I know what it is and why its so useful.
Thank you Deby! This little tool is a total gem.
Ditto what Deby said! Thanks Heather!❤
Oh Wow! I want this foot!!! The explanation of all the markings is wonderful. I am off to find this now…
I love learning new things about quilting; You gave an awesome description of what the 1/4″ foot is capable of doing. I thought it was for sewing two pieces of fabric to with 1/4″ seam… I’m excited and can’t wait to try this foot, it seems it is more useful than we all thought 🙂
Thank you so much Lisa. I had never used it before and was so impressed with just how useful it actually is!
~Heather
I have been using this for so long, but definitely not to it’s full potential. I feel so much smarter now. Thanks for putting this together to share with us.
We are all learning new things everyday! Can’t wait to see what you create with this foot.
~Heather
Thank you, never used a foot like this, will purchase one can’t walt to try it .
OMG, just found this on Pintrest. I feel like a complete goof because I never realized what those marks on my foot were for! Could have used this a long time ago but I’m so glad I read this now! Thanks!!!!
I just found one on Ebay from a seller in China for $3.19 with free shipping. On Ebay this foot is called a 1/4″ Snap On Patchwork Quilting Foot.
Can you please tell me which patchwork foot this is? I have a Pfaff but I think the feet are the same!! Thanks so much!!
Hello Jonann,
Different machines take different feet so it is important that you consult with your dealer to make sure you have the correct shank length. This foot is the 1/4″ foot with guide and it was made for a BabyLock machine.
~Heather
Heather thanks so much I have used a 1/4 inch foot for a while and never knew about the guide to help me pivot and still keep an accurate 1/4, thanks so much.
Yay Marilyn! I’m so glad to hear that you found the post helpful. This is really a wonderful foot to have in your sewing kit.
~Heather
So I’m fairly new to quilting but wondering if this could be used to make half square triangles?
Hello Kris & Welcome to a whole new way of sewing! Yes, I actually use this foot for my HST’s. I can draw one line on a diagonal (corner to corner) center of the square and the guide bar acts as my seam allowance. It works like a charm!
~Heather
OMG! The pivot guide is a life changer!! I’ve had a 1/4 inch quilting foot from the beginning of my quilting life. I don’t know how I could have taught myself to quilt without it. Yet up until now, pivoting has pretty much been guess work. Sometimes I hit it, sometimes I don’t. But now I’ll never have to guess. Thank you for introducing me to a feature I’ve always needed but never knew I had!