Halloween is right around the corner and it’s a big day in my world. The girls just love dressing up and knocking on doors but safety is always my number one concern. Let’s face it, the best time to go trick or treating in their eyes is at night. Factor in the excitement level and darting across the street to see a friend and you can understand my concerns. (Sorry, it’s just the mom in me!)
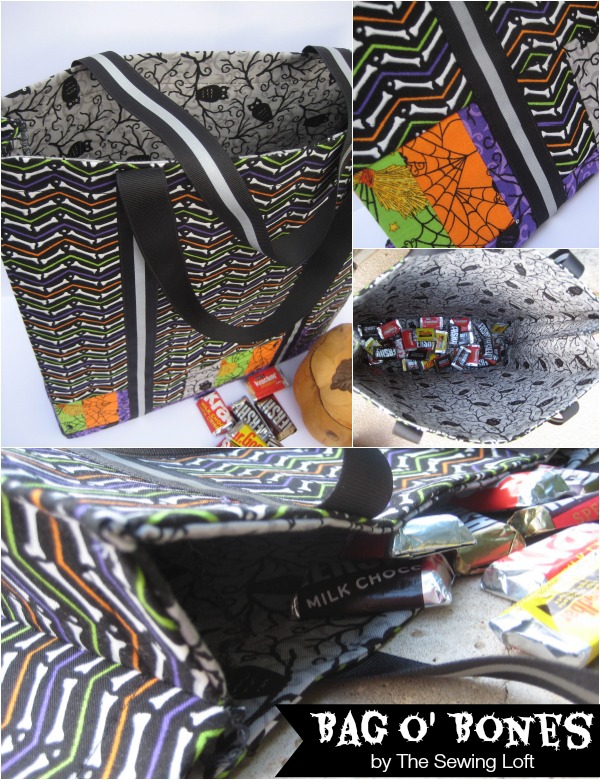
So today I am sharing a Halloween Tote Bag Pattern to keep our little ones safe. That’s right, this whimsical tote bag has a built-in safety feature.
Halloween Tote Bag Pattern
This project is for all levels.
Skill Level- 1 Button
Materials:
- 3 fat quarters
- 2 half yards
- 2 3/4 yards reflect taping
- 1/2 yard of decor bond
Cutting Instructions:
- Cut 1 strip of each fabric 2 1/4″
- Cut bottom fabric 6 1/2″ x 16 1/2″
- Cut 2 top of bag panels 10 3/4″ x 16 1/2″
- Cut deco bond 16 1/2″ x 32″
- Cut lining 16 1/2″ x 32″
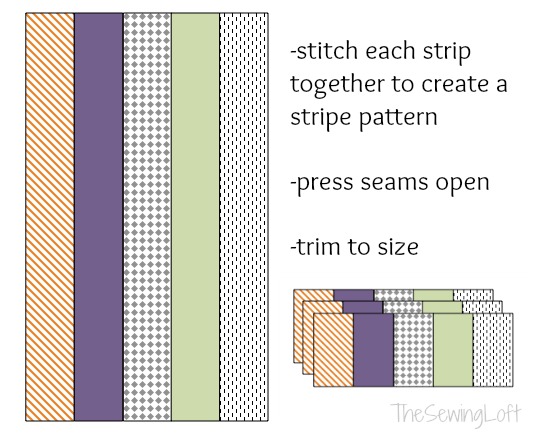
- Cut 1 strip of 2 1/4″ x 18 “of all 5 fabrics.
Sewing Instructions:
Stitch each strip together to create a stripe effect. Press seams. Alternating fabrics and pressing seams open as you work. Cut stripe rows to 3 1/2″ tall.
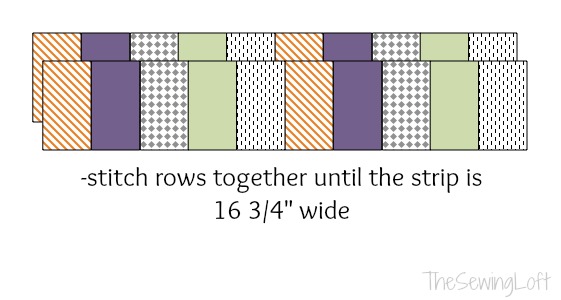
Stitch each row together short end to short end to create a long row of vertical stripes. Stitch 2 groups of 12 together alternating fabrics and pressing seams open as you work. Finished measurement is 16 3/4″.
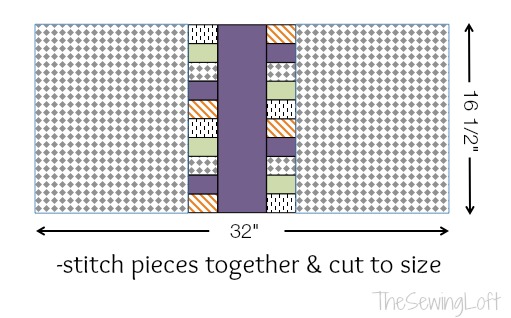
Stitch all panel pieces together to create 1 long piece that measures 32″ long. Fuse with deco bond interlining to wrong side of fabric. Square and trim panel to measure 16 1/2″ x 32″.
Grab lining and attach lining to wrong sides to the front of bag along the short ends. Press and flip to expose right sides. Press again. Straight stitch along the top edge.
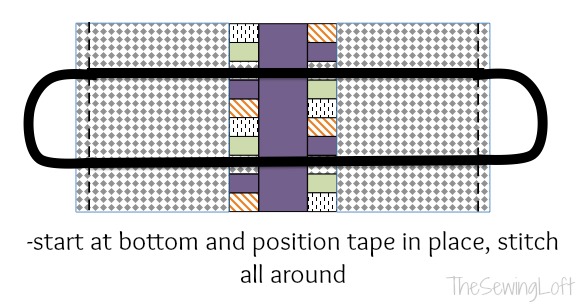
To attach reflective tape aka- handles, align your clear quilt ruler 4 1/2″ from the edge. Butt tape against ruler edge and pin in place. When you reach the top edge, measure out 16″ for the handle length and continue to pin 4 1/2″ along the other side. Repeat the process until you overlap at the bottom starting point.
*Tip: Ditch the pins and grab the glue stitch! A dab of washable glue is perfect to keep the reflective tape in place while stitching.
Stitch all around the reflective tape and at overlapping point to secure in place. Feel free to create a box stitch along the top edge for additional reinforcement.
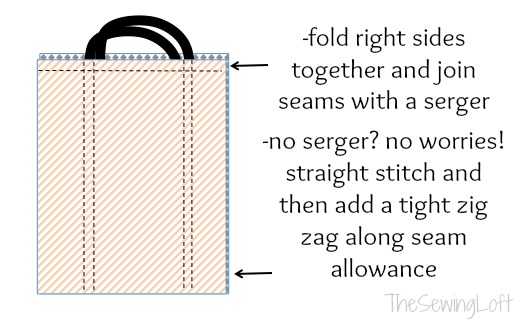
Fold right sides together and stitch side seams with a serger machine. No serger, NO Worries! Just straight stitch and go over the seam allowance with a tight zig zag to reduce fabric fraying.
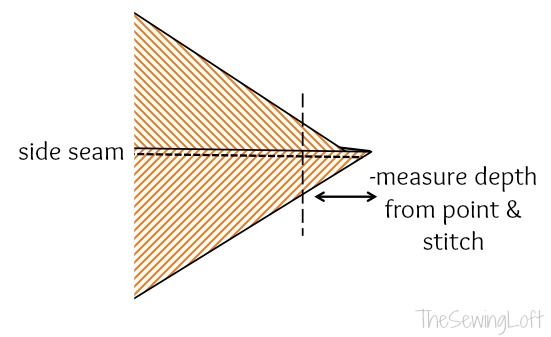
Mieter the bottom corners, turn right side out and you are all set!
Since we added a layer of decor bond, the bag will stand up straight on it’s own! (Don’t tell anyone but that’s my secret weapon for sewing these types of bags.)
Now that you have some built-in safety measures, let the candy collection begin!
Be sure to check out this list of over 100 free tote bag patterns to keep you stitching!
ps- don’t you love the fabric! A big Thank you to The Ribbon Retreat for the supplies.
Hello! Are you new to The Sewing Loft?
If so, I’m glad you stopped by and hope that something has inspired you to keep your needle moving! Don’t miss a single project and subscribe via email HERE! Bonus- free download with newsletter sign up. Another great way to connect with me is via Facebook, Pinterest, Twitter, Google+ or Follow along with Bloglovin. I’m looking forward to getting to know you and creating together!



Comments & Reviews
That is so clever 🙂