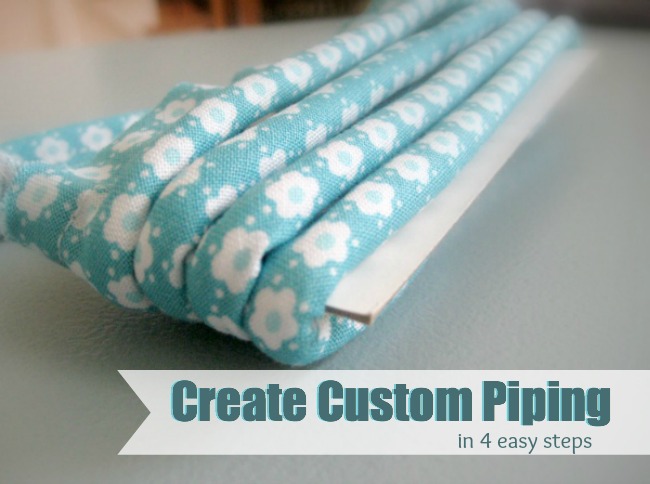
Custom piping is easy to create and can enhance even the simplest of projects. That’s right, in just a few simple steps, this custom trim can completely transform your project. Let me show you how in just four simple steps.
Create Custom Piping
This project is for all levels.
Skill Level- 1 Button
- continuous bias strip of fabric
- cotton piping/cording
Tools:
- sewing machine
- zipper foot
- basic sewing supplies
Basic Instructions:
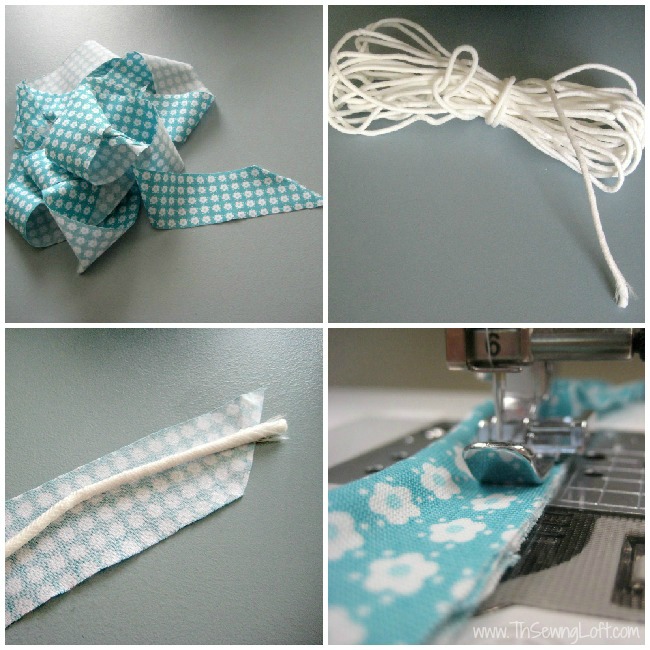
- Attach your zipper foot to your machine and check the needle position.
- Lay right side of your bias strip on a flat surface and center your cording on top.
- Fold the bias fabric in half, matching raw edge to raw edge.
- Straight stitch close to the cording with your zipper foot. *Tip: Stitch about 1/8″ from the cording for basting. Then when cording is sandwiched between the layers of fabric in your project, you will use your zipper foot again and stitch as close as possible. This will prevent your basting stitch from being visible.
Creating custom piping is a great way to enhance your project and give it that personal touch. The key is not to be caught short. With just a few minutes of prep work and some simple calculations, you can be adding that professional touch to your sewing with confidence.


Comments & Reviews
Great tutorial Heather! Pinning for future reference. 🙂
I had no idea it was that easy! Thanks for sharing!
This is great for beginners, but what about a measurement for the bias tape. How would you determine the width of the bias based on the size of the cord?
Hello Christine,
The best way to determine the width of bias for your cording is to wrap your tape measure around your cording and add seam allowance that you feel comfortable with. But this is a great suggestion for a post. I am happy to put together a quick cheat sheet with a few guidelines. Give me some time and you will see it here!
~Heather
I bought a piping foot, and guess what I now do lots of custom piping.
Thanks for this tute, Heather! I have a question: where do I find cotton piping/cording? I live in Italy and never seen this before, is that a special kind of cord or I can use any kind of it? Which diameter do I have to search?
Thank you,
MammaNene
SergerPepper.blogspot.it
Hello MammaNene,
Cording comes in all different widths. You can find it in your home decor section of your fabric store and it is readily available on line. Type in the words “cotton cording for piping” in google search box and you will be amazed what comes up. You can purchase it by the yard or even on a massive roll. It all depends on what your needs are. Personally, I like cotton cording for my projects.
Would love to see what you create with your cording!
~Heather
Love this tutorial. I have so many things on my to-sew list that require piping. Can’t wait to use it. I have pinned it for later reference.
Sarah M Schultz
Love this! I have an upcoming project I need to make piping for and was going to just wing it – glad for the 1/8″ tip for basting. Pinning!
Yay! So glad to hear it was helpful. I would love to see your project when finished.
~Heather
I wish I would have known this simple technique when making my Bali bag! Maybe now ill make another one!
Do I need to preshrink the cotton piping as I always preshrink my cotton fabric.???
This is a great question Marcie. One that I have never thought about! Since I have some raw piping in the studio, I will do a test and let you know.
~Heather
I put my cording in a washing bag and just rinsed it with hot water and then dried it in the dryer in the bag. If you expect to wash your item after it’s made, you need to pre-shrink everything.. Ie cording, material, zippers. Etc.otherwise the item will not lie flat.. It’ll be wrinkly or rippled.
Heather I really like your Sewing Loft blog. I’ve sewn off and on for years, but a lot of new
Items and ideas are out there. And keep up your helpful blog. Always more to learn.
Thank you Irene. We are always learning new things!
~Heather
Hi I’m Michelle and just started to learn how to sew well I can sew a straight line without breaking the tread or needle. I make beach items and I thought making some cute simple tees, decorative shorts, and beach pants would be easy well it’s not I sewed the whole tee so basically there are no way to put your neck or arms through it….lol funny but I just don’t get bais and piping still or how it works with different types of fabric. Do you have a way or post that is really easy to get for someone who’s never really sewed?
Thanks Michelle
I find that if I cut the fabric wider than it needs to be I have some extra fabric to pull on to make it tighter around the cord as I sew.
I forgot to add that. After sewing, I trim the cording to the width that I want
Can you say how wide the fabric strips are? I’m postponing covering a HUGE trapezoid pillow for someone because of this piping, the piping seems a normal size, will remember to cut on bias….
You can make them any size. It all depends on the width of your cording.
~Heather
Here is what I do: after covering the cording, I run it through the serger. That leaves a 5/8″ seam. I like to sew the piping tight against the pillow or whatever project I’m doing, so I use an adjustable straight edge zipper foot. I can set the needle just a big to the left so that the seam is tight to the piping. I use 2″ wide bias strips for most sizes of cording, except the large size, probably 3″.
I make my binding but buy my pipping. Thank you for the idea. What size do u cut your strips and what size of cording do you use? Thanks
So glad you found it helpful Margie! I used all different sizes for my piping. Some projects call for super skinny mini details and others like outdoor cushions could require something chunkier. That means, I’m all over the board.
~Heather
I’ve just come across your website, and I’ve found it useful already.