Last week I shared easy techniques for printing on fabric at home and the response was amazing…. But you had questions, many questions. So, I wanted to take the time to answer all of them and share a few more photos. (Be warned, this is a long post due to the questions and photos but I wanted to be thorough.)
Printing on Fabric at Home Q & A
Please note that many of the questions overlapped and I did my best group them together.
Q: Many of you wanted to know what type of printer I used and does this have to be a ink-jet printer?
A: My at home printer is an Epson ink jet model number WF-2540. It takes Designed for Excellence ink, it is nothing special just standard ink that I bought at my local office supply store. Some of the features listed on the box include:
- Vivid color,sharp text
- Instant dry, smudge resistant
- Fade resistant
Q: Are these fabric sheets for laser or ink jet printers?
A: All of the printable fabric sheets that I found were at the store level were made for inkjet printers.
Q: Deb wants to know: How do you set the ink? I have had my images fade with washing.
A: Each printer sheet requires different steps. Years ago I used fabric sheets that required the ink to be set with a hot iron but none of the packages I found on the market mentioned this. Perhaps technology has improved. That said, I did iron my standard fabric before attaching it to my tester.
Q: Can you tell us more about the computer software needed and the source of other printables?
A: There is no special software required for these labels. You can download the pattern and hit the print button on your computer.
Q: Bree left a comment: I can’t wait to try this, but first I have to ask:
How well does this hold up to washing? Is there a specific type of printer/ink to use?
A: Well Bree, I’m so glad you asked! Since this was a question was asked by many, I wanted to really break it down and share photos of each type of option for printing labels on fabric at home. Here are photos of my labels throughout the washing process.
Printing on Fabric at Home Wash Results
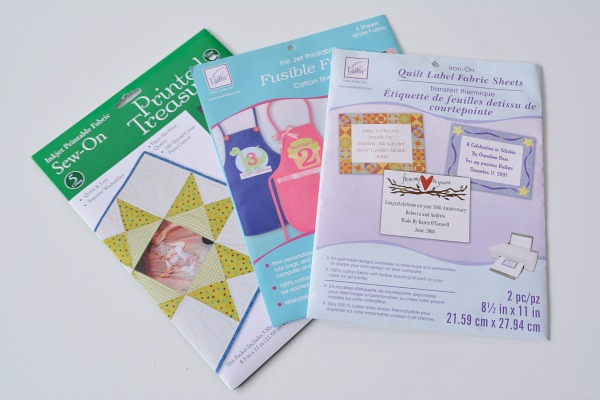
To start off, I purchased these 3 types of printable fabric sheets at my local fabric shop. There are many different brands on the market today but this is what was available at my local shop.
- Printed Treasures by Dritz
- Quilted Label Fabric Sheets by June Tailor
- Fusible Fabric Sheets by June Tailor
I made these observations after getting them home, opening the package and comparing.
- The only difference between June Tailor quilting Label fabric & June Tailor fusible fabric sheets is the packaging.
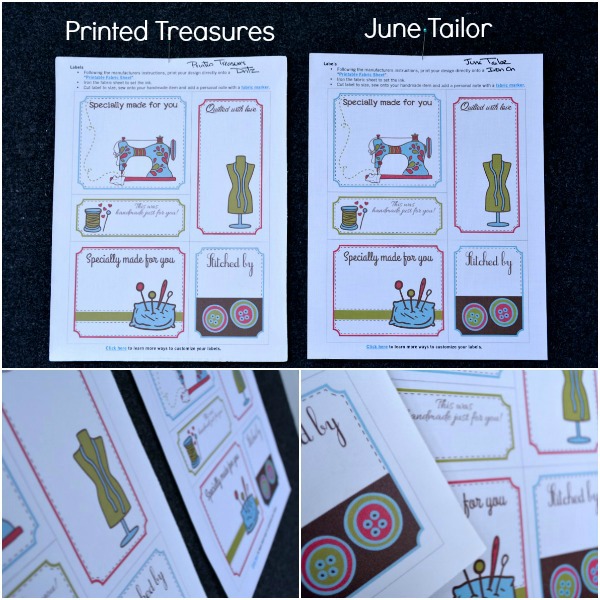
- June Tailor is a crisp white in color, Dritz is more of a slight cream.
- Both have a slight texture and soft handfeel.
- June Tailor is a fusible iron on and Dritz is sew on.
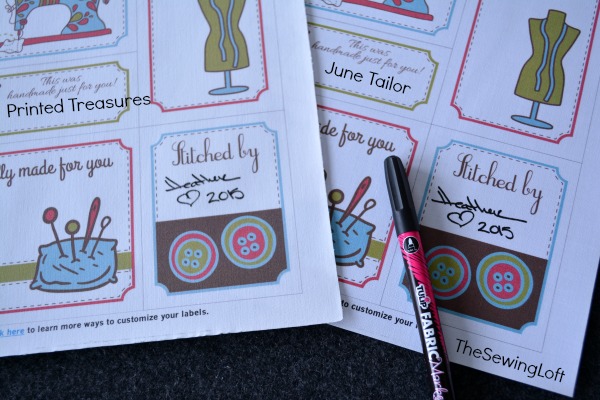
To start the process, I printed my Artsy Labels out on each printable fabric sheet on my Epson ink jet printer. They both worked perfectly.
Then I added a personal note with Tulip Fabric Marker and noticed that the white ground of June Tailor made my writing clean and crisp. Dritz looked slightly faded.
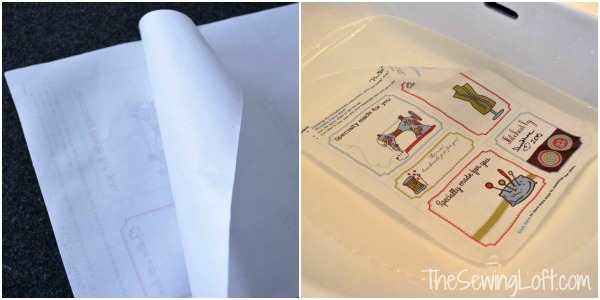
Dritz suggested an additional step before attaching to fabric. So, I followed the instructions on the package. Peeled away the paper, rinsed in water and let air dry.
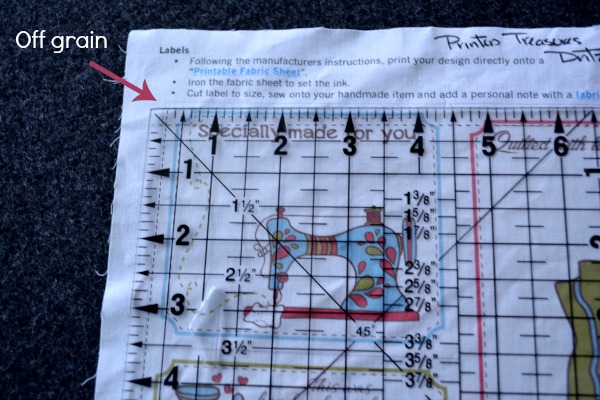
After the printed fabric sheet was dry, I lined up a ruler and noticed that my fabric piece was slightly off grain and distorted. (Can you see the light gray line above the ruler?)
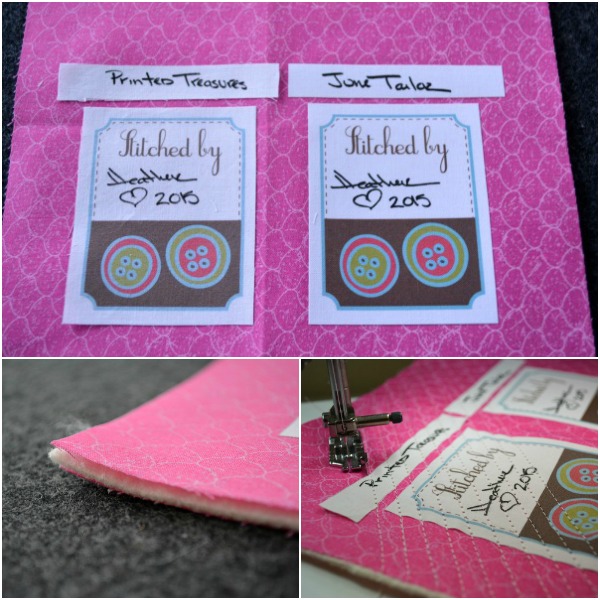
Since I wanted to see how these printed labels would react in real life, I stitched & ironed them onto a scrap piece of fabric. But I didn’t stop there. I made them into a mini quilt.
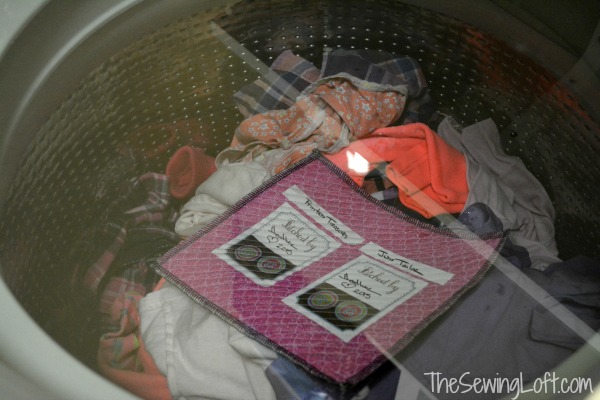
Now, it’s time to wash and tumble dry.
*Note: The June Tailor packaging states to hand wash and tumble dry. That does not work in my world so, each was placed in the washer with my everyday laundry. To be clear, there was no color sorting (outside the norm), pretreating or special additives introduced. Just plain old laundry!
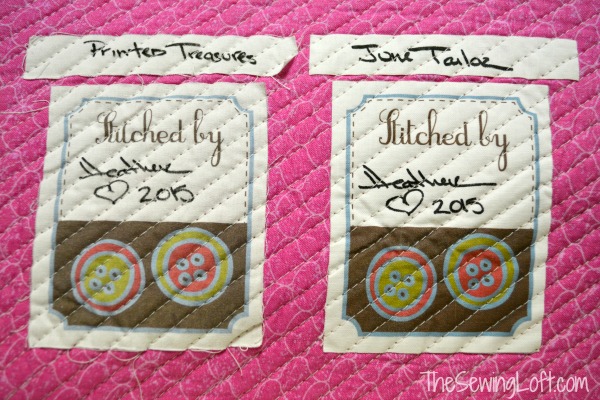
After 1 washing
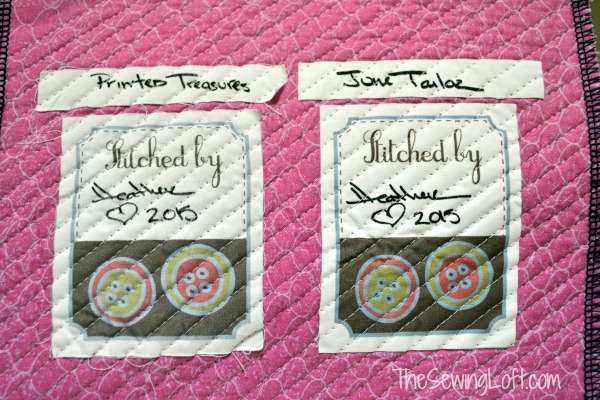
Labels after 5 washings
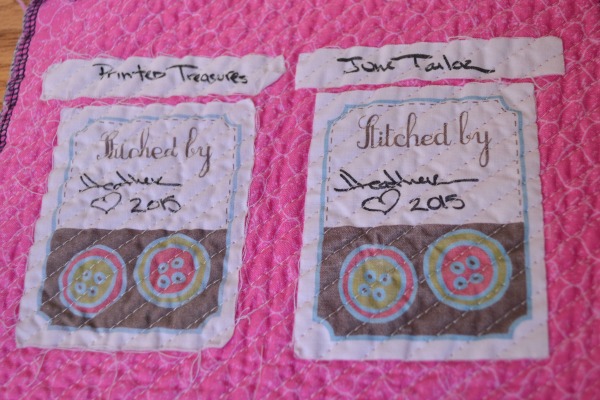
After 8 washings
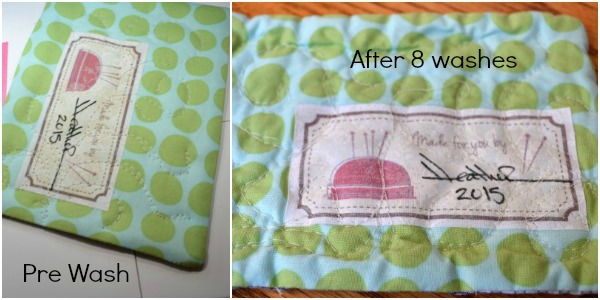
And after all the washings were complete I realized that I did not take clear pictures of the labels printed on my fabric at each step. So, here is the before washing and after 8 times in the machine. You will notice that there is not much difference between them and they did not fray as much as the fabric printer sheets. *Remember, these labels were lighter in color saturation than the Artsy Labels.
My biggest take aways-
- Follow the instructions on packaging.
- Consider the color of your fabric if it is a crisp clean white, you may want to opt for the June Tailor printer sheets.
- Fabric printer sheets were softer and more pliable than I expected.
- Labels will fray when washed over and over.
- Outside of the fusible backing, there was not much difference between the brands.
- I do a TON of laundry!
- And just like our clothes, these labels will fade over time.
Feel free to leave me a note in the comment section if you have any additional questions about printing on fabric at home. While I am not an expert in this type of printing, I can certainly help out by sharing my findings.
In the meantime, I will be sure to toss these label testers in the laundry over the next few weeks and circle back with an update once they reach 20 times around the spin cycle. I really want to know how printing on fabric at home will hold up in the real world!
Hello! Are you new to The Sewing Loft?
If so, I’m glad you stopped by and hope that something has inspired you to keep your needle moving! Don’t miss a single project and subscribe via email HERE! Bonus- free embroidery pattern with newsletter sign up. Another great way to connect with me is via Facebook, Pinterest, Twitter, Google+ or Follow along with Bloglovin. I’m looking forward to getting to know you and creating together!


Comments & Reviews
What a great posting! Can I add my two bits? I make my own fabric printer sheets. Fabric printer sheets are stupidly expensive here in Canada so I was looking for an alternative. I simply cut and iron fabric, usually a plain white or off white Kona, slightly bigger than a sheet or printer paper. I use 505 basting spray on the cut fabric and carefully lay the paper on top. I flip this over and use my hands to make certain paper and fabric are smoothly adhered to one another. Excess fabric is cut off so it is now EXACTLY the size of the printer paper. I can now run this through my printer. I have not done the extensive testing you have. But I do know after several washings the labels still look ‘good’.
Thanks a bunch Ann! Yes, the printer sheets are expensive and I love using a fabric from my stash. I even like to use a white on white print for some extra texture.I’ll keep you posted on how they hold up after more washings.
~Heather
I went and got some Freezer Paper but I am not sure what to do with it?
If you would like to use it for printing on fabric, you will need to cut it to size and iron it (shiny side down) to the wrong side of fabric. You can find more info here: https://thesewingloftblog.com/2015/01/19/printing-on-fabric/ The steps are the same.
~Heather
Great information! I’ve printed on fabric sheets quite a bit, but I’ve sure learned a lot from this post. I make art quilts, so they don’t get laundered, but knowing what will happen if I do need to wash them is great. Love, Love, Love your site!! Thanks for sharing your knowledge.
Yay, so glad it was helpful Jackie!
~Heather
I really enjoy your blog and especially this info. I am retired and make lots of quilts and labels are so important..I use the freezer paper method and love your printable labels. Thank you so much for all you do for us.
Thank you Heather. Do you happen to know if the fabric printing sheets you bought are treated to retain the color? Or are they just plain fabric attached to paper for easy printing? I bought a pkg of sheets many years ago, and I think they were treated. I never got a chance to use them (was going to make a photo quilt) and when I moved they got placed in a box on the bottom, back row, of a closet full of boxes, and I don’t have the energy to dig them out. But now, I want to use them, LOL.
Also, is it possible to customize the Lables???
Years ago, I read about using TONER copiers and printers to make iron on transfers. You had to reverse the design, and then iron the printed paper onto your fabric. It, of course, would only be black; it made like a coloring book-look transfer, if just an outline. Also could be colored in with fabric crayons, prior to ironing on. But I’m sure you could do the freezer paper method, for printing directly on fabric, right side up, and then just heat set it (BUT REMEMBER TO COVER IT WITH PAPER OR SCRAP FABRIC TO PROTECT YOUR IRON AND PRESSING SURFACE OR YOU WILL HAVE A MESS! ) DISCLAIMER: I never tried any of this, so experimenting is in order. 🙂
THANK YOU SO MUCH for the write up and the washing of course! LOL… Don’t worry we all do loads after loads of laundry with small and not so small children. 😉 It really is a pity where I am now we don’t have these type of printable fabric. 🙁 Only the transfer method and only with ink jet. Oh well… Perhaps I’ll get one really cheap inkjet? hehehe…. Now to make space!
Heather, what a phenomenal tutorial! I so want to give this a try. It would be so fun to make something personally printed for my daughter. 🙂 Please come share your blog posts over at the Home Matters Linky Party! We’d love to have you for a visit. The Door is OPEN! 🙂
~Lorelai
Life With Lorelai
Heather- great post! You are an honorary “CraftTestDummy” with your thorough methodology on this one. 😉 I’m going to share this on CraftTestDummies.com. Thank you SO much for great info.
Thanks Jenny, one of these days we need to test something together!
~Heather
Thank you so much or this info. Love it!
Several years ago I used printer fabric to make sew-in labels. I used a graphics/desktop publishing program with a template for address labels, which gave me 30 labels on a letter-size sheet. I followed the package instructions for printing and heat-setting. When I cut them apart, I used pinking shears,to keep the edges from fraying. Maybe others will find this tip useful.
Pinking Shears are a great tip!
Thanks for sharing.
~Heather
Thanks so much for doing all this research for us! I’ve never tried this before but feel like I could definitely do it, thanks to you!
No problem! There were so many questions and I just wanted to share the facts. Every brand is different but these are my basic findings. I hope it helps others like me.
~Heather
I read recently can’t remember where, after printing to lay printed fabric flat in a vinegar bath let dry rinse then iron
Thank you for the instruction. I have printed on fabric many times but I always spray Retayne on the picture before washing it. It does hold the picture better and longer using Retayne..
Hello Helen!
I am not familiar with Retayne and will be doing a quick search to learn more. Thanks so much for sharing the tip!
~Heather
Thanks for your post on printing on fabric. I have been printing on fabric since 2000 and prefer to use my own fabric as I find that a tighter weave holds the ink better and gives a better print. I have used Bubble Jet Set 2000 for years until I was able to get the pre treated cotton. I still treat my silk fabric with it. Tip: clip the corners of the fabric adhered to the freezer paper as it prevents the corners from catching in the printer. Ask me how I know that little trick!!! One of the things I print is photos of rocks taken around our province. Way back when I was searching for landscape fabrics, the rocks were just not the right proportion. So now I print them, cut them up and hand applique them in place. You’ll see some samples of this on my blog.
I was wondering after I printed on my own fabric do I need to wash or set it some way?
Personally, I would heat set it with a hot iron.
~Heather
Thank you for the great run down of how they hold up over washings. What type of pen/marker did you use to write on them?
There is a Tulip Fabric Marker shown in one of the pictures above.
Personally i like the printed treasures (mostly because its cheaper) one tip i would give is to edit your photos BEFORE printing. I use the windows photo viewer program that comes preloaded on all windows computers. I up the color saturation a bit, increase the contrast, increase the brightness a bit and sharpen it a bit. It seems to make a brighter crisper image on the fabric, also i set my printer to “max dpi’ (i have an HP, desk jet) to give it lots of ink. After letting the fabric air dry , i use a very hot dry iron top set the ink (it also makes it easier to peel the paper backing off) after peeling off the paper, i lay the paper on the front of my fabric and run a hot iron over it once more, it seems to kind of seal the ink in, because the hp inks dont seem to hold as well if i dont