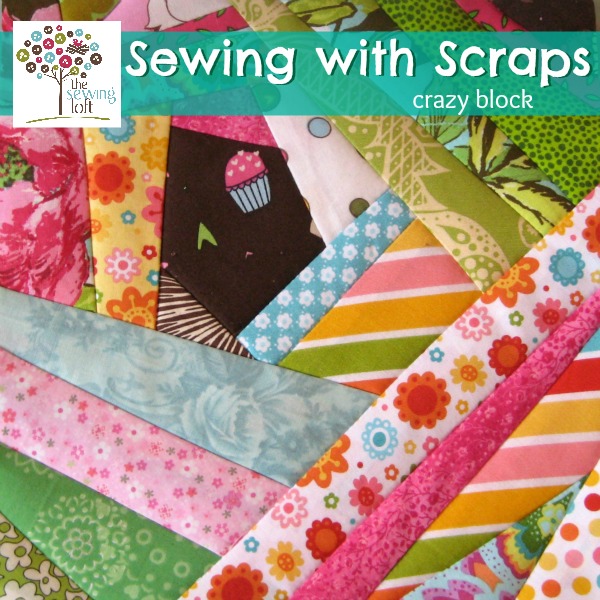
Since my scrap basket is once again out of control, I thought I would challenge myself to strictly sewing with scraps. You know, that type of stitching that you have no clue what your making but you know the mixture of fun prints and wild colors is going to create something fantastic!
Sewing with Scraps – Crazy Square Block
This project is for all levels.
Skill Level- 1 Button
Materials:
- fabric scraps
- 10″ x 10″ square of muslin or fabric
- 10″ x 10″ square of batting *optional
Tools:
- sewing machine
- basic sewing tools
- iron & ironing board
- rotary cutter and self healing mat are optional
Quick Note
Interested in an Ad-Free, printable PDF version of this tutorial? Scroll to the bottom for more info!
*Note that this project can be made in any size and you are basically creating a fabric sandwich with a layer of batting in the center. Remember when layering that you want the right side of fabrics or the ‘pretty side’ to show.
Basic Instructions:
- Start with pre-pressed scrap pieces of fabric. Cut a 10″ x 10″ square of backer fabric and batting.
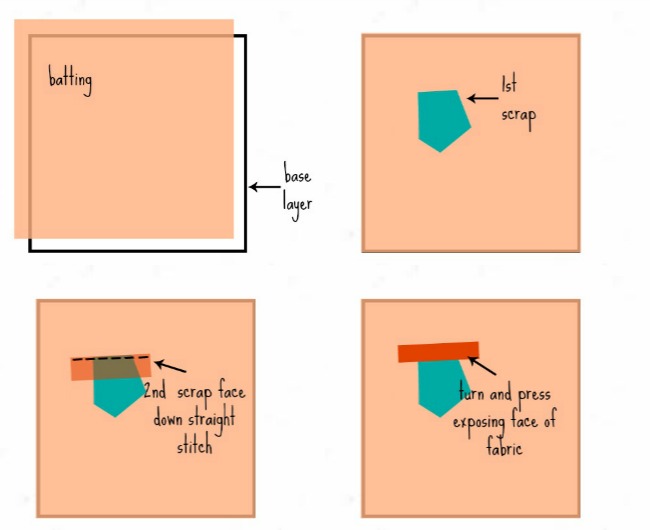
- Create your fabric sandwich like so: muslin or backer fabric wrong side up, a layer of batting, and then your 1st scrap positioned in place right side up.
- The 1st layer of scrap fabric should be an old shape created from straight lines and can even be a little off-kilter. Place and pin the scrap towards the upper corner of the square; right side or pretty side up. All around machine stitch fabric scrap in place.
- Now, let the games begin! Starting with a fabric scrap long enough to cover the base layer, place right sides together and stitch 1/4″ from the edge; flip fabric strip over and press. (this is called the stitch and flip method.)
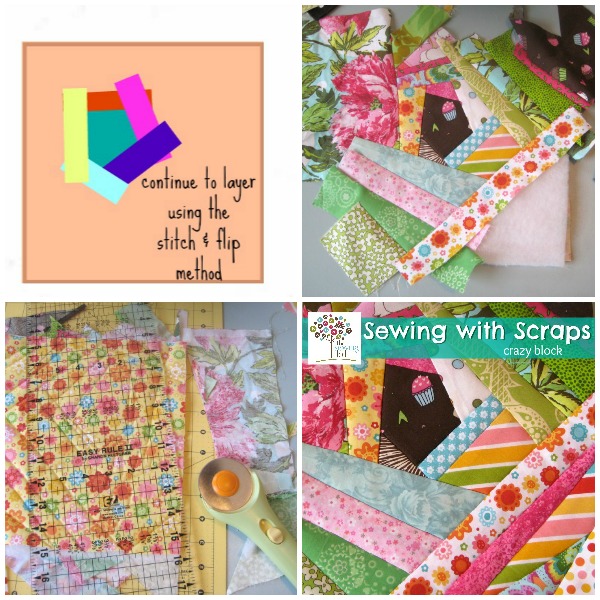
- Repeat the process all the way around your 1st scrap, overlapping each layer as you sew.
- Continue to add on by layering and building on top of each piece. It is important to always use the same seam allowance and cover the previous stitch line. Don’t forget- pressing counts too!
- After you have filled your square with fun fabric scraps, press one more time and trim off all extra fabric to return the block to 10″ x 10″.

Get the ad-free Crazy Block PDF
Click below to download the full printable PDF and print at home!
Tips for Sewing with Scraps:
- Pressing counts- big time! Pressing after each piece will keep your fabric smooth and prevent unsightly puckering.
- Uniform seam allowance is your friend.
- Trim away excess fabric only after you have flipped and pressed your scrap in place.
- Combining fun prints and wild colors will create amazing blocks.
Wow, I just love it when my scrap basket turns into something amazing. I think my day of sewing with scraps was a success! Now, the million dollar question is what should I turn this crazy block into? I have an idea but would love to hear suggestions from you. Leave a comment below or on the facebook page.
And if you need more inspiration for stitching up your fabric scraps – check out this awesome list!

ps- to help stir your creative juices while sewing with scraps, this tutorial is being used in the SewCanShe Crazy Quilt Block Sewalong from April 20th through May 18th. So, let’s get your scrap basket all cleaned out and your crazy block project entered to win some fabulous prizes!



Comments & Reviews
If you place a piece of the heat resistant fabric between batting and backing piece, when finished and trimmed, it all quilted and all you have to do is bind and you have a cute scrappy potholder. It Fill a box full and save for party favors next time you have the girls over for chit chat and coffee. Your friends will love you. Or a good hostess gift when going to a pot luck.
That’s a great tip! Thanks so much for sharing. I am loving all these ideas!
-Heather
Gorgeous.
Heather, I love this method of quilting. No measuring, no matchy-matchy, no lining up corners and seams…so much room for creativity! I need to lock myself into my sewing room and try this meandering way of stitching.
So, what could you make this into?
Hmmm…
*a pillow front
*make 2 large pieces, add solid colored sides and a strap for reusable grocery bags
*you could use a template to cut out a heart of flowers to applique onto a shirt or jacket
*make a long strip for a d border to add to towels…ok, now I need to start my own!!!
Thanks for sharing!
Love all of your ideas! I am going to share a fun project soon. It is easy and everyone can use!
-Heather
Love the look of your crazy block! You could use it to make
1) Wall hanging
2) Table decoration
3) Purse
4) Pillow
5) Embellish a shirt or jacket.
6) Make a sewing bag.
ooh very nice. Well what would I make this into? Probably a pot holder or placemat?
What a great idea. Can’t wait to give it a try.
Great use of scraps. It would be a fun way to make potholders, hot pads, table topper, tote bags….oh the many uses!
I like that you can make a quilt for a friend and then use the scraps to make a project for yourself that reminds you of your friend and the gift you made.
I’ve never tried this, but saw it on Sew Can She, and it looks like so much fun, that I can’t resist giving it a whirl. Thanks for such a clear how-to! As for using the block, hmmm, pillow? mug rug? wall banner? shopping tote?
How fun. Thanks for this tutorial. This would be cute as the left side of a placemeat. Or a center piece to put a plant or candle on.
This looks like such fun! And I’m a beginner sewer. Gotta try it! Love all the fabrics together! Thanks for the inspiration!
how would i go about making this into a quilt?
I have scraps from every quilt I’ve made so far (I’ve only been quilting for 3.5 years) and someday I plan to make a bunch of blocks and make a quilt for myself. I was originally planning to do a log cabin but I actually like this much better!
Since I retired, I have been making one crazy block from scraps from each quilt I made. When I have enough blocks, I will make myself a memory quilt of all the gifted quilts I made.
I absolutely LOVE this Heather! I’m pinning it to try myself – always looking for new scrap projects! I might make one and turn it into a mug rug!
Thanks for linking to a Round Tuit!
Hope you have a fabulous week!
Jill @ Creating my way to Success
I’m sure it’s been asked but this is the first time I’ve looked at this kind of quilt block. I’m assuming that you sew the batting and back to the scrap material. How do you sew more than one blockk together?
I’m no expert, but could you trim the scrap pieces on the outermost edges approximately 1/2″ wider than the backing, and then lay a 2nd finished piece atop it, right sides together, and sew the seam?
In other words, if you had same-size squares, finish the each square by trimming the scrap pieces to extend beyond the backing approximately 1/2″. (You would not trim the scrap pieces flush with the backing.) When you want to attach the blocks, sew same sides together to seam.
I defer to experts who can expand on this possibility. 😉
I am only new to quilting but this sounds like a great idea that would work very well,
I know EXACTLY what I’m going to do with this! I’ll be making a purse from it, and a matching wallet. Thank you for the idea – I had actually done this very same method on a purse for my sister in 2009, so I was excited to find an actual pattern for it here (I didn’t have one, just cut the pieces and went for it). Mine came out beautifully (I think I have a photo of it on my blog), and I just KNOW this one will come out just as beautiful. Thanks so much for this!!
I would love to do this; however I would also like to know how to put squares together for a quilt.
Thanks for the great idea. I love making tote bags for Silent Auctions for charity from denim and corduroy, lined with colourful cotton and pocketed with same. I will do a nice mix and match from the cotton lining and other matches to create the crazy quilt pockets for added interest.
Cheers
Another alternative is to attach the crazy quilting to a muslin back, then use that as your top layer over batting and backing.
I have seen tutorials on how to do quilt strips just using your machine, 2 materials and batting. Once your block here is completed, you would lay down a strip of material right side up, put your quilt block at the edge covering the material. Next you lay another strip of material face down (same size) and batting (same size) along the same edges. This is going to be thick! Sew using at least a 1/4 inch seam. Once again you iron very well after sewing. If you want to make sure your strip stays in place, sew a seam along the outer edge. Turn the block, and repeat until it is the size you want for your project.
THIS IS AN AWESOME CRAFT AND TUTORIAL WILL BE SO HELPFUL WHEN SEWING IT. I HAVE ADDED IT TO MY FAVORITES AND AM EXCITED TO MAKE 1 OR SEVERAL. THANK YOU FOR SHARING
Bernysblessings.blogspot.com
What can I say except “Absolutely Brilliant” so many ideas on here, can’t wait to try it out, thank you so much for sharing 🙂
Looking for some ideas to make a “memory mini mini quilt block” featuring some of the scraps from things I made in the past for my daughters, and turning it into a Christmas tree ornament, and I think I have found it. I assume I can finish the 1 block edges with yet another random fabric piece, folded over and stitched!
Do this on a piece of paper instead of batteing etc,
Make Many- enough for a quilt. Trim them square and then sew the blocks together. Voila! a quilt top!
You cold make all the starting pieces the same fabric it would be a nice way to tiie the blocks together visually.
This crazy block would be perfect for scraps left over from making masks. I know many of us across the world are making masks due to the COVID19 pandemic. I have a lot of random sized scraps and I think I’ll be putting them to use making crazy blocks!!!