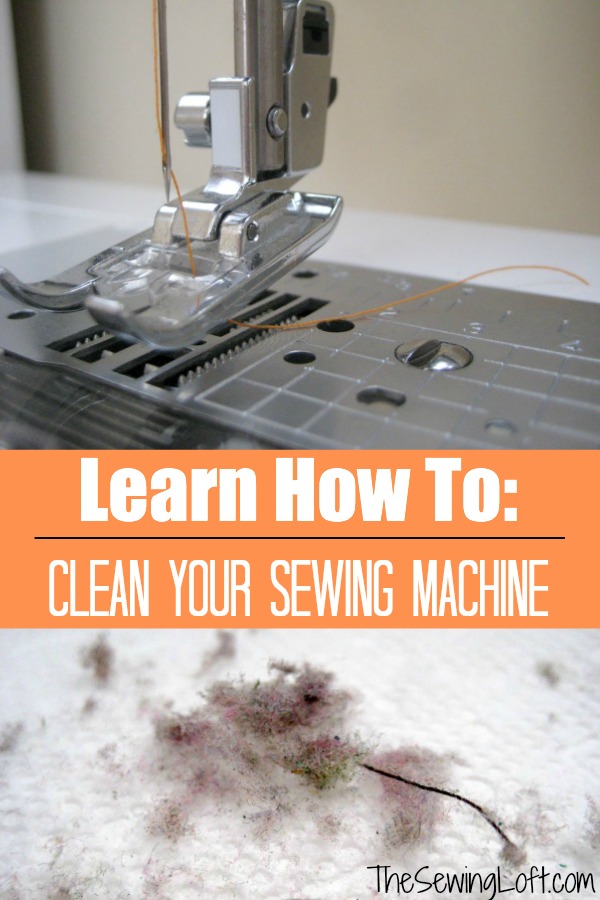
Do you ever wonder how and when to clean your sewing machine? If the answer is a big fat NO then now is the time! The amount of dust and fibers that accumulate under that little cover is crazy!! Let’s walk through the steps. I promise it’s really easy!
How To Clean Your Sewing Machine
This tutorial will be a guideline since there are so many different make and model machines on the market today.
Tools:
- Manual
- Long Tweezers
- Small Brush or Pipe Cleaner Brush
- Disc Shape Screwdriver
*All of these items should come with your machine except the pipe cleaner brush. You can make that for pennies. See how here.
Here is how I clean my sewing machine:
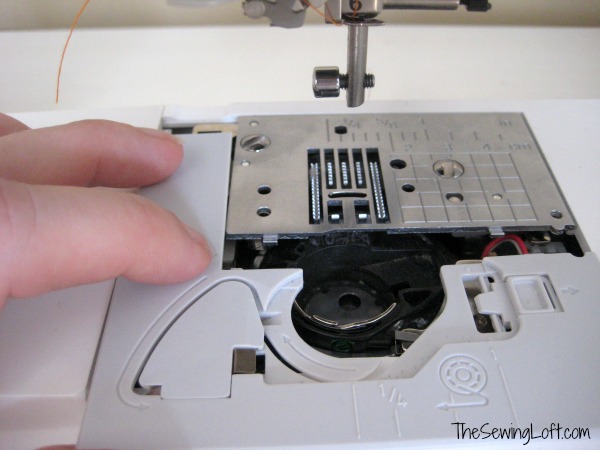
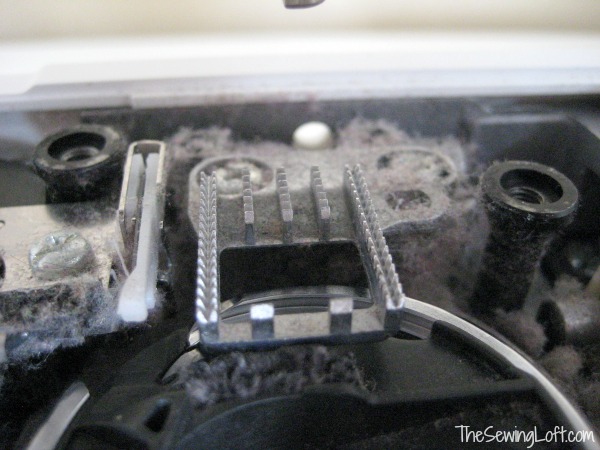
Start by gathering your tools and turning off your machine. You could even unplug it for extra safety measures. I start by making sure the needle is in the “UP” position and turn off the machine. Remove the needle and the presser foot holder. Slide your flatbed attachment (surface) off. Slide the needle plate cover towards you to remove. See all that gunk? YUCK!
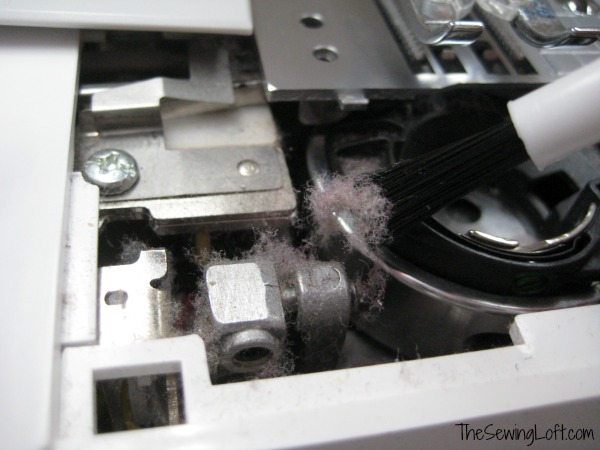
Now it’s time to start cleaning. Grab that small brush and those tweezers and start cleaning away.
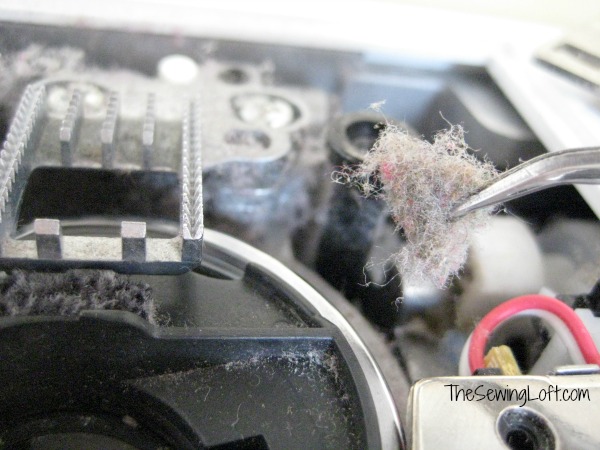
If you haven’t cleaned your machine in a while you might be shocked. Those lint balls are gross!
Some are buried deep and need to be pulled out with the longer tweezers. Remember the game Operation? Use the small brush and tweezers to clean out all that gunk.
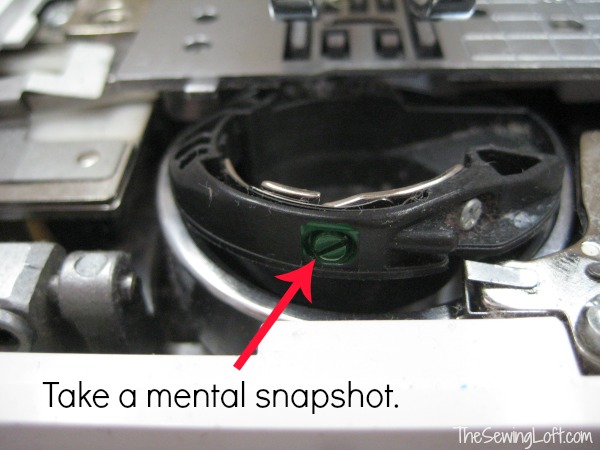
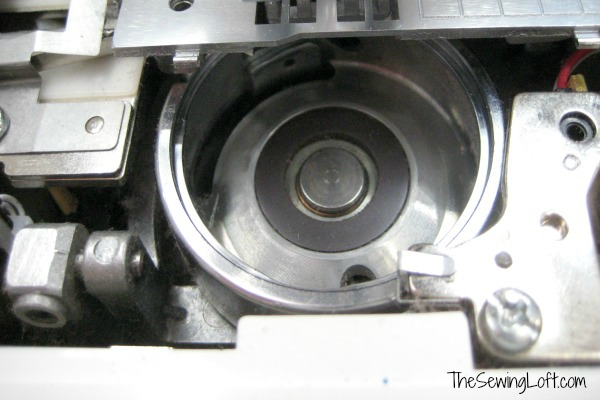
My machine has a removable bobbin basket. I like to take this out and clean both it and the area around it off. Before you carefully remove the bobbin case, take a mental snapshot. (Pull out your camera if you need to. Trust me, if you’ve never done this before you will thank me later.)
Quick Tip- My manual suggests running a vacuum brush over it but I’ve never tried. Do not use compressed air here. You do not want to push the link into the machine.
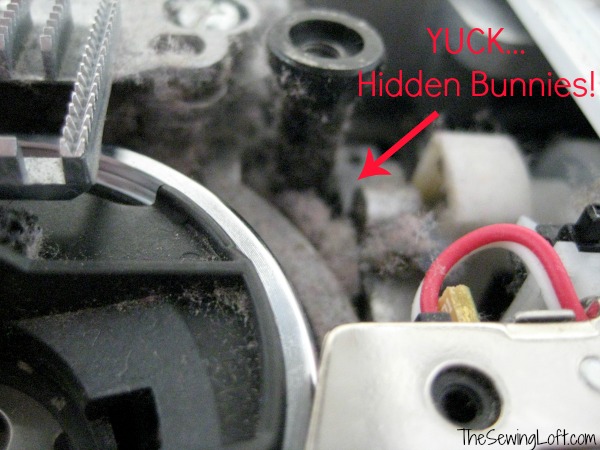
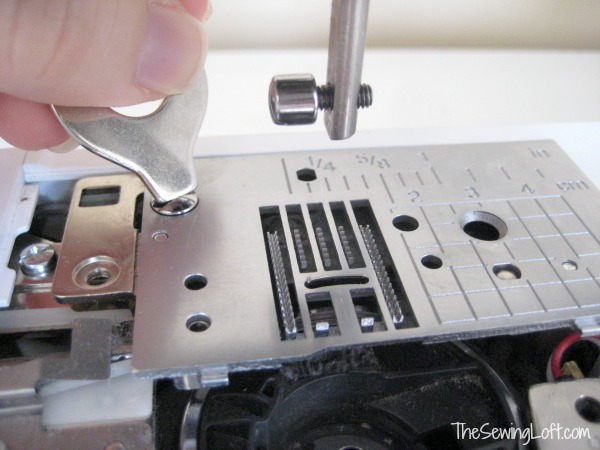
Want to go a few steps further? Grab that disc shape screwdriver and unscrew the needle plate. I was shocked at all these dust bunnies the 1st time I did this. Repeat the cleaning process. While your there, if your machine has a cutter feature be sure to give the knife a quick sweep of the brush. This will help keep things running smoothly.
Now it’s time to refer to your mental snapshot and put everything back together. The tricky part on my machine is the bobbin basket. There is a small green dot that needs to be lined up at the center. Refer to your sewing manual for tips on your machine.
To keep your machine in top working order, let’s start fresh and grab a new needle. Once everything is back together, let’s get her looking good by taking it one step further and wipe down the surface. I like to do it with a soft cloth dipped in a neutral detergent. Be sure to squeeze it out firmly before wiping down the exterior surface. Then give it another pass with a fresh dry cloth. Your baby should be looking good as new!
The whole process should only take 4 to 5 minutes total. It is best to clean out your sewing machine after every big project to keep everything in working order.
**I don’t recommend oiling your machine. I believe that this step is best left to the professionals. Actually, I recommend getting your friend a yearly check up. That’s right, sometimes they need a little preventive medicine to keep things in working order.
Additional ways to keep your sewing machine clean:
- Keep your girl covered! That’s right, most machines come with a simple dust cover. Use it! Dust from lint gets everywhere in your sewing space.
- Changes your needles often. It is recommended that we replace them after 4-6 hours of sewing. (I get a big FAIL in this department!)
- Watch the tension when winding your bobbins.
- Do not use old or vintage thread. Technology has changed and advanced so much over the years. Vintage threads tend to produce more loose fibers and lint will accumulate faster. Save the vintage spools for a pretty display.
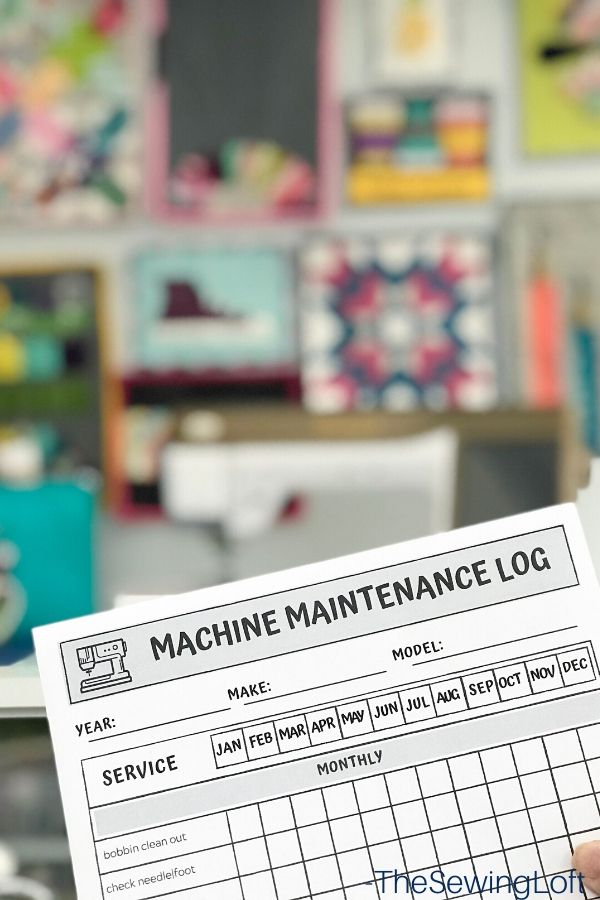
- Maintain a simple maintenance log for your machine. Click here for my free download.
- Be sure to have your machine serviced. They will grease her up when needed, check tension settings and all machine parts.
That’s it! Now that you have learned how to clean your sewing machine, why not check under the hood of your serger. Be sure to PIN THIS POST for easy reference.


Comments & Reviews
So helpful!! I thought I was pretty on top of keeping my machine clean . . . eeek!! Not at all!! Pinning this!
I’m always grossed out when I lift off those covers but routine cleaning helps keep everything in check!
~Heather
Recently I had to have my machine serviced.( I was complaining). My son said “Do you have your car serviced on a regular basis. Of course. Well, with the amount of sewing you do you need to take care of your machine as you would your car” The simplest logic is sometimes the best.
So true MariJanyne! I think we all take it for granted but I’m determined to be better about my routine maintenance. Especially since it is SO easy!!
Give my best to the Clippers! Miss you guys.
~Heather
Thanks for this, I do clean my machine and it does help… I just started changing my needle more often and now am trying to keep track of it,
Now how do you adjust the tension when it goes wrong?..when I’m free motion quilting with my machine, the bottom thread is sometimes a little loose especially when I go around corners.
My sewing machine needs a good cleaning! Your post serves as a good reminder to me to get that done!! I’ve linked to your tutorial on Craft Gossip:
http://sewing.craftgossip.com/tutorial-how-to-clean-your-sewing-machine/2014/02/21/
–Anne
Thanks a bunch Anne! Don’t be shocked when you look under that hood.
~Heather
I literally just did this yesterday on my Babylock.
So glad to hear that your girl got a clean up! Keep her looking pretty!
~Heather
I cleaned my machine on Monday.
Perfect!
Great advice!
I have another tip for those who may not have a good “mental picture”. Just use your phone and take a quick snapshot of the assembly to assist with the memory of how it all goes back together. So simple and effective.
That’s exactly what I would do Ruby! I use my phone for everything.
Thanks so much for sharing your quick tip.
~Heather
This was quite thorough—thank you. I have used compressed air thinking it saves time, so thank you for the warning, I will go back to the brush next time. Read my post on keeping track of your needles:
http://www.thelostapron.com/2012/08/keep-track-of-your-needles.html
If you are cleaning a similar machine as the pictured please put the needle plate back on first then the bobbin case back in then the “L” shaped plastic piece. The order is VERY important.
This was a good idea.
I wonder if you could help me, with an adjustment to my thread so I get a lock stitch all the time. I thought it was because I was working with very thin fabric. Could that be & what do I need to do to correct that?
I keep a skinny “SOFT” paint brush right next to my machine and I run it around the bobbin case with every bobbin change, project change or more often if sewing on fleece or equally fuzzy fabrics. Each time a fair amount of “fuzz” comes out on the brush! Sewing machines are expensive to repair and a little easy maintenance is soooo productive! Good Blog!
Thank you for the great info. I always wondered what that little round thing was for in my tool kit! Lol!
This is great! When I clean my machine, I use a long skinny paint brush. It really gets to those hard to reach areas and the dust bunnies stick to the brush.
Love the smaller paint brush. I use them to help me stuff my dolls. They have many uses! Thanks so much for sharing Crystal.
~Heather
good tutorial for cleaning machines. I only disagree with one item mentioned. Some machines need regular oiling. Read your manual regarding the oiling. Ask your service man or woman who cleans machines professionally if you have any doubt. Generally there are just a couple spots to oil. In the extremely dry climate of NewMexico, I have to oil my machine regularly or it would die of thirst. I can tell by a change in tone it makes if I have waited too long to oil. Caroline of SewCanShe.com (see her blog)mentions in last weeks blog that her new Juki has 5 spots to oil and must be done DAILY if you sew daily. So, read your manual!!!! Thanks for the info.
Hello Catherine,
Thank you. I agree that machines need regular oiling, maintenance and service however, this differs on each individual machine. That is why I believe it is best to read the manual and talk to your professionals. Over oiling can be just as dangerous as no oil. Yearly check ups and service are best. Think of it as your physical.
~Heather
ps- love Caroline!
I like the idea of photographing the bobbin! A q-tip is handy for getting lint out of crevices.
Here’s another tip: The quickest way to clean your machine when you are in the middle of sewing is canned air! A quick blast of air clears out everything without having to unscrew everything.
I want to go clean my girl right away!
Go for it Jenya! You will be surprised just how much gunk is in there. Total Yuck!
~Heather
a very helpful tutorial thanks for all the great tips…Kim
I actually just did this last night. The tweezers would have helped. I wanted to oil my machine but can’t get it apart enough. Hope what I managed to do helps.
Every little bit helps Margaret! I’m determined to get on a schedule with cleaning mine.
~Heather
OhEmmGee…my poor machine says thank you for saving her life. If there was a place to donate fuzz balls & dust bunnies, the building would be dedicated to her, Sewsie Threadsly. Thank you!
Love it Tami! I think we all feel that way and forget to clean them out. I feel like my girl has a bit more “spring” in her stitch since I dolled her up.
Glad to hear you have captured all the dust bunnies and relocated them.
~Heather
desperately need to print out this tutorial, looks exactly like my Baby Lock Decorators Choice, if I had this to look at maybe it would not have cost me $129 to have tect try to straighten out what I did wrong trying to clean it with no manual.
When I was young and didn’t know better, I actually got rid of a couple of sewing machines because the stitches wouldn’t lock. I finally found out that all I needed was for the fuzz and lint to be removed! Now I clean after each large project and sometimes during. Thanks. Peggy
I do this periodically. I also regularly use a vacuum attachment that I purchased (for less than $20) that is for cleaning computer keyboards. It has tiny, skinny hoses. Then I hold a flexible straw in the tiny hose and really clean out those hard to reach crevices. Works great!
Great tip Kathleen!
Thanks for sharing.
~Heather
When I sell a machine , I tell my customers to do this once a month. You can’t believe how many people don’t read instructions, or listen to my advice 🙁
I try to do this on a regular base. I use a mascara brush all the lint sticks to it. Great tutorial!!
Thanks, Heather! I always find your information helpful and your projects fun!!
I’m not one to machine sew that often, but I’ve had it long enough that I really need to look into this the next time I pull mine out. Thank you for the tips!
Thanks for the great tips. I need to do this. Badly!
When I complain about having to have my machine serviced my sons comment was. ” do you have your car serviced. I said Yes every 3000. miles. His reply with the amount of sewing you do the machine needs to be serviced like your car.”
He is so right MJ!! We do a bunch of stitching and these babies need to be cleaned. Hello to the crew for me. The next time I get up to NJ I need to see if I can crash a meeting!
Hugs-
Heather
I clean my machine quite often. But I have not removed the bobbin on my new machine, and I will be doing. I do oil my, very little. I use a small craft brush to the dust. It sure cures the noise, machine not sewing right. I need to change my needle more often tho’. Thank you for sharing this cleaning. I had questions on the job, but feel more comfortable now.
Wonderful tips. Love your ideas and they are very easy to follow. Side note: in this sentence “. . big fat NO [than] now is the time!” [then] is the correct word to use.
I really must remember to put the cover on my machine – it just isn’t a habit but I know it should be! Thanks for the tips on really getting all that dust out.
Always good advice. I tend to think I have ‘just recently’ cleaned under the hood but find that I haven’t done it as often as I think I have. Rather than taking a mental snapshot use your cell phone to take pics. That way you are sure to have it back together without any fuss.
You mentioned cleaning around the cutter. Do you take anything off to get to cutter. My cutter has stopped working. I’ve read where it could have a peice of thread caught in it but don’t know how to get it out.
Great photos and tutorial. Thanks a bunch!
I use a Pap smear brush unused of course it’s surprising how the lint sticks to it and cleans really well ask your doctor for they gladly give them away
That is awesome Trish! Do you work in a doctor’s office? I would never even think of that!
~Heather
Very helpful. Will go clean my baby now and make a dust cover for her. Thanks.
very helpful. If you want to go further, once you take out the bobbin basket, you can use a regular vacuum and really get a lot of lint out. But that still leaves a lot on the under side of your machine. So…sew…lay the machine on its “back” and unscrew the bottom panel. It will have one or two screws and is easy to reattach. You will be stunned by the amount of lint on the undercarriage of your machine. I haven’t taken my machine to the shop for repairs or cleaning in years and I use it daily! It really is easy.
Hi l am Mrs naveed I have brothers s.machine model 1975.now its motor gives sound what should I do thankyou if u consider my mail
Sorry to hear your machine is making funny sounds. I would take it into the shop for a tune up. They would be able to best determine how to get her purring like a kitten again!
~Heather
M
y Bernina gets an annual service. I neglect my sweetie pie, the Singer Featherweight. Recently, she just stopped winding the bobbin. I tried applying extra pressure, loosening the flywheel again, everything I could think of. Well, guess what? She just needed a little bit of oil and she’s back to sewing up a storm again! Thank you for reminding us to take care of our machines!
Yay! I’m so glad to hear that it was a quick fix and you are back up and sewing again.
~Heather
I use WD 40 quick squirt ,then q tips to dry thoroughly,after all the first steps of getting the dust bunnies. It lubricated,and removes any moisture from machine. Also Change needles frequently!!
Great post! I disagree about the oiling though, especially if you have a Featherweight or other vintage sewing machine. Oiling IS NOT difficult and on machines like the Featherweight, should be done every 8 hours of sewing. Use an oil made for sewing machines and empower yourself to learn this valuable skill. Own your machine! Download a manual if you have to.
BTW, for the poster who mentioned she had a Featherweight that “froze” up; they will also do that if a thread gets behind the bobbin case. There’s a great group on Facebook that will walk you through this fix. You can do this! Happy sewing!
Thanks for the tips Phyllis.
~Heather
How do you fix your machine to sewing your blue jeans
I use a fuzzy pipe cleaner instead of a brush. Seems to pick up lint much better than brush.
Also, I can bend the pipe cleaner to go behind and below where a straight brush or “lint picker” won’t go. Thanks for the great advice!
That’s a great tip Lynn! Thanks so much for sharing.
~Heather
Thank you for this very thorough process, with photos, for keeping the yuck out of my machine.
A good investment ($10) is the tool kit that you attach to your vacuum. You can use it on your desktop as well. Apparently, 95% of repairs to sewing machines could be avoided if the machine was cleaned regularly.
there is a women in my guild that owns a large sewing machine shop and i am pretty sure they serivce sewing machines so i can just take it to meeting and she can bring it back to a meeting when its done. easy!!! then i can have her put my name in her computer to reming her to get it next year about this time for service. i will also put on my planner i keep in my purse.
That is awesome Gloria! So glad to hear that you are taking care of your tools!
~Heather
I take my cleaning a step further. Every time I change a bobbin I have handy a fat (as opposed to skinny) pipe cleaner. I poke this carefully into any opening I see, twist a little and withdraw lots and lots of lint. I think doing this keeps the lint from getting deeper into the machine.
I cleaned like you until it looked spotless, then I used the soft brush attachment on my vacuum cleaner with a clean container. Hidden icks (grimy dust bunnies) came out on the brush and in the container. Not a million but they were large enough to see easily and were compacted into balls instead of loose like before vacuuming. I don’t know where they were hiding but I learned to have the vacuum handy when cleaning. thank you for the post, it got me started and the machine is running quieter???
fantastic post! My mom has sewing machine. I wanted to surprise her and clean it. Thankfully I have found your article! I am going to use all your tips! Do you know where this Disc Shape Screwdriver should be ? Thank you!
What about using the small nozzle on the vacuum cleaner? I think it would suck out those dust bunnies rather well. Could there be any problem with doing that?
Good information here. I have to add that on the bobbin basket there is a white dot (to the right of the green-painted screw) that matches up to the white dot on the frame of the machine. This is also a good ‘match-up’ when replacing the bobbin basket. Thank you for posting this article!
I keep an index card with the tools, dating cleaning & changing needle. It’s amazing how quickly 5-6 weeks go by when I check again.
such a great idea!
~Heather
I wind 10 bobbins. When the bobbins run out, that’s my indication to clean as you’ve described above. I also keep a plastic film container with a hole in the lid to dispose of the old sewing needle. I rarely change thread colors when putting together quilt tops, so this method has served me well. By doing this, I think I prolong the taking of my machine in for repair an extra couple of months.
Cleaning the bobbin area is usually the most tricky part. Some detailed tips on that one might have been a nice addition.
Hello Nancy,
Thank you for the note. That area can be tricky. The next time I give my girl a good cleaning, I’ll be sure to turn on the camera and film the process.
~Heather
Hi Heather,
I have gotten into the habit of cleaning the bobbin area with every bobbin change. A swipe or two around the area with a cotton swab goes a long way to keeping the area clean
Regards,
Barbara Harris
Thank you. You gave me motivation and good tips.
Excellent tips! I have also learned when changing my needle that I cover the opening underneath it before dropping the needle screw. This keeps the needle from plunging right into the workings of the machine where you have to go in and fish it out. I leave it covered until I have a new needle in place. Ask me how I know this happens- lol.
I never even thought about cleaning mine, thank you for this review.
Thanks for the tips
this is very useful information about how to clean a sewing machine at home, you give great tips for us and I appreciate you.
Thank you for the great video. I appreciate the time you spent to make it possible for me to learn.
Grandma Rose
I his was helpful,as a beginner.Cant wait to clean my singer 411g manual machine by myself…. Thanks