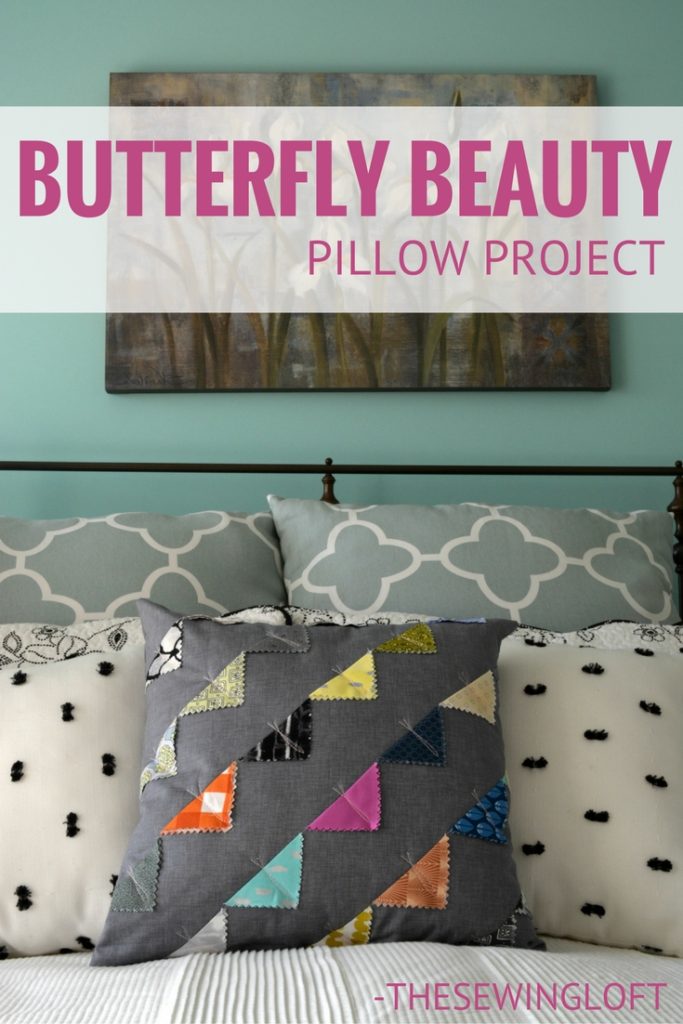
Butterflies are one of those amazing creatures that mystifies and inspires me. To help attract them to my world, I have butterfly bushes all along the back of my yard. During the summer months, they seem to dance around each bush all day long.
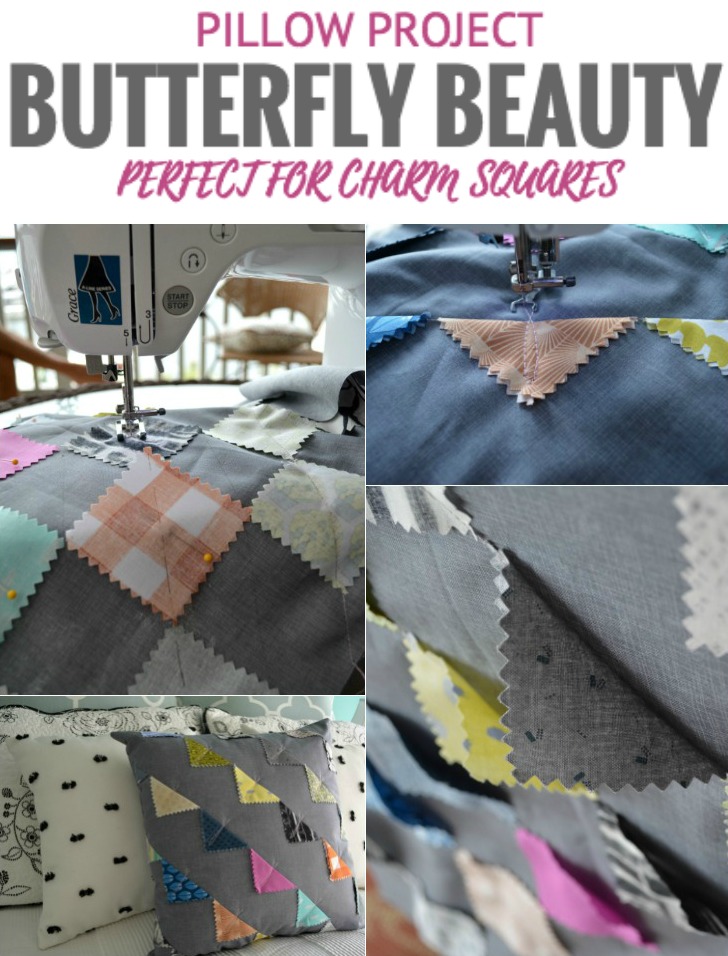
Their colors range and I just love the way they seem to float in the air. To help bring this feeling into my home I created this easy to make DIY Butterfly Beauty pillow.
DIY Butterfly Beauty Pillow
This project is for all levels.
Skill Level- 1 Button
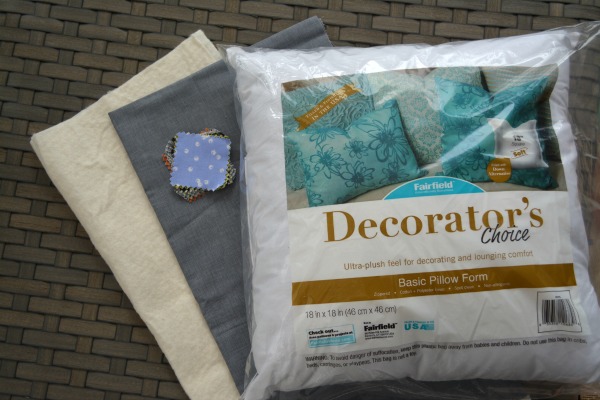
- 1 pack charm squares
- half yard of fabric
- 18″ x 18″ pillow form by Fairfield
- Contrast Embroidery Thread
- batting is optional
Tools:
- sewing machine
- basic sewing tools
*Note that this project can be made in any size to fit your pillow form. Not only will the layer of batting act as a stabilizer for each fabric piece but it will help maintain a smooth outlook on your pillow. I add this to all of my pillow covers to extend their use.
Cutting Instructions:
- (1) 19″ square of batting
- (2) 18 1/2″ square of fabric
- 1 package of charm squares or you can pre cut 2 1/1″ squares from assorted scraps
Sewing Instructions:
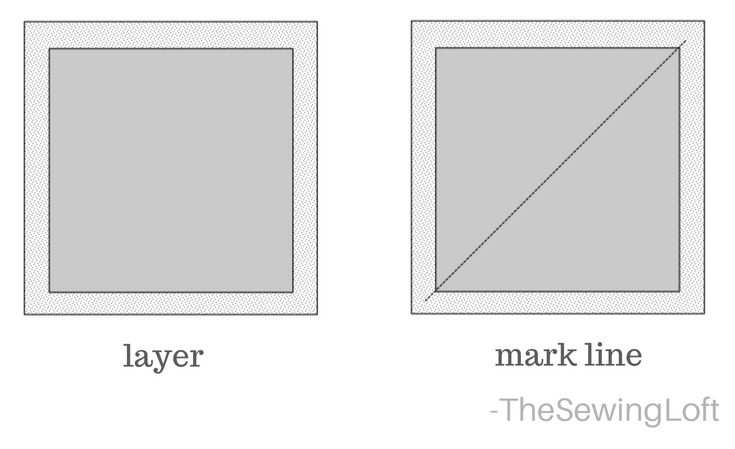
- Create your fabric sandwich like so: layer of batting and pillow front positioned in center; place right side up.
- With heat erasing marker, draw a diagonal line from corner to corner.
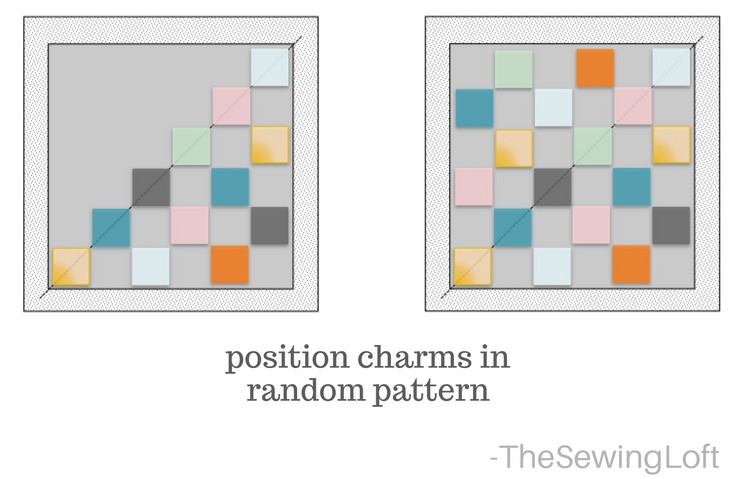
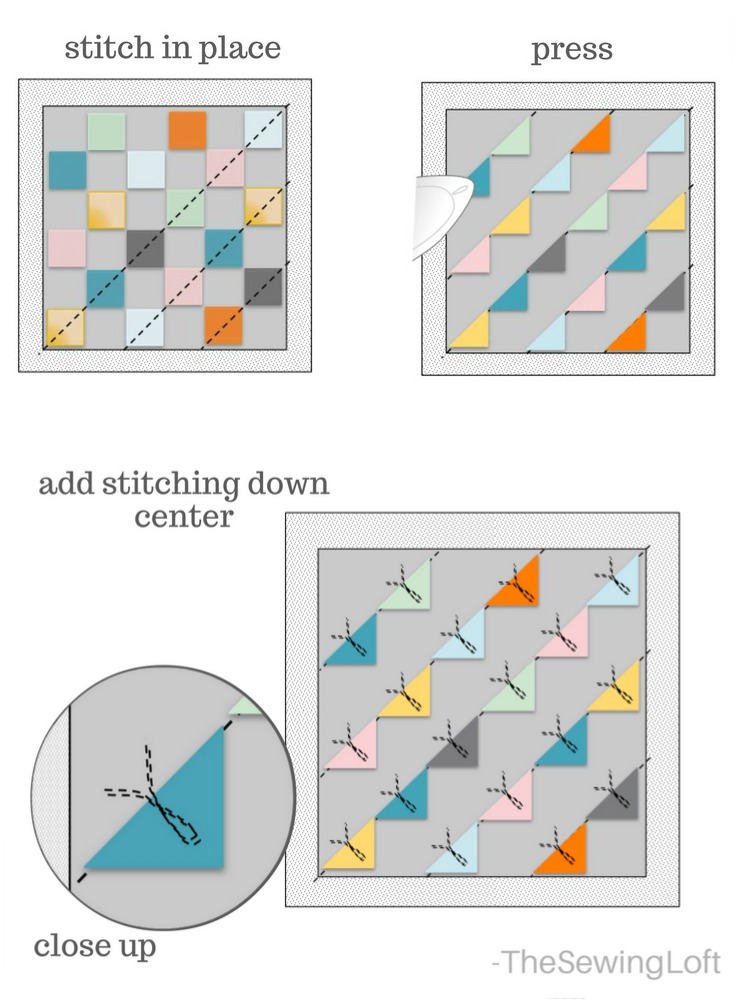
- Position and pin charm squares right side down along the center line. Be sure to match each corner of the square with the line. Continue to position and pin charm squares in place to fill the entire front pillow cover. Stitch a straight line from corner to corner of each square.
- Fold and press the corner of each square down to create a triangle. Stitch each piece in place with free motion stitching at the center. You can see that I started above the triangle and looped at the bottom. This gives the appearance of a butterfly.
- Attach backer fabric with closure method of choice; trim corners and turn right side out. Slip pillow form inside cover and find the perfect spot to showcase your handy work!
I just love the way it turned out! So the next time you see a pack of charm squares at the store, be sure to snatch them up and make something fun. Plus, let’s not forget that projects like this are great for our scrap stash. Just cut your fabrics into charm squares and you are set!
And for those of you who have never sewn with the freemotion foot before please don’t be scared. Check out my short video from another project and see just how easy it is to use.
**Special thanks to Fairfield World for their continued support of The Sewing Loft. Working with their products is a pleasure!
Hello! Are you new here?
Do you want to learn more about sewing? If so, be sure to sign up for our newsletter HERE and never miss a stitch! Daily Sewing Tips, Everyday Projects and Fantastic Inspiration delivered straight to your mailbox!
Bonus– free download with newsletter sign up.
Feel free to connect with me on Facebook, Pinterest, or Instagram. I look forward to getting to know you and stitching up a storm!


Comments & Reviews
So pretty!! I’ve got a Craft Gossip post scheduled for tomorrow evening that features your tutorial: http://sewing.craftgossip.com/?p=89186 –Anne
Thanks so much Anne. You are pretty amazing at this iSpy game!
~Heather
how big are the squares on the pillow?
A charm square is 2 1/2″. You can find charm packs sold at any local quilting shop or cut your own to size.
~Heather