After you have pieced together your favorite quilt blocks into a beautiful quilt top, it’s time to start the prep work for the all-over stitching such as long arming or free motion. That means, square a quilt top, create a quilt sandwich, truing your topper, and pinning things together.
Taking the time to do this prep work can transform your quilt from a homemade “nice job” to a stand-out, professional project. One of the most important steps is to true, or square up, the quilt as you complete it.
Related Read: 15 Quick and easy quilts patterns.
When you sew together the blocks of a quilt, sometimes you’re going to wind up with seams that weren’t perfect. After all, you’re a human, not a machine! Over time, these little imperfections in the seam allowances can add up. Making the quilt top uneven along the edges. Learning how to true a quilt can solve that problem, so let’s get started!
How to Square a Quilt
Skill Level- 1 Button
Related Make: Free Quilts of Valor Design
Materials Needed:
- square quilt ruler (any size, but in general the bigger, the better)
- straight edge cutting ruler
- rotary cutting tool
- rotary cutting mat
- quilt sandwich components – top, batting, backing
**Omigrid offers a value-priced variety pack of nonslip square rulers. These are great for any size project!
To true the quilt top, you’re going to make sure that all the corners are at 90-degree angles and all of the edges straight, even lines. Here’s how:
Step 1: Square a Quilt Top
Lay your quilt top on a large table or cutting surface. Be sure that it is well supported and one side isn’t pulling it down off the table. Arrange it so that the bottom right corner of the quilt is on your cutting mat, with room around the edges.
Tip: You can fold or bunch up the rest of the quilt top to keep it on the table at this point, just make sure you’ve got a large, smooth surface to work with in this corner.
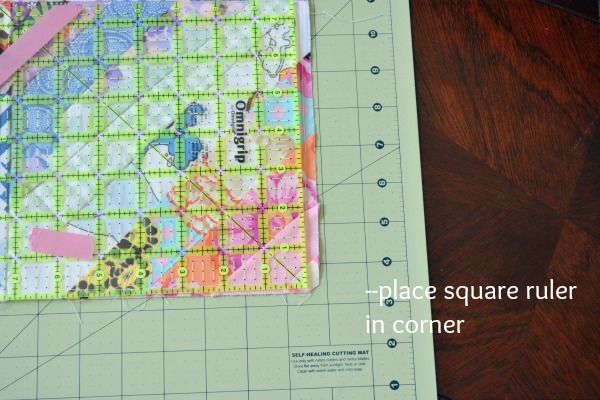
Position your straight edge cutting ruler on top of the corner of the quilt top, lining it up so that the outer edges of the ruler are in a position to give you a clean corner on the quilt top.
Place your square cutting ruler directly on top of your straight-edge ruler, so that you can clearly find a clean corner that is neat and straight. Adjust both rulers as needed in order to find the perfect corner placement – you’ll use this as your cutting guide, so the edges of your ruler will become the new edges of your quilt top.
Tip: Make sure the fabric edges of your quilt top line up with or extend beyond the edges of your ruler – you don’t want them slipping under it or else your newly-cut lines won’t be even.
Start fresh! Consider replacing the blade on your rotary cutter for a sharp and crisp edge.
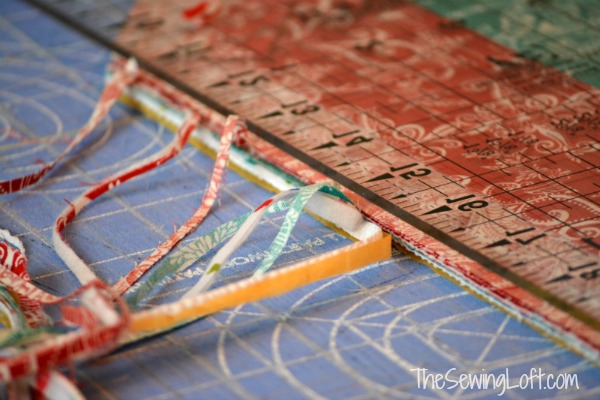
Use your rotary cutter to cut along the right edge of your rulers, as far as that ruler will allow you to go.
Move your quilt top so that the top right corner is in position on the cutting mat, and repeat steps 2-4 to cut a straight, clean corner in this position.
Position your quilt top accordingly so that you can continue to cut the straight line between the bottom right corner and the top right corner, using your straight-edge ruler and rotary cutter. Move the quilt top as you go, continuing that line from one corner to the other, until the whole right side of your quilt has a straight edge.
Repeat these steps with the bottom left and top left corners.
Smooth out any jagged edges caused by moving your ruler across the quilt.
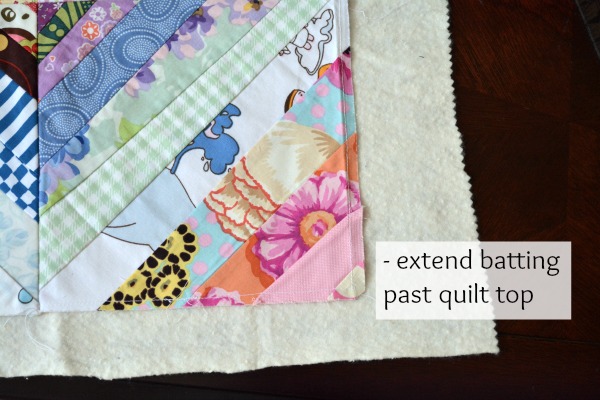
Now you can add your batting and backing to your quilt top, and quilt it however you normally would. Be sure that the batting is slightly larger than the quilt top, and the backing is larger than the batting.
Make It Today: Stitch up your Jelly Rolls with these patterns.
Final Step- Square a Quilt
Step 2: Square/True up the Quilt Sandwich
It is important to square your quilt top before adding the binding. This will ensure that everything is neat and square. Double-checking this step will help you achieve a straight edge quilt and provide an even foundation for sewing on the binding.
Sometimes the quilting process pulls in at the edges of the quilt, so this process helps to even that out. The first step is to press the finished quilt sandwich; some people even like to block the quilt (wet it, stretch it into shape, and let it air dry) or wash and dry it before doing this process. Any of those options are fine and are up to the individual quilter’s preference.
In order to true the quilt sandwich, you’re going to repeat all of the steps outlined in Step 1, except this time you’ll have a whole quilt sandwich to square up and cut through. The process is exactly the same, you’ll just have a little more bulk to work around. Square up your quilt sandwich and then you will be ready to bind the finished quilt.
Need more tips?




Comments & Reviews
I am editor of my guild’s newsletter and was wondering if I could have permission to reprint this article for our newsletter. I will include a link to your page and give you credit for producing the article.
Thanks for your note Sandie. I love working with guides and am happy to help out. Please email me directly – Heather @ thesewingloft {dot} com
Thank you for reminding us about “true up.” If I do it for each block then it is awful at the end. When I do a bed quilt, I take it to the quilter to have it quilted but she does not “true up” or sew on the binding. So off to the HARDWARE STORE. My husband first helped me use a chalk plumb line to true up the edges but that was really messy. Then we got a laser square. They start at about $40 and go WAY up the $$$$ but I make a lot of quilts every year and it has helped enormously.
I lay the quilted quilt sandwich on the garage floor that I have already covered with large sheets of plastic. Then I put the laser at the corner and turn it on. The beam of light shoots the entire length of a king size quilt then I can cut or mark the left side and bottom, then put the light at the opposite corner and mark the right side and top. Thanks also for the tips on the tools. always helpful.
Great tip Joan. Thanks a bunch for sharing!
~Heather
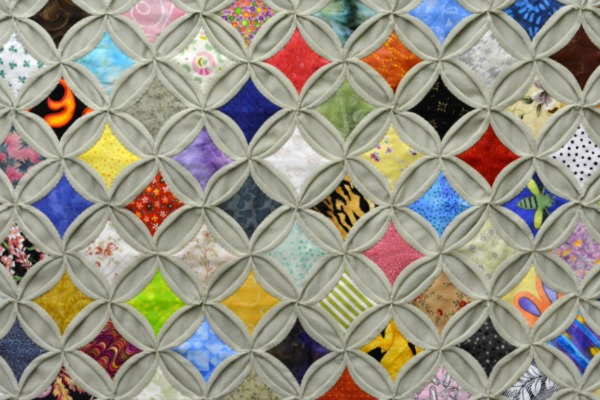
hi, i just found a quilt at a thrift store that is made like the second photo from the top of this article — gray background fabric wrapped in arcs over center pieces — what is this technique or pattern called?
Such a lucky find Gery! Those are called cathedral windows and they are pretty amazing!
~Heather
Great tips thank you Heather