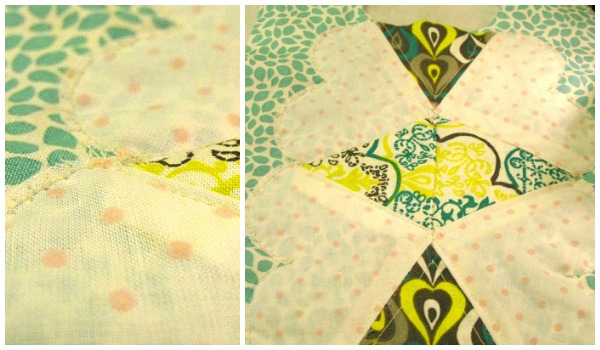
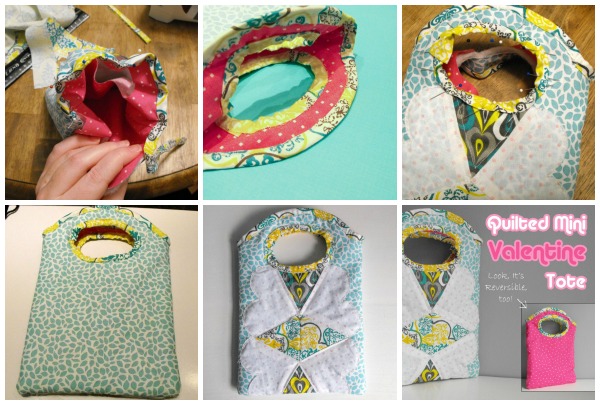
We are in luck today!! Molly from Craft Idea’s Weekly is back again and sharing this super cute quilted mini Valentine’s tote bag.
Quilted Mini Valentine Tote
This project is for all levels.
Skill Level- 1 Button
This pattern will help you create a simple little mini tote with a pretty quilted top. This can be sewn by hand or with a machine.
Supplies:
- Fabric – Choose at least two different complimentary fabrics for your bag and at least 3 different fabrics for your quilt top pieces. (I used a package of fat quarters for this project and had more than enough fabric.)
- Bias Tape – Purchase 1/2 inch bias tape or make your own
- Template – Download the free bag template

Tools:
- Basic Sewing Tools and Notions (pins, thread, scissors, etc.)
Instructions:
- Download and print the free mini valentine tote template.
- Cut Your Fabric Pieces: You can fold your fabrics in half , pin your template to the front, then cut so you get four pieces.
- Cut Your Padding: Use the same template you just used for the fabric to cut two pieces of quilt batting. (The quilt batting I used was a light, synthetic quilt batting – you can really use any light batting you prefer.)
- Quilt or Embellish The Front and Back: At this point, you will want to embellish or quilt the outer fabric for the bag. If you are using the mini quilt pieces included in the template, you will want to cut out those pieces, finish them using the English Paper Piecing method described here: and then sew them on to the top layer with the batting pinned to the back. You will have your sewn quilt piece on top, then one bag fabric layer, then your batting. Stipple this piece as desired. You can also embellish the back piece the same way if you would like. If you want to leave the back relatively plain, just stipple it or simply sew a diamond shape onto it to keep the patting attached to the fabric. You can also attach the outer fabric to a hoop and hand embroider the outside before stippling and sewing together.
- Sew The Outside of The Bag: Next you will start to sew your bag pieces together. Take your outside pieces (which at this point are embellished fabric stippled to a batting backing) and put them pretty sides together. Sew from the corner of the box, all the way around to the other corner of the box, leaving the pieces that will be the handles open. Turn this piece inside out so the pretty sides are now on the outside.
- Sew The Bag Lining: Take your other two pieces of bag fabric and put them pretty sides together. Sew around the outside from corner to corner just as you did with the outer pieces. Don’t turn this one inside out – once it is sewn, push it in to the other bag piece. It lines the bag. It also makes the bag reversible! You should see the bag coming together, but still see raggedy edges and batting around the handles.
- Pin and Sew Bias Tape To The Edges: Pin 1/2 inch bias tape to all of the open edges, folding it over the top so the tape binds the edges together. Sew it first to the entire open outer edge. When that is complete, pin the bias tape to the inside of each handle and sew using a straight, zig zag, or decorative stitch.
You are done!
A special thanks to Molly from Craft Ideas Weekly for sharing the quilted mini Valentine tote with us today. It is super cute for anytime of year! Don’t forget, after you download the pattern, be sure to stop by and pay her a visit.
Molly shares a ton of crafty projects to help keep you inspired and her community Facebook Page is always hopping!
Hello! Are you new to The Sewing Loft?
If so, I’m glad you stopped by and hope that something has inspired you to keep your needle moving! Don’t miss a single project and subscribe via email HERE! Bonus- free printable download with newsletter sign up. Another great way to connect with me is via Facebook, Pinterest, Twitter, Google+ or Follow my blog with Bloglovin. I’m looking forward to getting to know you and creating together!


Comments & Reviews
This looks really cute and I appreciate the pictures for the bag-finishing. I’d like to try it. Is there supposed to be an active link to the English piecing? I have never done that technique.
Sorry Joyce, I did forget to hyper link it. All linked up now but here is the direct page for easy reference. https://thesewingloftblog.com/2013/10/08/english-paper-piecing/ I would love to see your finished bag. Feel free to share on FB or the flickr album.
~Heather
How cute!! I’ve linked to your tutorial over at Craft Gossip: http://sewing.craftgossip.com/tutorial-reversible-quilted-valentine-mini-tote/2014/01/08/
–Anne
This is adorable! Thanks for sharing 🙂
Oh I can’t wait to try this – SEW cute! Thanks for sharing!!
The link to the article on making your own bias tape is not working for me–I get a site error message.
Sorry you were having trouble. Here is the direct link: https://thesewingloftblog.com/creating-continuous-bias/
~Heather
Thank you! And thank you for the time you take putting these tutorials together!
You are so welcome Ell!
~Heather
Thank you so much, gonna be a book bag for me!