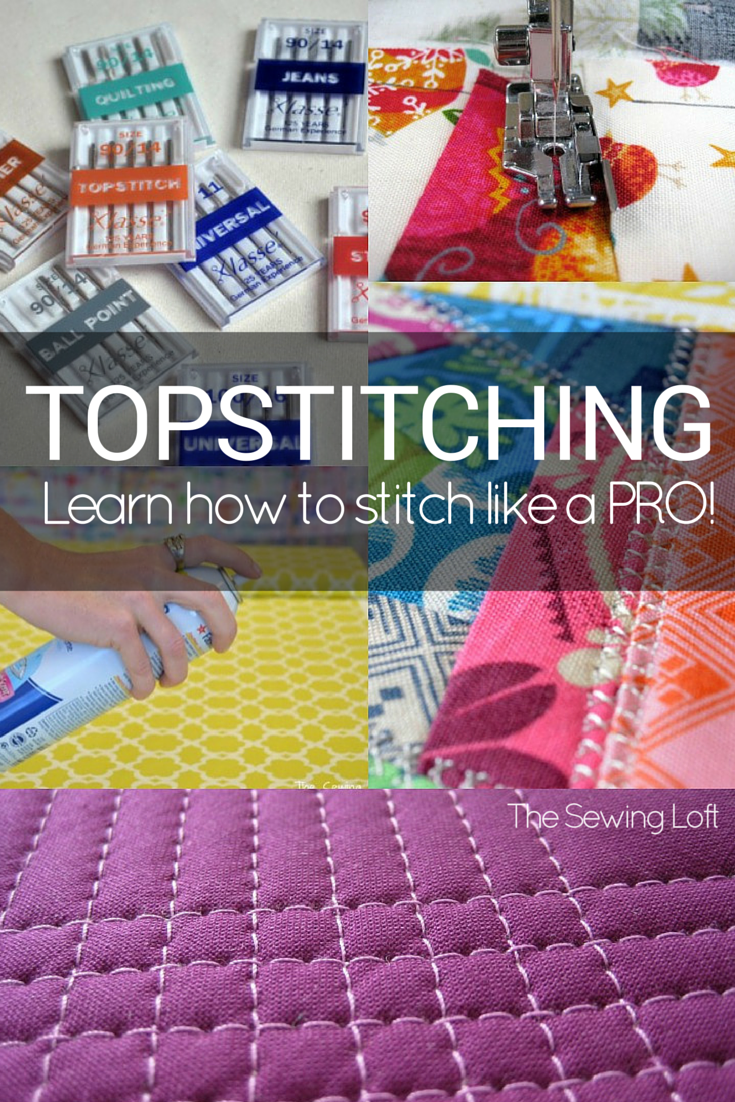
Top stitching is what it sounds like – a line of stitches that show on the top of your project. Technically you can use any stitch and thread to topstitch a project, but if you want professional results and a polished finish, it’s best to learn to topstitch like the pros.
Top Stitching Tips:
- Top stitching thread is heavier weight than traditional thread; you put this thread in the top of your machine and use regular sewing thread in the bobbin.
- 90/14 is a special needle sized for top stitching; it has a larger eye to accommodate the thicker thread.
- Your stitch line should be slightly longer than a joining stitch when you’re topstitching.
- Sometimes your project might work better with a different thread & needle for topstitching; make sure you choose your needle wisely.
- Consider stepping outside of the thread matching box with a fun contrasting color – this can bring a pop of fun and pizzazz to your finished project.
- Take your time and test on a piece of scrap fabric first. Make sure you use the same number of layers in your test swatch as you’ll have in the finished project, and test out a few different threads, needles, and stitch types/lengths before you decide on the real deal.
- Topstitching on knits is tricky. It is important to not have wavy/puckered seams. One way to avoid that is to use a twin needle for topstitching knits.
- Stitch spacing from the edge is extremely important when topstitching. Consider using a guide foot for consistency.
- Depending on the thickness of fabric layers, the tension may need adjusting. This is especially important with denim/jeans. Again, it’s always important to do a test piece first.
- If you’re using a thicker fabric or a lot of layers, position some scrap fabric under the back of your presser foot before you begin to sew. This allows the presser foot to remain straight, horizontally, so that it doesn’t have to “climb uphill” to begin sewing the garment.
- Don’t backstitch – at least, not in the traditional way. Instead of stitching back and forth a few times to begin and end your topstitching, first shorten your stitch length to something very short; backstitch just once back and forth, then lengthen your stitches and sew as normal. This creates a more subtle way to anchor your stitches.
- When you’re finished sewing, pull the top threads to the bottom or back of the work and tie them in a knot with the lower threads, then trim.
- Try on any garment before you start the topstitching. It’s much harder to unpick topstitching than it is to remove traditional seams.
- Whenever possible, save all of your topstitching until the end of a project. That way you only have to change out your thread, needle, and stitch settings one time instead of going back and forth from traditional stitching to topstitching.
- Stabilize fabrics as needed. Use spray starch to stabilize stretchy or thin fabrics before you sew. Another option is to add a layer of interfacing between the fabric layers or to use tear-away stabilizer under the material and then tear it off when you’re finished sewing.
- Add cording for extra impact. If you really want your topstitching to stand out, position a length of pearl cotton where you want the stitches to go, and then stitch over the cording with a narrow zigzag to hold it in place.
- Trim seam allowances before topstitching. This reduces the bulk of the fabric under the stitches, making it easier to get a smooth, even finish.
- Step outside of the box and experiment with your decorative stitches!
Find even more of favorite topstitching tips in my latest class with Annie’s Creative Studio.
Have I missed one of your favorite top stitching tips? Please share it with me in the comments!
Be sure to check out our library of sewing tips for even more ways to improve your skills!
Hello! Are you new to The Sewing Loft?
If so, I’m glad you stopped by and hope that something has inspired you to keep your needle moving! Don’t miss a single project and subscribe via email HERE! Bonus- free download with newsletter sign up.
Another great way to connect with me is via Facebook, Pinterest, Twitter , Google + or Follow along with Bloglovin. I’m looking forward to getting to know you and creating together!


Comments & Reviews
Great tips! I’ve got a Craft Gossip post scheduled for later today that links to your post: http://sewing.craftgossip.com/tips-for-topstitching-like-a-boss/2015/04/13/ –Anne
I received a e-mail yesterday offering a free pattern for a mini wallet with pintucks and couldn’t figgure out how to get to the tutorial or down load, what gives with people who offer things but then make it impossible to find??
Sue, I am sorry you are having trouble finding the downloadable template. The pattern and class are totally free as are all of my classes on Sew at Home. There is a contact button at bottom center of your screen. Please drop them a note as the customer service is fantastic and super quick! I’m sure they have help get it sorted out.
~Heather
Re: tip 10, I discovered that my sewing machine came with a “hump jumper” (or jean-a-ma-jig), and this works like a charm. Available online…
That is awesome Mary, thanks so much for sharing!
~Heather
Watch your edge instead of the needle!
That’s a great tip Amy!
~Heather
Spray starch burns because I always set my iron too hot. I found Mary Ellen’s Press-a spray that comes unscented or scented and will not burn with my hot iron.
My favorite topstitching thread when it’s a good ‘match’ for my project is Gutermann Jean’s thread #5397, which is variegated (like most denim). Love using it w/a double needle when I can too!